

Before you can even think about organizing, you have to know what you're working with. The process really boils down to three main phases: decluttering what you have, sorting it all into sensible groups, and then finding a home for everything. Nail this first, and you'll build a system that keeps your creative space functional and, more importantly, inspiring.
Tackling the Creative Mess Head-On
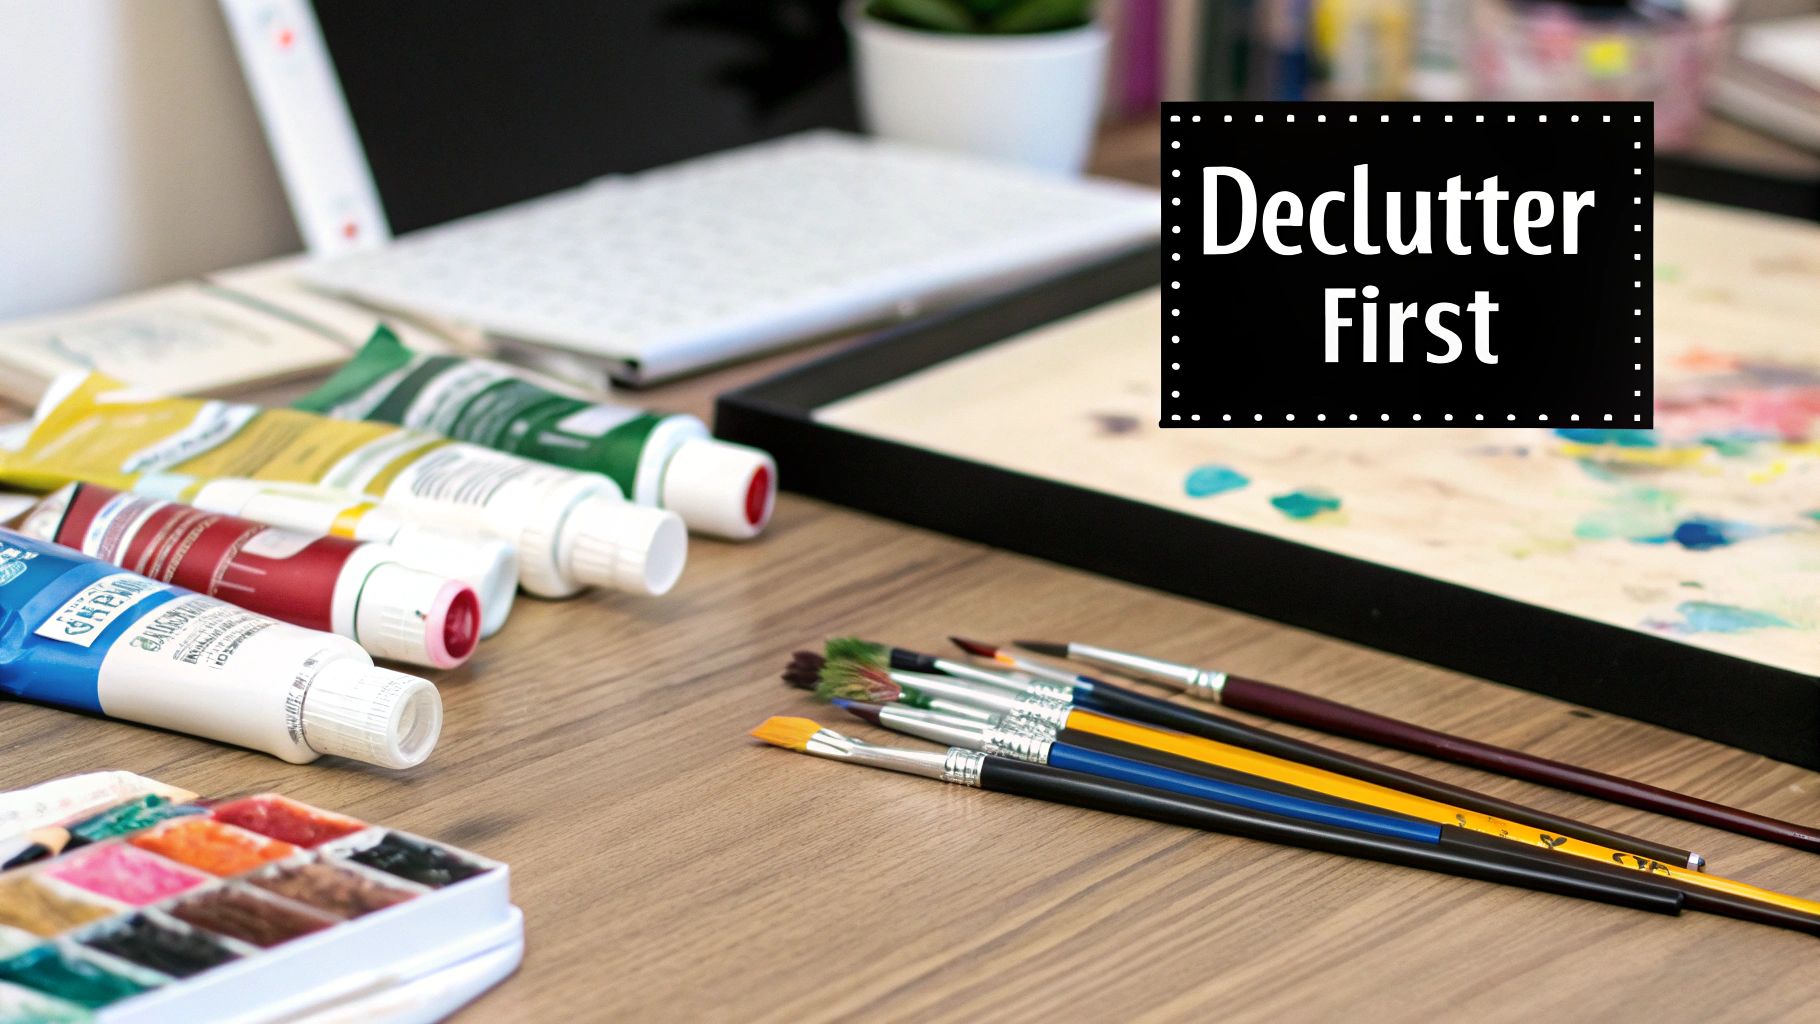
Resist the urge to run out and buy cute containers. The first, and arguably most important, step is to take a good, hard look at what you actually own and use. A truly great system starts with making smart decisions about your current collection, not just shuffling clutter from one box to another.
Start by pulling everything out. Yes, everything. Pile it all in one central spot. It's going to look like a creative explosion, and it might feel a little overwhelming, but seeing the full scope of your inventory is a crucial part of the process.
From there, create three piles to make the decision-making easier:
- Keep: These are your go-to tools, the things you reach for constantly. This pile is only for items in good shape that are truly part of your creative workflow.
- Donate: This is for perfectly good supplies that just don't fit your style anymore. We all have them—that set of oil pastels you never quite got the hang of, or the fancy paper you bought for a project you finished years ago. Let someone else give them a life.
- Discard: It’s time to be ruthless. This is for the stuff that’s just plain done. We’re talking about dried-up paint tubes, frayed brushes that shed everywhere, and pens that are completely out of ink.
Making Honest Assessments
Sorting requires a bit of detective work. Go through and swatch all your markers, pens, and paints to see what’s still vibrant. Check your pencil leads for breakage and look over your paper for any damage or yellowing. If a tool causes you more frustration than creative joy, it’s time for it to go.
The real point of this big purge is to clear the slate. When you only keep the supplies that genuinely serve your art, you make every step that follows so much easier. You'll also stop accidentally buying duplicates of things you already had buried in a drawer.
The global art supplies market is expected to hit US$ 13.22 billion by 2031, which just goes to show how quickly our personal stashes can get out of control. Getting organized is the only way to manage it all without feeling totally swamped.
If you find yourself getting stuck here, just remember that letting go of unused supplies isn't about loss—it's about making space for new creative energy. For a little extra motivation, you can find lots of simple tips for effective decluttering that translate perfectly to a studio. Getting this reset right is the single most important step you can take toward a workspace you love.
Finding a Smart Home for Every Tool
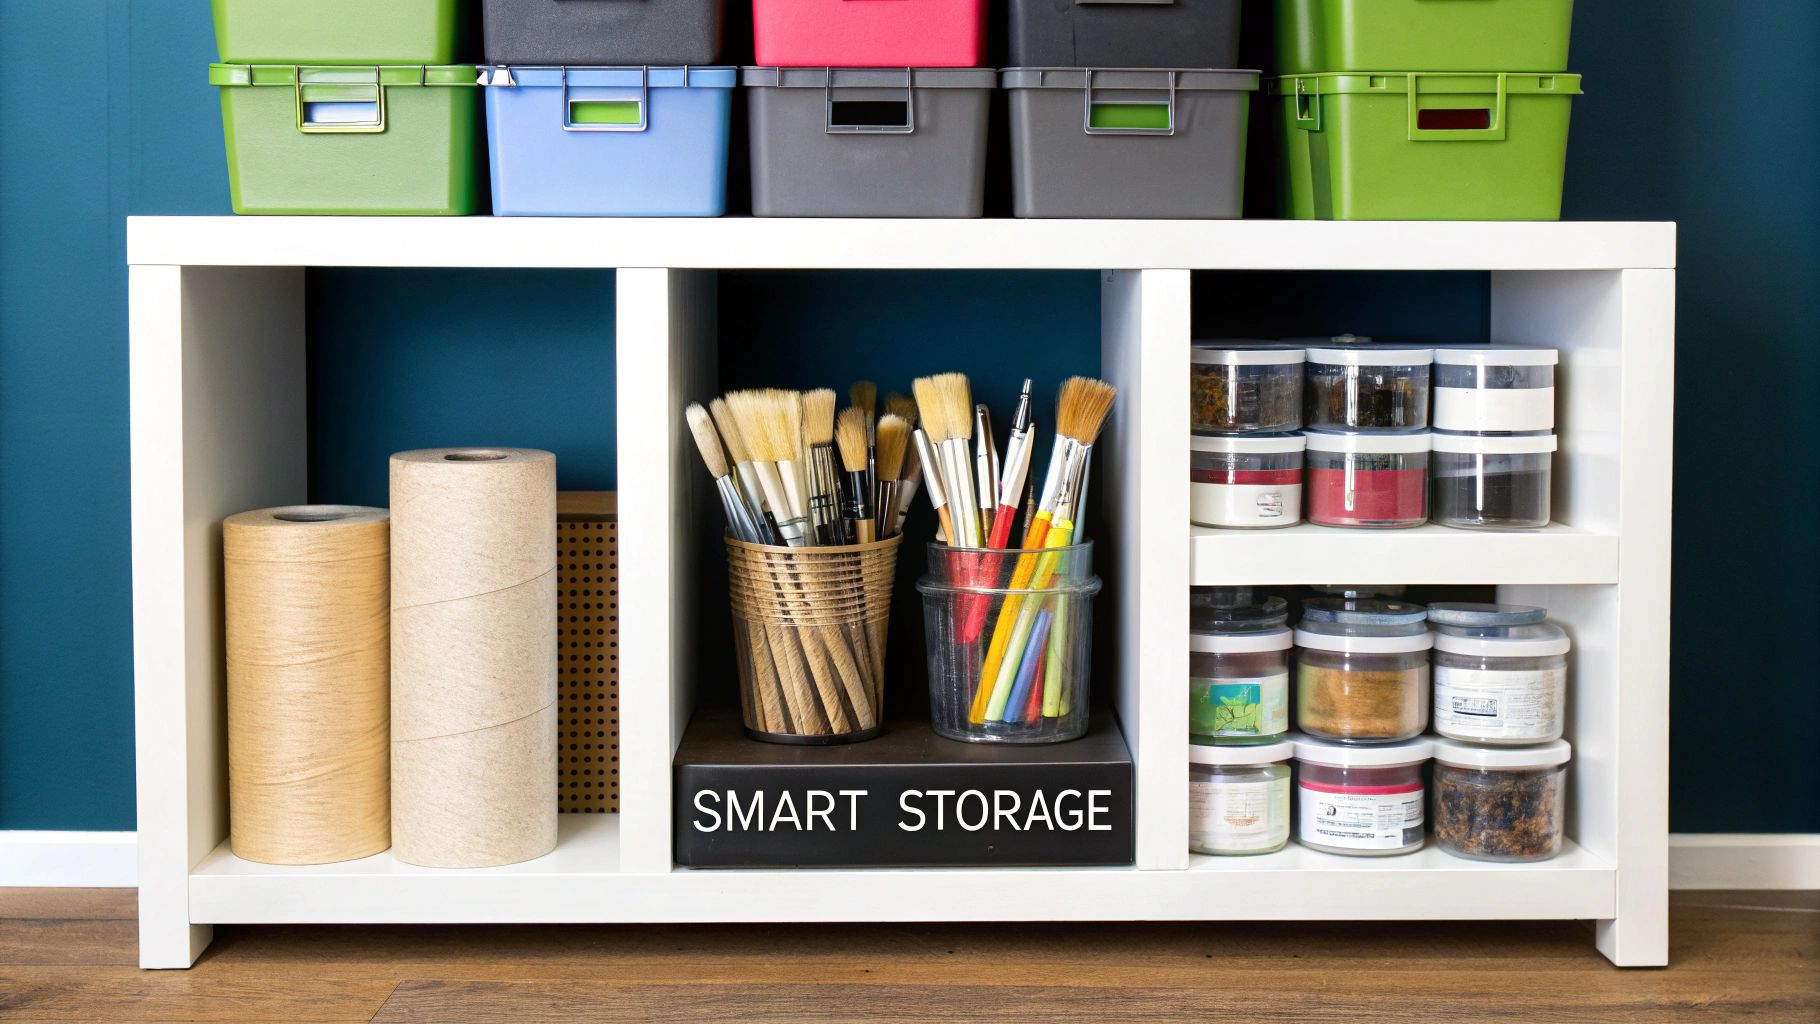
Once you’ve sorted through your supplies, it's time to find a home for everything. This isn't just about stashing your gear out of sight; it's about building a system where every tool has a logical, easy-to-reach spot. Good storage makes your creative process flow because your materials are protected, visible, and ready the moment an idea hits.
A great place to start is with visibility. Clear, stackable bins are an artist's best friend. They let you see what’s inside at a glance, so you don't have to rifle through a dozen opaque boxes just to find that one tube of ultramarine blue. If you’re working in a smaller space or a room that serves multiple purposes, a rolling cart can be a total game-changer. It’s like a mobile workstation you can easily wheel out when you need it and tuck away when you're done.
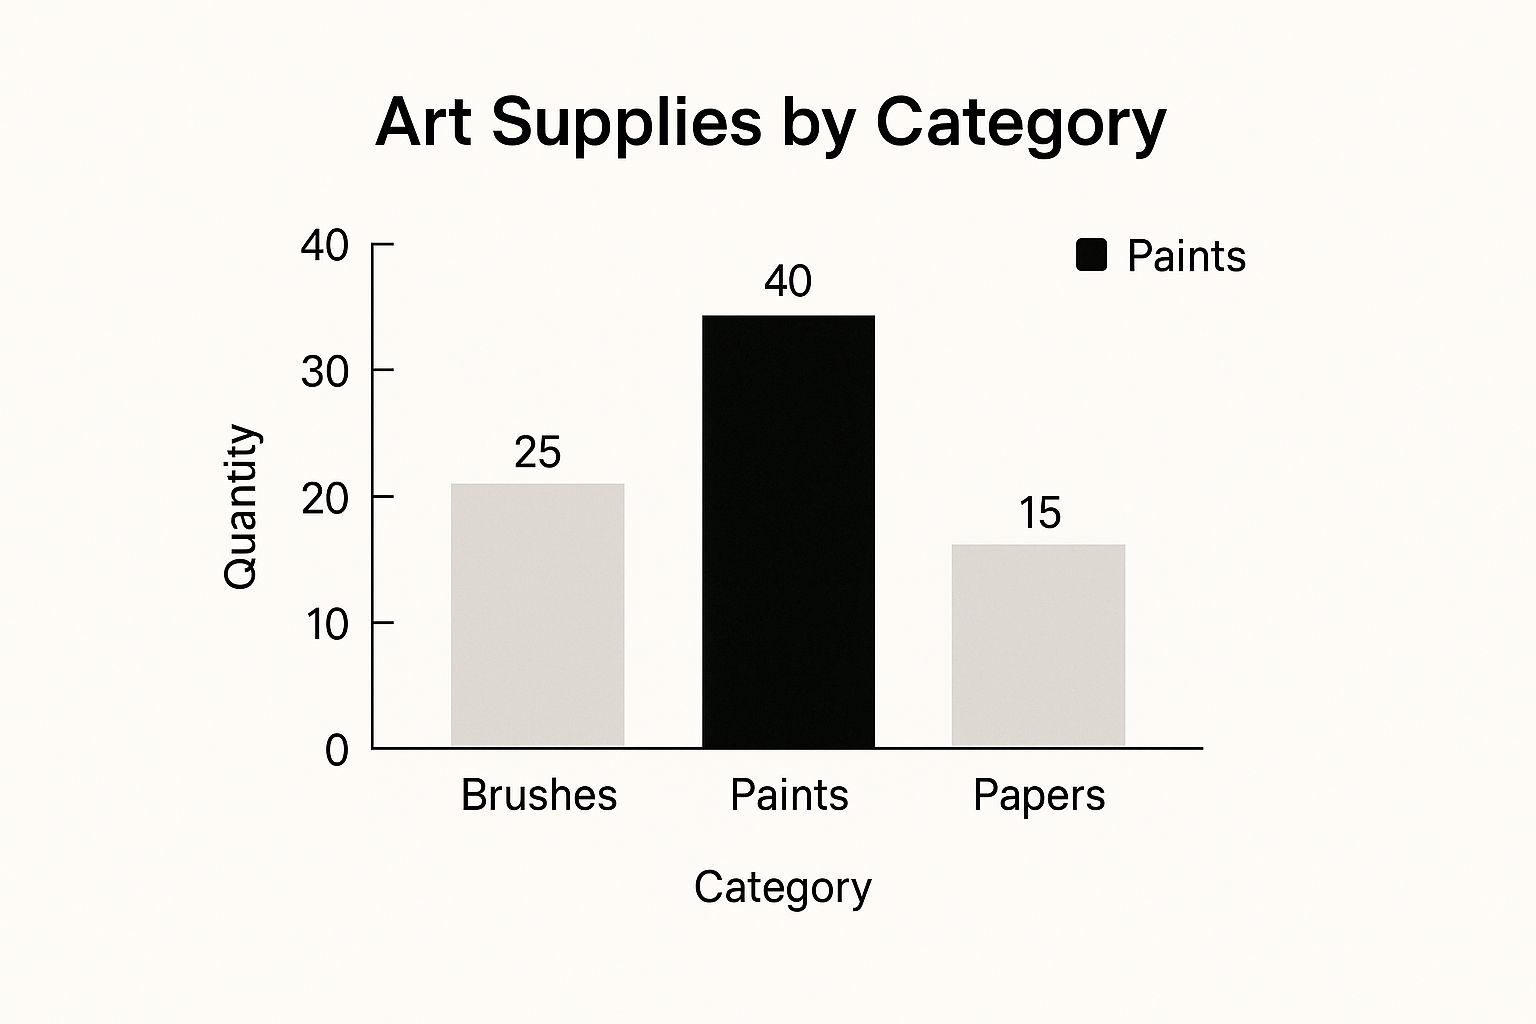
As you can tell, paints often take up the most real estate, which really drives home the need for smart, efficient storage.
Match the Storage to the Supply
The real secret is matching the container to its contents. Think about delicate tools like pencils, pastels, and charcoal—they need shallow, compartmentalized drawers to prevent them from rolling around and breaking. This also makes it a breeze to keep different shades or hardness levels separated. If you’re serious about organization, dedicated furniture like crafts storage drawers can make a world of difference.
When it comes to paints, especially acrylics and oils, airtight containers are non-negotiable. They're essential for preventing your paints from drying out. I often grab a bunch of small, individual pots from the craft store to save custom-mixed colors. It's a huge time-saver for my next painting session.
The ultimate goal is to create a system that works for you. When you organize tools by how you use them—like keeping all your watercolor supplies in one spot—you cut down on setup time and stay in that creative zone longer.
To give you a better idea, here’s a quick-reference table that matches common art supplies with storage solutions that have worked well for me and many other artists.
Smart Storage Solutions for Common Art Supplies
| Art Supply Type | Recommended Storage Solution | Why It Works |
|---|---|---|
| Acrylic/Oil Paint Tubes | Clear, stackable plastic drawers or bins | Keeps colors visible and grouped, protects tubes from being punctured. |
| Watercolor Pans/Tubes | Original tins or small, sectioned plastic cases | Compact, portable, and keeps individual colors from getting messy. |
| Pencils & Pens | Upright jars, mugs, or horizontal trays | Vertical storage makes them easy to grab. Horizontal trays protect delicate tips. |
| Brushes | Upright jars (bristles up) or a roll-up fabric case | Prevents bristle damage and allows them to air dry properly. |
| Paper & Canvases | Flat-file cabinets or stored vertically in slots | Keeps paper from bending or creasing and protects canvas surfaces. |
This table is just a starting point, of course. The key is to find what feels intuitive for your workflow.
If you’re just beginning to build your collection, our guide on essential https://paint-by-number.com/blogs/learn-about-paint-by-numbers/art-supplies-for-beginners can help you get started on the right foot. A little planning now will save you countless headaches down the road and let you focus on what really matters: creating.
Creating Your Personal Organization System
A good organization system is less about having perfectly neat containers and more about making your space work for you. It's about designing a workflow that feels completely intuitive, almost like an extension of your own creative process. When you get this right, finding what you need becomes second nature, freeing you up to just create.
Think about how you naturally reach for your supplies. Are you constantly hunting for a specific shade? If that's you, try organizing by color family. Imagine opening a drawer and seeing all your reds—paints, pencils, pastels—grouped together, with another drawer dedicated to blues. This simple shift can dramatically cut down the time you spend searching.
Arrange Your Supplies by Project and Medium
Another approach I swear by is creating project-based kits. Think of it as a "go-bag" for your art. Having a dedicated watercolor box with your favorite paper, paints, brushes, and masking fluid all in one place means you're always ready to paint when the mood strikes. This is a lifesaver for artists who jump between different mediums.
You can make a kit for literally anything:
- Sketching Pouch: Toss in your graphite pencils, a kneaded eraser, and a small sketchbook. Perfect for drawing on the go.
- Printmaking Bin: Keep your carving tools, brayers, ink, and linoleum blocks together. It also helps contain the mess.
- Digital Art Station: A designated spot on your desk with your tablet, stylus, and chargers neatly organized.
This method isn’t just about staying tidy; it’s about being ready for inspiration. With a well-packed kit, you can easily take your art to the park, a coffee shop, or just a different room in the house.
A real game-changer is setting up dedicated “zones” in your studio. Having a painting area with an easel and paints, separate from a clean sketching table, drastically minimizes the setup and cleanup time between projects.
Don't forget that maintaining your tools is part of a smart system, too. A smooth workflow includes taking care of your brushes after each painting session. If you need some pointers, our guide on how to clean paint brushes properly has some great, practical tips.
Ultimately, you’re aiming for a logical flow where everything has a home and a purpose. When your space is working with you, you can stop thinking about logistics and focus completely on your art.
Making Your Supplies Easy to Find

You’ve done the hard work of sorting everything, but that system won't do you much good if you can't find that specific tube of cadmium yellow when inspiration strikes. This is where labeling comes in—it’s the final step that turns your storage from a collection of mystery boxes into a searchable library of tools.
Don't just slap on a piece of masking tape that will peel off in a month. A simple label maker is a fantastic investment, creating clean, uniform labels that really tie the space together. If you're more of a visual person, try a system of color-coded dots. For example, you could use red for all your acrylics, blue for watercolors, and green for pastels. This lets you spot what you need from across the room.
Smart Labeling Tricks for Artists
Sometimes, a simple text label isn't enough. For anything you've stored in an opaque bin, a clear label is an absolute must to save yourself from digging through container after container. But for certain supplies, we can get a bit more clever.
Here's a trick I picked up years ago for my paint tubes: put a small dab of the actual paint right on the cap. Once it's dry, you can instantly see the true, dried color without having to guess or open every single tube to find the right shade. It’s a tiny detail that makes a huge difference in the middle of a painting session.
The best labeling system is one you’ll actually use. Whether it's a high-tech label maker or a simple dot of paint, consistency is what prevents a tidy studio from descending back into chaos.
Ultimately, making everything easy to find means you spend less time searching and more time creating. That's how you build a workspace that truly works for you and your art.
Keeping Your Creative Space Organized
Let's be honest, the real win in organizing your art supplies isn't just the big cleanup—it's keeping it that way for good. The secret is building a few simple habits that stop the clutter from slowly creeping back in. When you weave these little routines into your daily flow, organization stops feeling like a chore and becomes a natural part of how you create.
One of the best habits I've ever picked up is the ‘five-minute reset’. Seriously, that's it. At the end of every session, just take five minutes to put your main tools back where they belong. This tiny effort is what stands between a manageable workspace and total chaos.
Build Routines That Stick
Beyond the daily tidy-up, a quick quarterly check-in can be a lifesaver. This is your moment to get rid of supplies you never touch, check if your markers are still alive, and just take stock of what you actually have. Knowing your inventory is a huge part of avoiding buying the same tube of paint three times.
We all learned how important this was during the 2020 supply chain mess when art materials became weirdly hard to find. Artists who already had a good handle on their inventory were able to keep working without a hitch. You can actually read more about how the market was impacted over at Fortune Business Insights.
Here’s a rule that completely changed the game for me: nothing new comes into the studio until I know exactly where it's going to live. It forces you to be so much more thoughtful about what you bring into your space.
Finally, remember that a clean space even helps with your finished work. It’s a lot easier to protect a completed canvas when you aren't navigating an obstacle course of supplies. If you're ready for that next step, our guide on how to frame canvas paintings has some great, practical tips to give your art that final professional touch.
Common Art Supply Organization Questions
Even the best-laid plans can hit a snag. Let's walk through some of the most common organizing hurdles I see artists face and find some practical solutions to get you back to creating.
How Do I Organize in a Tiny Space?
When you're short on square footage, you have to get creative and think vertically. The walls and doors are your new best friends.
- Go Vertical: Get some adjustable shelving and use that wall space all the way to the ceiling. It keeps your precious floor clear for your easel or desk.
- Use Your Doors: I swear by over-the-door shoe organizers. They’re not just for shoes! The little pockets are perfect for stashing paint tubes, markers, and all sorts of tools.
- Embrace Mobility: A rolling art cart is a game-changer in a small studio. You can load it up with whatever you're working on, and when you’re done for the day, just wheel it into a closet. Out of sight, out of mind.
The real secret to small-space success is making every single inch count. Don't forget about that "dead" space under your bed. A few shallow, rolling bins can easily store paper or canvases, keeping them flat and out of the way.
What Are Some Budget-Friendly Organization Ideas?
You absolutely don’t need to drop a ton of cash to get your studio in order. Honestly, some of the best organizing hacks come from just repurposing things you already have.
Take a look around your house. Old pasta sauce jars are fantastic for holding brushes, pens, and pencils. Shoeboxes? Cover them in some nice paper, and you’ve got custom drawer dividers for your pastels or charcoal.
And don't sleep on thrift stores! I've found old spice racks that are perfect for holding tiny ink bottles and vintage tackle boxes that make incredible organizers for beads, buttons, and other small bits.
How Should I Store Large Paper and Canvases?
Nothing is more frustrating than grabbing a fresh sheet of paper only to find it has a bent corner or a weird crease. The goal here is simple: keep things flat or properly rolled.
For big sheets of paper, a professional flat-file cabinet is the dream, but sliding them under a bed works just as well. If you have the vertical space, a large artist's portfolio or a DIY holder with vertical slots will keep everything upright and safe.
For rolled canvas or paper, always store them standing up in a tall basket or bin. This prevents gravity from creating those annoying flat spots. Never lay rolls on their side for long-term storage. It seems like a small thing, but it makes a huge difference in keeping your materials pristine.


