

So, you've finished your painting, and now you're wondering how to get it from the tabletop to the wall. You've essentially got two paths you can take. The first is stretching the canvas over wooden bars to create that tight, gallery-ready look. The other is mounting an already-stretched canvas into a decorative frame for a more traditional finish.
One method relies on staples and tension to pull the canvas taut, while the other uses simple hardware like clips or offsets to secure the artwork inside the frame.
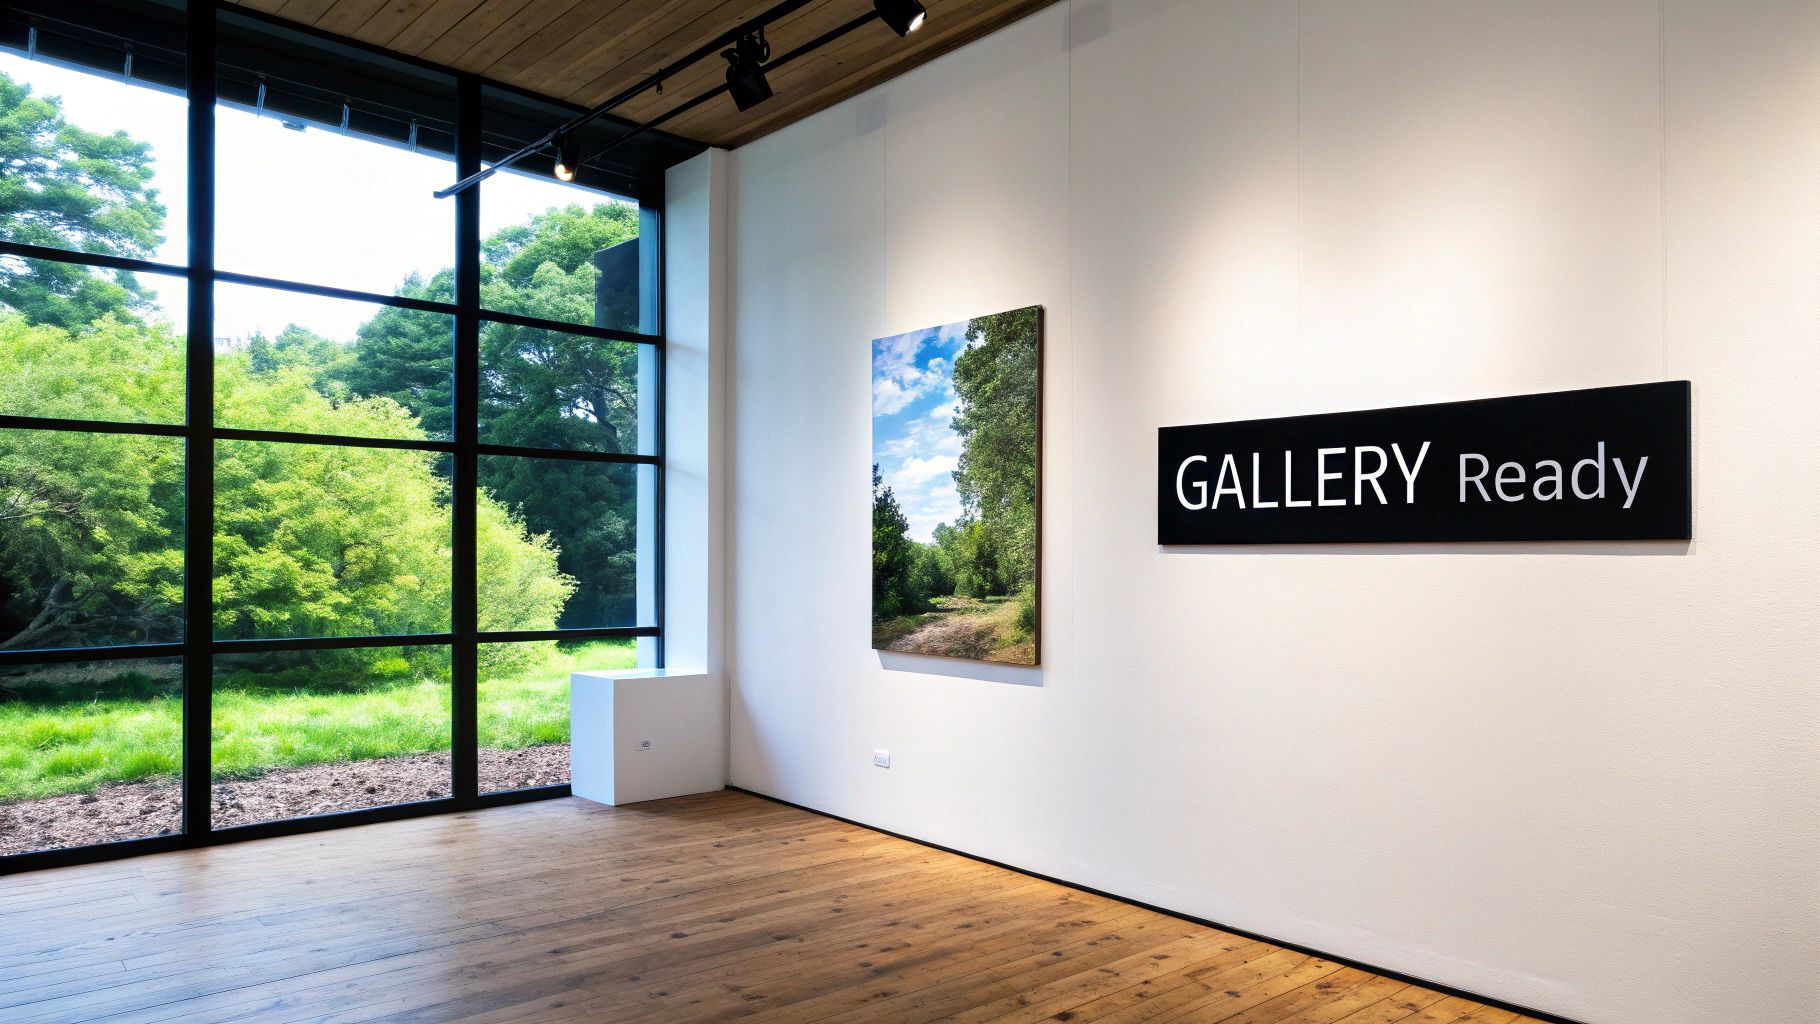
Giving Your Art a Gallery-Worthy Finish
You’ve poured hours into your paint-by-numbers canvas, carefully filling in each section to bring the image to life. Now for the final, and most rewarding, part: framing. This is the step that transforms your project into a piece of art you’ll be proud to hang on your wall.
Think of framing as the final brushstroke. It elevates your work from a hobbyist piece into something that looks genuinely professional. Whether this is your first time or you’re just looking for a better technique, I’ll break down the process into simple, clear steps.
Why Bother with a Frame?
A good frame does more than just make your canvas look finished. It's the skeleton that provides crucial support, preventing the canvas from sagging, warping, or getting damaged over the years. A well-framed piece hangs flush against the wall, looks intentional, and protects all the hard work you put in.
This has been a key part of the DIY art scene for decades. When Max S. Klein and Dan Hobbs introduced the first paint-by-numbers kits back in 1950, people immediately wanted that polished, gallery look. It caught on fast—by 1954, a staggering 12 million kits were sold every year as people everywhere embraced this new creative outlet.
Choosing Your Framing Method
Before you grab any tools, you need to decide which approach is right for you. This choice depends entirely on what kind of canvas you have and the style you're going for.
- Stretching a Rolled Canvas: This is the classic approach for canvases that arrive rolled up in a tube—common with paint-by-numbers kits that include a set of loose wooden bars. The goal is to create a tight, drum-like surface with clean, modern edges.
- Mounting in a Decorative Frame: If your canvas is already stretched, or if you prefer a more formal look, then popping it into a decorative "floater" or traditional frame is your best bet. This adds another design element that can complement your artwork and your room's decor.
Key Takeaway: The method you pick defines the final look. Stretching gives you that minimalist, gallery-wrapped feel, while a decorative frame offers a more classic, polished presentation.
Once you know which way you’re headed, you can gather the right tools and set up your workspace. After you've successfully framed your piece, you can find some inspiring dining room wall decor ideas to see how your new artwork can fit into your home. This guide will walk you through both techniques, step by step.
Getting Your Framing Gear Together
Before you dive in, let’s talk tools. Getting everything you need laid out beforehand is one of my biggest pieces of advice—it turns a potentially fiddly job into a smooth, satisfying process. You don't need a professional workshop, just a few key items that will make all the difference between a saggy, crooked canvas and one that looks sharp and gallery-ready.
Think of it as your mise en place for framing. Whether you’re stretching a fresh canvas or fitting one into a fancy frame, having the right gear on hand is half the battle.
For Stretching a Rolled Canvas
If your canvas arrived rolled up with a set of wooden bars, you’re doing a traditional canvas stretch. The goal here is to get the canvas taut like a drum, and these tools are what will get you there.
- Staple Gun: This is your workhorse. A good heavy-duty manual or electric staple gun is a must. You'll want one that uses 1/4-inch or 3/8-inch staples—deep enough to get a solid grip in the wood but not so long they poke through the front.
- Staples: Don't get caught short! Make sure you have a full box of the right size staples for your gun. There’s nothing worse than running out when you’re halfway through.
- Canvas Pliers: Honestly, this is the game-changer. These specialized pliers have a wide, padded jaw that grabs the canvas firmly without tearing it. They give you the leverage to pull the canvas incredibly tight in a way your fingers just can't manage.
- Tape Measure: Precision matters. You’ll be using this to find and mark the exact center of each side of the canvas and each stretcher bar. It’s the key to a perfectly aligned painting.
- Hammer: A small tack hammer is great to have on hand. Sometimes a staple doesn't sit perfectly flat, and a gentle tap will set it flush against the wood, preventing snags or scratches.
My Two Cents: You can technically stretch a canvas without pliers, but the final result won't be nearly as tight. If you plan on framing more than one piece, investing in a pair is the single best thing you can do to level up your results.
For Mounting in a Decorative Frame
Got a canvas that’s already stretched? Great! Your job is much simpler: securing it inside a larger, more ornate frame. You can put away the staple gun and pliers for this one; the hardware is totally different.
- Offset Clips (or Z-Clips): These little Z-shaped metal brackets are the professional standard for this job. They come in different depths (like 1/8", 1/4", or 1/2") to bridge the gap between the back of your canvas and the decorative frame. Just measure the difference in height to pick the right size.
- Screwdriver or Drill: A small drill will make attaching the clips with their tiny screws a breeze, but a regular Phillips head screwdriver will get the job done just fine.
- Tape Measure: You'll need this again to make sure your canvas is perfectly centered inside the decorative frame. A little bit of measuring here ensures you have an even, balanced border all the way around.
To make it even clearer, here's a quick look at how the tool requirements stack up for each method.
Essential Tools for Different Framing Methods
| Tool | For DIY Stretcher Frame (Required) | For Decorative Frame (Optional/Situational) |
|---|---|---|
| Staple Gun & Staples | ✅ Yes, essential for attaching canvas | ❌ No |
| Canvas Pliers | ✅ Yes, for professional tension | ❌ No |
| Tape Measure | ✅ Yes, for centering the image | ✅ Yes, for centering the frame |
| Hammer | ✅ Yes, for flush staples | ❌ No |
| Offset Clips & Screws | ❌ No | ✅ Yes, essential for securing the canvas |
| Screwdriver or Drill | ❌ No | ✅ Yes, for attaching clips |
As you can see, the tools don't really overlap. Knowing which project you're tackling helps you grab exactly what you need without cluttering your workspace. With these items ready to go, you're all set for a successful framing session.
The Art of Stretching a Canvas on a DIY Frame
This is the classic, hands-on technique if you're looking to get that authentic, gallery-wrapped finish. It’s the go-to method for paint-by-numbers kits that show up with a rolled-up canvas and a set of wooden stretcher bars. Learning this is a genuinely rewarding skill that you'll use on countless art projects down the road.
Mounting a canvas this way really took off with the rise of DIY art. The trend exploded during the post-WWII boom, a time when paint-by-numbers kits sold over 20 million units by 1955 alone. That era paved the way for today's market, where the global art reproduction sector is now valued at a staggering USD 50.62 billion.
If you're still figuring out what kind of frame to build, this ultimate guide to canvas frames is a great place to start before you dive in.
Building a Solid Foundation
First things first: you need to assemble those stretcher bars into a perfectly square frame. Most kits include four bars with interlocking, mitered corners. Just slide them together to form your rectangle.
To get it perfectly square, gently tap the corners on a flat surface until everything is flush. The trick to checking your work is to measure diagonally from corner to corner. Both diagonal measurements should be exactly the same. If they aren't, give the frame a little nudge to adjust it until they match.
Trust me, a wobbly or skewed frame is the number one reason for a distorted final piece. Taking an extra minute here will save you a massive headache later. A solid foundation is non-negotiable.
Here’s a look at the essential tools you’ll need for the job.
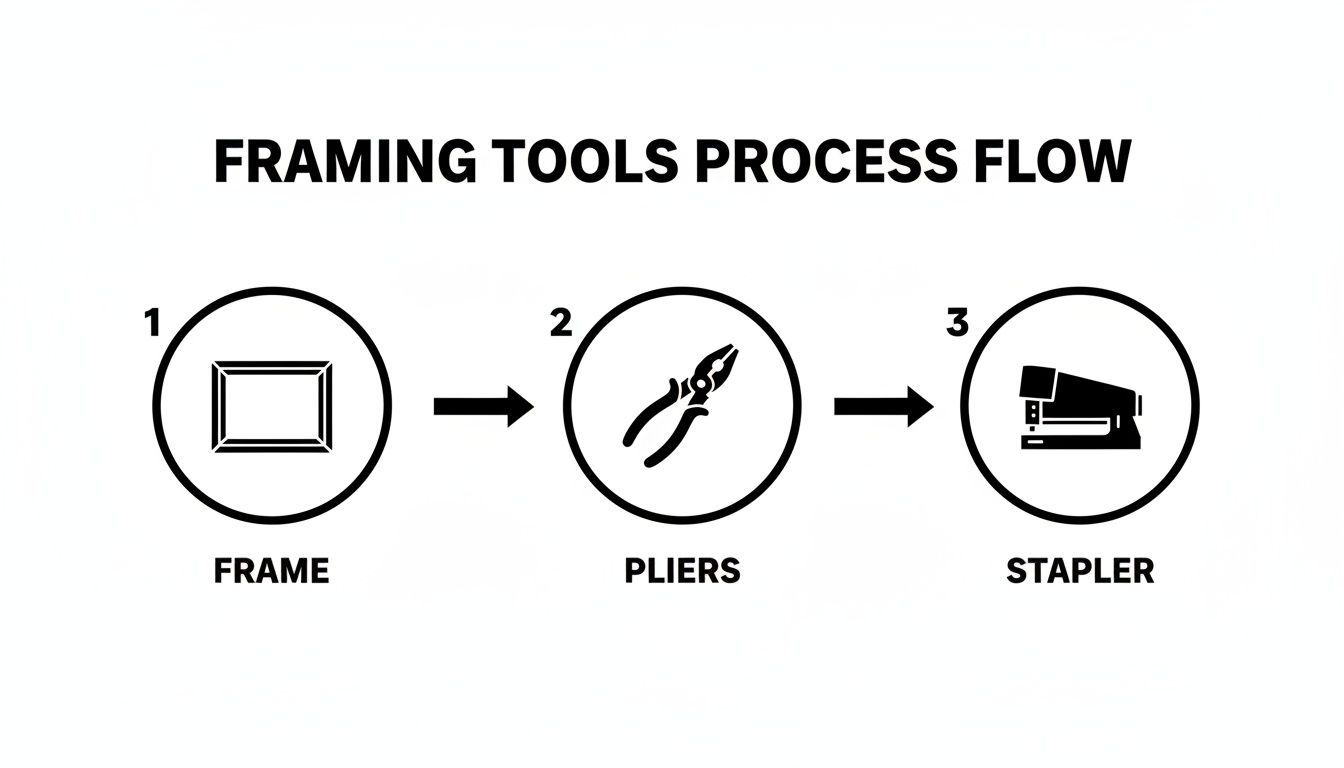
This sequence—frame assembly, pulling the canvas tight with pliers, and locking it down with a staple gun—is the core of the whole process.
The Center-Out Stapling Method
With your frame ready, lay your canvas face-down on a clean, flat surface. Now, place the assembled frame on top of it, also face-down. The key here is to get your artwork perfectly centered. Grab a tape measure and double-check that the border of extra canvas is even on all four sides.
The "center-out" method is what the pros use to guarantee even tension across the canvas, which is how you avoid those annoying ripples and warps. The idea is to secure the canvas in an opposing pattern, slowly working from the middle of each bar out toward the corners.
Here’s how it’s done:
- Start in the Middle: Pick one of the longer sides. Pull the canvas taut over the center of the bar and pop one staple right in the middle of the wood.
- Oppose and Repeat: Now, move to the opposite side of the frame. This is where canvas pliers really help. Get a firm grip, pull the canvas tight, and put another staple directly across from the first one. You should feel the canvas start to tighten up.
- Continue the Pattern: Do the same thing for the two shorter sides. Staple the center of one, then pull tight and staple the center of the other. At this point, you should have four staples—one in the middle of each bar—holding your canvas in place.
Pro Tip: So, how tight is tight enough? You’re aiming for a "drum-like" tension. The canvas should feel firm to the touch, but not so tight that you see the painted image distorting or the wooden frame starting to bow. It's a balance you'll get a feel for with a little practice.
Once your center points are anchored, just keep repeating that pattern. Work your way outwards from the center staples toward the corners, always stapling on opposite sides to keep the tension even. Place your staples every two to three inches, but be sure to leave about three inches of unstapled canvas near each corner. You'll need that slack for the next step.
For a deeper dive, check out our guide on https://paint-by-number.com/blogs/learn-about-paint-by-numbers/how-to-stretch-a-painted-canvas, which has some great visual examples.
Mastering Professional Corners
The final, and arguably most important, step is folding the corners. A clean, crisp corner fold is what separates a good job from a great one. The "hospital corner" or "gallery wrap" fold is the standard technique for a neat, professional finish on the back.
Start by pulling the fabric at the very tip of the corner straight toward the center of the frame. This will create two little "wings" of fabric on either side. Staple that corner point down securely.
Next, take one of those fabric wings and fold it neatly over that first staple, which should create a clean 45-degree angle. Pull it tight, and secure it with another staple. Finally, fold the second wing over the first, pulling it taut to create a perfectly flat, crisp corner. Lock that final fold down with a few staples.
Repeat this for all four corners, and you'll have a professional, bulk-free back that sits perfectly flush against the wall.
How to Mount Your Canvas in a Decorative Frame
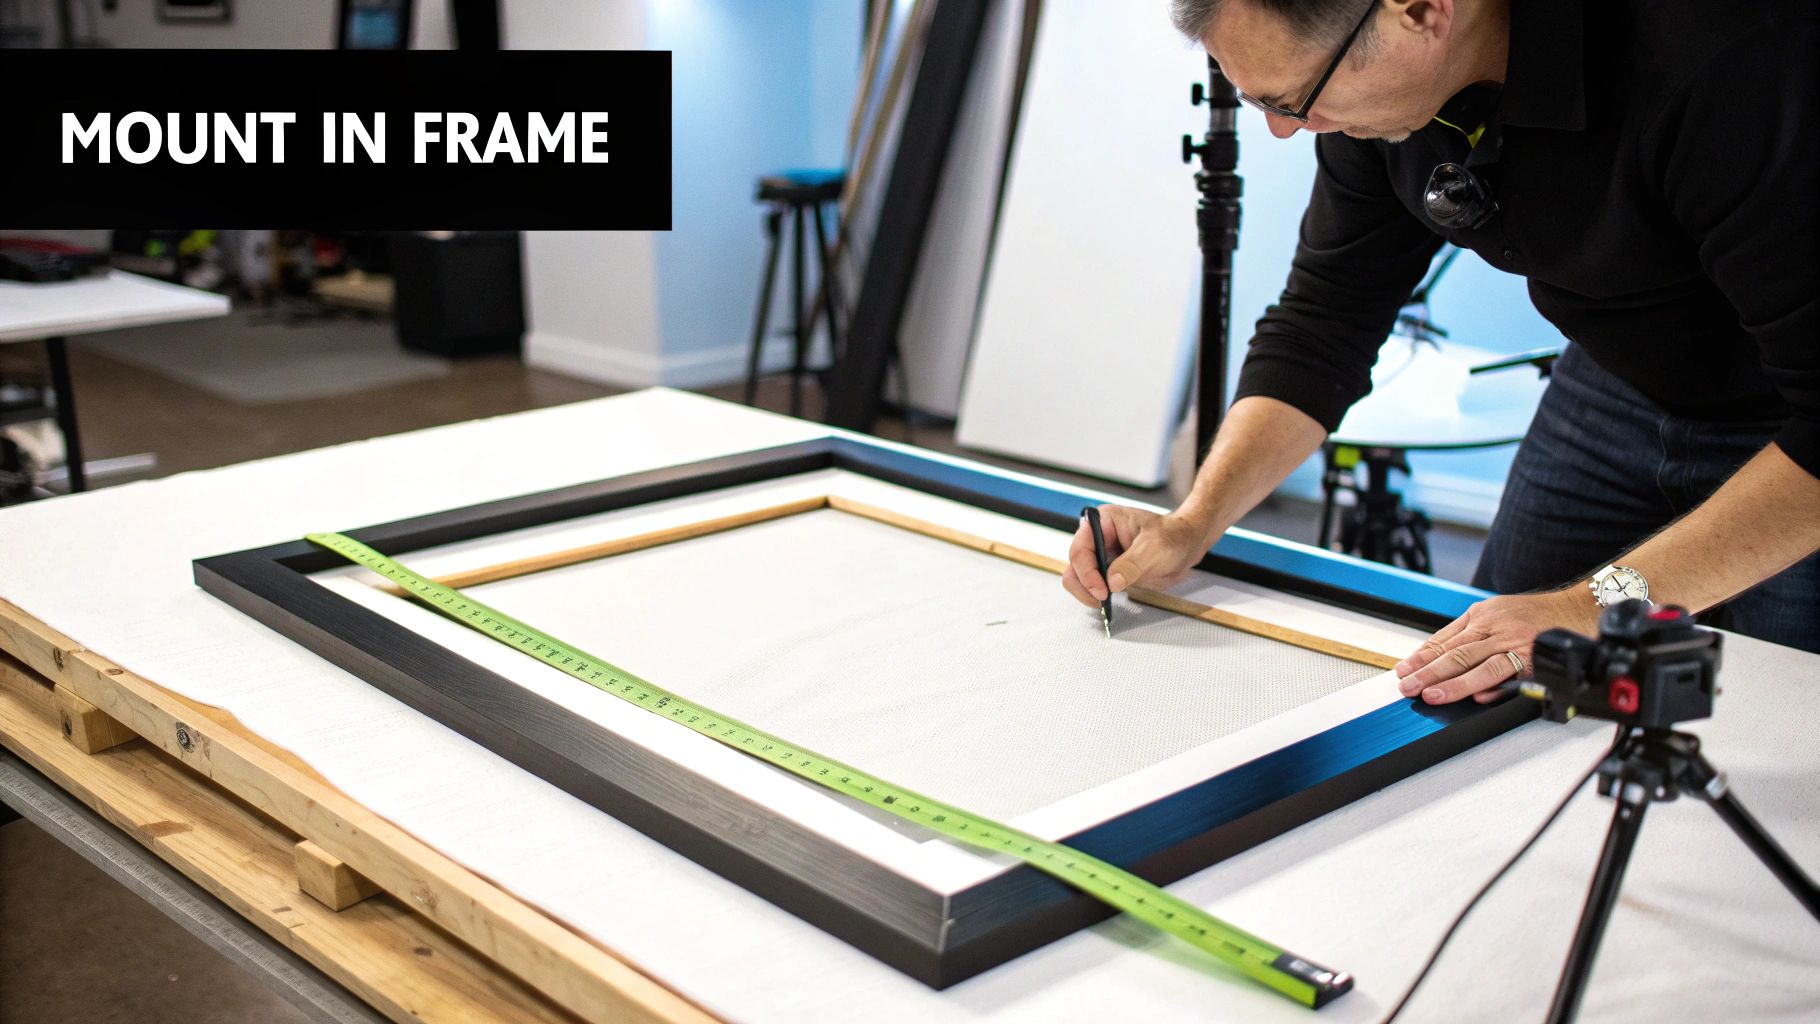
So, your canvas is already stretched and you're ready for the final touch. Or maybe you just prefer that classic, polished look. Either way, dropping a pre-stretched canvas into a decorative frame is a fantastic way to elevate your art. It instantly turns your painting into a true centerpiece.
The good news is that this process is way less work than stretching a canvas from scratch, but it still requires some precision to look right. Let’s walk through the best ways to secure your artwork, from the professional-grade hardware to some great no-drill alternatives. This is how you give your piece that high-end, gallery-quality presentation without the custom framing price tag.
The Professional Method: Using Offset Clips
If you want to do it like the pros, offset clips are your best friend. You might also hear them called Z-clips, and they are the gold standard for mounting a stretched canvas. These little Z-shaped metal brackets bridge the gap between your canvas and the decorative frame, locking everything in place.
Getting the size right is the most critical part. Just place your stretched canvas inside the decorative frame and measure the "offset"—that’s the height difference between the back of your stretcher bars and the back of the outer frame.
- 1/8-inch clips: These are perfect when the canvas sits almost totally flush with the frame.
- 1/4-inch clips: This is the most common size and works for the majority of standard canvas and frame combinations.
- 1/2-inch clips or larger: You'll need these for deeper gallery-wrapped canvases or frames with a very shallow recess.
Once you have the right clips, installation is a breeze. Set your canvas face-down inside the frame and get it centered. Position the offset clips so one end rests on the stretcher bar and the other on the decorative frame. Use a small screwdriver or a drill to secure them with the screws they came with. My advice? Use at least two clips on each of the four sides for nice, even pressure.
No-Drill Alternatives for a Secure Hold
Don't want to put holes in your beautiful new frame or your canvas's stretcher bars? I get it. Thankfully, there are a few reliable alternatives that give you a strong, lasting hold without any screws.
Heavy-duty double-sided framing tape is an excellent option. Make sure you look for archival-quality tape made specifically for mounting art. This is important because it won't yellow or fail over time, protecting your work. Just apply strips of tape to the back of the stretcher bars, peel the backing, and press the canvas firmly into the frame.
Another solid method is using a strong construction adhesive or a dedicated framer's glue. Apply a thin, neat bead of adhesive to the inner lip of the decorative frame right where the canvas will rest. Carefully lower your canvas into place, weigh it down with a few heavy books to ensure good contact, and let it dry completely based on the manufacturer's instructions. This creates a permanent and very secure bond.
Key Takeaway: For a solution that's adjustable and non-permanent, offset clips are the way to go. But for a simple, permanent mount without the fuss, high-quality framing tape or adhesive gives you a clean and totally secure finish.
Achieving the Floater Frame Aesthetic
A floater frame gives your art a really contemporary, high-end look. It creates this cool illusion that the canvas is "floating" inside the frame, leaving a small, even gap all the way around. This style is incredibly popular for modern art and especially paint-by-number canvases because it doesn’t cover up a single millimeter of your hard work.
The secret to making a floater frame look good is precise centering. Before you attach anything permanently, use small spacers to get that gap perfectly consistent—usually about 1/4 inch—on all four sides. You don't need anything fancy; small, cut-up pieces of cardboard or foam core work perfectly as temporary shims.
With the canvas perfectly positioned, you can secure it from behind. Floater frames are typically designed to be attached by driving screws through the back of the frame directly into the stretcher bars. I highly recommend pre-drilling small pilot holes first to keep the wood from splitting.
If you're starting with a canvas that isn't stretched yet, you might want to check out our detailed guide on how to frame an unstretched canvas painting first. Getting that step right will set you up for success when you're ready to mount it in its final, beautiful home.
Final Touches and Common Mistakes to Avoid
You’ve done the hard work—your canvas is stretched and secure on its frame. Now it's time for a few finishing touches that will take your work from "done" to "display-ready." These last steps are all about protecting your artwork and making sure it hangs perfectly.
First things first, let's talk about preservation. After spending hours on a painting, the last thing you want is for its vibrant colors to fade or for dust to cling to the paint. A protective top coat is a simple but absolutely essential step.
Protecting Your Masterpiece with Varnish
Think of applying a sealant or varnish as putting a shield on your artwork. It creates a barrier against UV rays, which can dull your colors over time, and it makes the surface way easier to clean. Without this layer, dust can settle into the porous surface of acrylic paint and become nearly impossible to remove.
You have a few options when it comes to the finish, and each one gives your piece a totally different vibe.
- Gloss Varnish: This gives your painting that shiny, almost wet look. It really makes colors pop and seem more saturated. It's a fantastic choice for bold, vibrant pieces.
- Matte Varnish: If you're not a fan of glare, a matte finish provides a non-reflective, flat look. This is perfect for a more subtle, modern feel where the texture of the canvas itself is part of the appeal.
- Satin Varnish: The happy medium. A satin finish offers a slight sheen that enriches colors without the high-gloss reflection. It's a popular choice because it's the best of both worlds.
Choosing the right finish is all about personal taste and the mood you want to create. If you want a complete walkthrough, you can learn more about how to seal acrylic paint on canvas and find the perfect option for your project.
Troubleshooting Common Framing Problems
Even when you're being careful, it's easy to run into a few little hiccups when stretching a canvas. The good news? Almost everything is fixable. One of the classic mistakes is over-tightening one side, which can pull the whole image out of shape.
If you step back and notice the lines in your painting look a bit skewed or warped, you've probably pulled one side of the canvas much tighter than the other. The fix is pretty straightforward: just remove the staples from that over-stretched side, let the canvas relax for a moment, and then re-stretch it, this time focusing on applying even, balanced tension.
Another common problem is a canvas that sags a little in the middle. This can happen right away if it wasn't pulled quite tight enough, or it can develop over time.
The Water Trick: For minor sagging, there’s an almost magical fix. Lay the framed canvas face down. Lightly mist the back of the raw canvas with a spray bottle of clean water—don't soak it, just dampen it. As the water evaporates, the canvas fibers will shrink and tighten, pulling the surface taut again.
It's a neat trick that has saved many of my own projects. But what about other issues? Here's a quick guide to some common problems I've seen over the years.
Common Framing Problems and Quick Fixes
| Problem | Cause | How to Fix It |
|---|---|---|
| Ripples or Waves | Uneven stapling pattern or inconsistent tension. | Remove the staples from the rippled area, pull evenly with your pliers, and re-staple using the center-out method. |
| Frame is Not Square | Stretcher bars weren't perfectly aligned when you joined them. | Measure the diagonals. If they aren't the same, gently push on the corners of the longer diagonal to nudge the frame into square. |
| Bulky Corners | The canvas wasn't folded neatly on the back. | Un-staple the corner, re-fold it using the "hospital corner" technique for a flat, clean look, and then staple it back down. |
These little adjustments can make a huge difference in the final look of your framed artwork.
Installing Hanging Hardware Correctly
Okay, the final, final step: adding the hardware so you can actually hang your art securely. The type you choose really depends on the size and weight of your framed piece.
For smaller, lighter canvases (think anything under 20 inches), a simple sawtooth hanger is usually all you need. Just find the center of the top stretcher bar, place the hanger, and tap it in with a hammer.
For bigger, heavier paintings, you'll want something more stable. Using two D-rings and some picture wire is the professional way to go.
- Measure about one-third of the way down from the top of the frame on both the left and right stretcher bars. Make a small mark at each spot.
- Screw a D-ring into each mark, making sure they're level with each other.
- Cut a piece of picture wire that’s a few inches longer than the width of the frame.
- Thread the wire through both D-rings and twist it back on itself to secure it. Leave just a little bit of slack—the wire should be taut enough that it won't be visible above the frame when it's hanging.
This D-ring and wire method helps your artwork hang level and keeps it stable on the wall. It’s that final touch that says your beautifully framed piece is officially ready to be admired.
Common Questions About Framing Your Canvas
As you get to the end of your project, you're bound to have a few questions. Stretching a canvas involves a handful of specific techniques, and getting the right answers can be the difference between a good result and a great one. Let's tackle some of the most common things people ask.
We've pulled together some practical advice to help you handle these final steps like a pro.
Can I Frame a Canvas That Is Already Painted?
You bet. In fact, that's how it's almost always done. Most artists frame their work only after the painting is completely finished and dry. The key is simply to be gentle with your masterpiece to avoid smudging the surface or cracking any thick paint.
When you're stretching a painted canvas, work carefully. Use steady, even pressure with your canvas pliers instead of yanking on the fabric. If you're placing it into a decorative frame, here's a crucial tip: make sure the painted surface doesn't touch any glass. If moisture gets trapped in there, the paint can stick to the glass over time and ruin your hard work.
What’s the Difference Between Stretcher Bars and a Regular Picture Frame?
This is a great question, as they serve two totally different purposes. I like to think of them as the skeleton and the outfit for your art.
-
Stretcher Bars: This is the inner wooden skeleton that your canvas gets pulled tight around. Its only job is structural—to keep the canvas taut and perfectly flat so it doesn't sag or warp.
-
A Regular Picture Frame: This is the decorative "outfit" that goes around the stretched canvas. It could be anything from a classic ornate frame to a modern floater frame. You always stretch your canvas on the bars first, and then you can mount that whole unit inside a decorative frame for a finished look.
Always start with stretcher bars to give your canvas a solid foundation. The decorative frame is the final touch you add to match the art and your room's decor.
My Canvas Has Wrinkles After Stretching—How Do I Fix It?
First off, don't panic! This happens to everyone at some point, and it’s almost always fixable. Wrinkles and sags are just a sign of uneven tension.
Flip your canvas over and check the staples on the back. Are they spaced out evenly? Wrinkles usually pop up where one area was pulled less tightly than another. The fix is to gently remove the staples in that saggy section, give the canvas a slightly firmer pull with your pliers, and re-staple it.
For small sags that show up later, there's a fantastic little trick. Just lightly spray the back of the raw canvas with a fine mist of water. As the canvas dries, the fibers shrink and tighten up, pulling out minor wrinkles like magic. Be careful not to drench it—too much water could potentially seep through and affect the paint on the front.
Ready to turn your favorite photo into a masterpiece? Custom Paint By Numbers provides everything you need, including a premium linen canvas, numbered acrylic paints, and a DIY frame to create a beautiful, personalized piece of art.


