

There’s something incredibly special about turning a favorite photo into a piece of art you painted yourself. It’s a rewarding way to bring a personal touch to your walls, transforming a cherished memory into a custom paint-by-numbers canvas.
All it takes is a picture you love, a little help from a digital tool to create the template, and some basic art supplies. The best part? You don't need any prior painting experience to create something you’ll be proud of.
Turn Your Favorite Photos into Art
Have you ever looked at a photograph and thought, "That would make a fantastic painting"? Well, you're in the right place. This guide is all about taking that idea and making it a reality.
Forget those generic kits with landscapes you've never visited. We're going to focus on turning your personal pictures—a candid family portrait, a stunning vacation snapshot, or a goofy photo of your pet—into a one-of-a-kind paint-by-numbers project. It's a simple, guided method for creating something truly meaningful.
A Modern Take on a Classic Hobby
The concept of making painting accessible to everyone has a rich history. It was pioneered back in 1951 by Dan Robbins, who drew inspiration from Leonardo da Vinci's own teaching methods of numbering sections for his apprentices.
By 1954, this simple idea had exploded in popularity, with an astonishing 12 million "Craft Master" kits sold. We’re just building on that legacy, but instead of using pre-made designs, we're putting your personal photos at the heart of the project. You can explore more on how to turn your picture into a paint by number to see how it all works.
The real magic of creating your own paint-by-numbers is watching a personal memory slowly come to life with each brushstroke. It connects you to the photo in a way that just printing it never could.
More Than Just a Painting
The goal here isn’t just to paint; it’s to create a genuine keepsake. This process puts you in complete control, from choosing the image to mixing the exact shades needed to capture its spirit. I’ll walk you through everything you need to know to make sure your final piece is a beautiful reflection of your original photo.
Of course, this is just one way to bring your photos into the physical world. There are many creative avenues for transforming memories into tangible items, from custom photo products like personalized candles to personalized puzzles. Think of this project as your first step into a wider world of personalized art.
Choosing an Image That Works
Before you can start painting, you have to pick the right picture. This is probably the most important step in the whole process, because not every photo is cut out to be a paint-by-numbers project. The best ones have a few things in common that make them much easier to turn into a clean, paintable template.
Think about it this way: a photo with strong light and shadows, a clear subject, and a simple background is what you’re looking for. A close-up of your dog's face will almost always turn out better than a busy landscape shot with dozens of tiny trees and buildings in the distance. You want a picture where the important parts are easy to see and separate into colored shapes.
Key Qualities of a Perfect Photo
Before you commit to an image, run through this quick mental checklist. Getting this right from the start will make a massive difference in how your final painting turns out.
- High Contrast: You need clear separation between light and dark areas. Photos taken in bright, direct light are often perfect because they create strong highlights and shadows. These translate beautifully into distinct, easy-to-paint sections.
- A Clear Focal Point: What's the main event in your photo? A strong subject, whether it's a person, a pet, or a flower, is essential for a good composition. Images without a clear focus tend to look muddy and confusing once they're converted.
- Uncluttered Background: A simple or blurred background is your best friend here. It makes sure your subject pops. A busy, chaotic background creates way too many tiny, complicated segments to paint.
There's a reason paint by numbers took off like a rocket in the 1950s and never really went away. The all-in-one kits made art feel possible for everyone, a straightforward approach that's even used in therapeutic settings today. If you're curious, you can read more about the fascinating history of this popular craft and its journey around the world.
Simple Edits for Better Results
Even a great photo can usually be made better with a few simple edits. You don't need fancy software; the basic editor on your phone or computer is more than enough.
Pro Tip: Don't be afraid to crop aggressively. So many people make the mistake of trying to squeeze everything in. Cropping tightly around your main subject will instantly make your painting more impactful and a whole lot easier to tackle.
A quick adjustment to the brightness and contrast can also work wonders. Pushing the contrast just a little bit helps make the different color areas stand out more, which gives the conversion software cleaner edges to work with. For instance, if you're using a photo of a black cat, bumping up the brightness can reveal subtle highlights in its fur that would otherwise get lost in a single dark shape.
Creating Your Numbered Template
Alright, you’ve picked the perfect photo. Now comes the part that feels a little like magic: turning that image into a paintable, numbered canvas. This is where your picture gets broken down into individual shapes, each with a number tied to a specific paint color. Don't worry, you don't need to be a graphic designer to pull this off. There are some great tools out there that do the heavy lifting for you.
You could fire up professional software like Adobe Photoshop, which gives you ultimate control but honestly has a pretty steep learning curve. For most of us, a free online converter is the way to go. They’re built for exactly this purpose and make the whole thing surprisingly simple.
Using an Online Converter
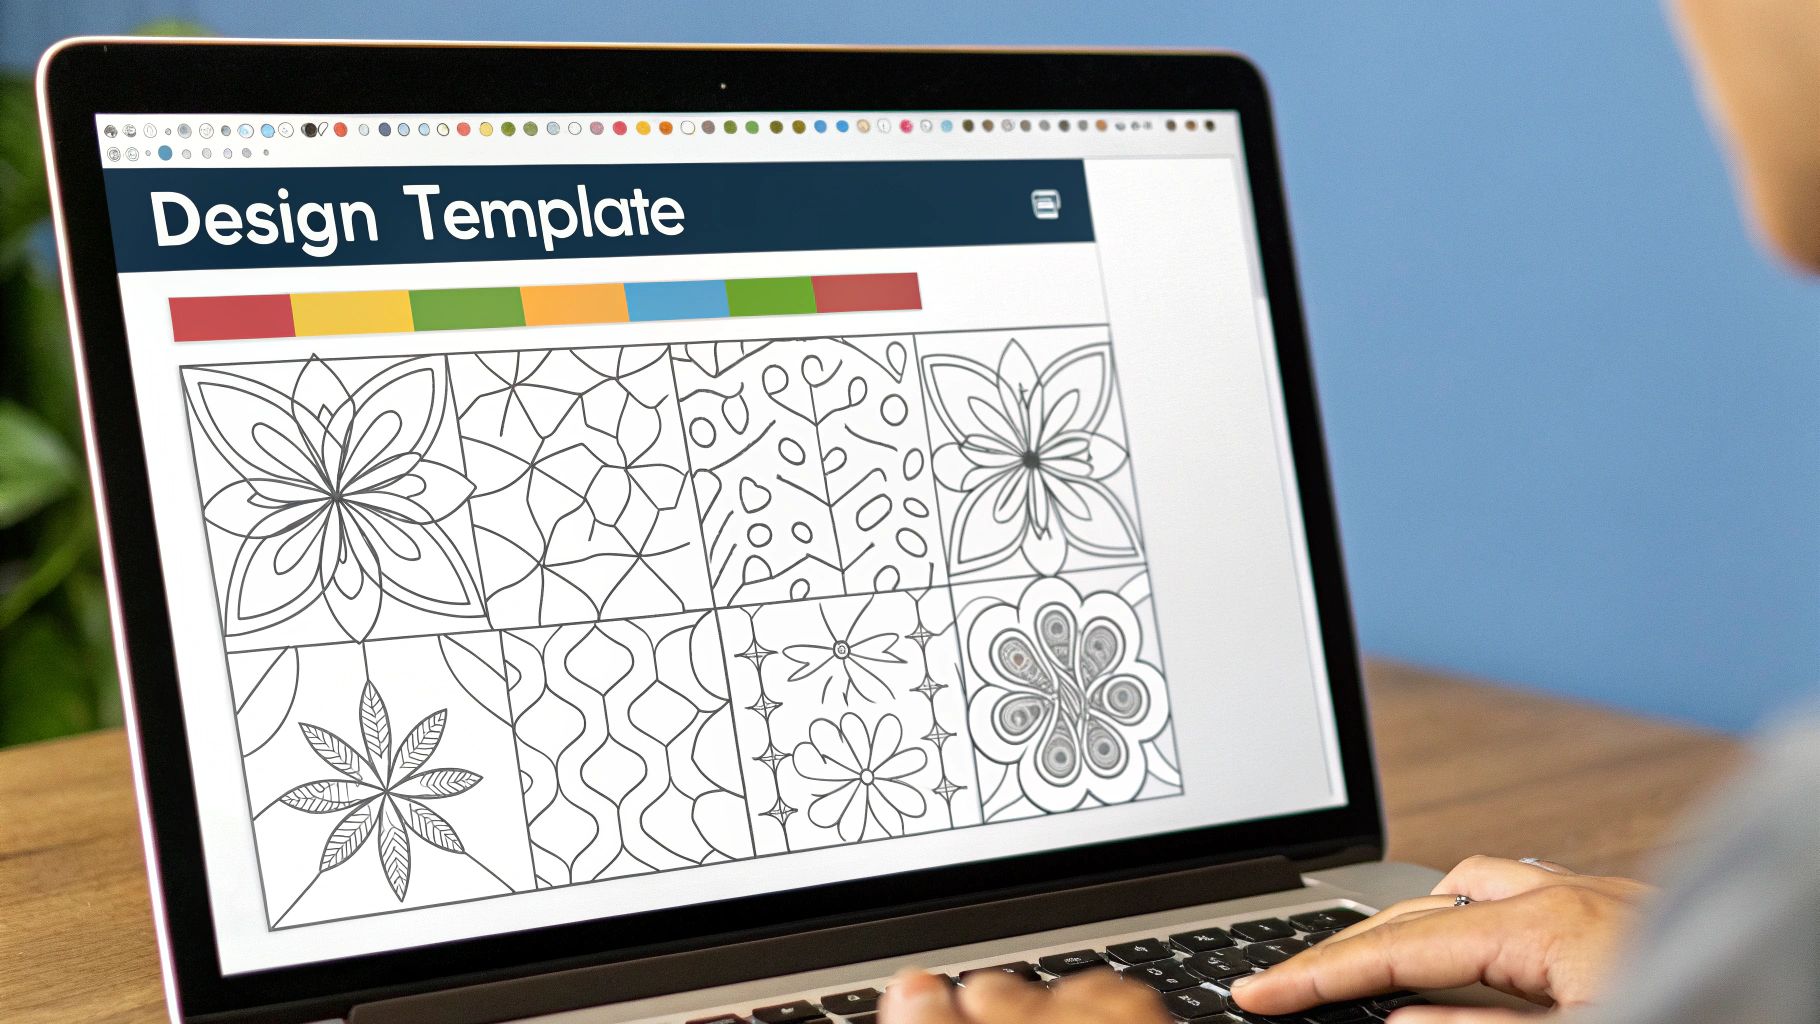
Web-based tools are a fantastic starting point, especially if you're just learning how to make a paint by number from a photo. They take all the complicated image processing and boil it down to a few clicks.
A really popular and easy-to-use option is PBNify. You just upload your photo, and it instantly generates a preview of your potential painting. It handles all the segmenting and number assigning, giving you a printable template in minutes.
Here’s a look at the kind of clean, simple interface you can expect from a tool like this.
See how it gives you clear options to play with the color palette and shows you the final outline right away?
Getting a result that's both beautiful and actually fun to paint comes down to tweaking the settings. The two main things you'll adjust are the number of colors and the level of detail. For a first project, I usually recommend starting with 20 to 25 colors. That’s enough to get some nice depth without making you feel like you're juggling a hundred tiny paint pots.
The goal isn't to create a perfect, pixel-for-pixel copy of your photo but to capture its spirit. Don't be afraid to simplify the color palette. Sometimes, fewer colors can make the final piece even more striking and artistic.
Once you’re happy with how the digital preview looks, you can download the numbered outline and its matching color key. Now, it's time to get that guide onto your canvas.
Comparing Digital Conversion Tools
There are a few different types of tools you can use to generate your template. Here's a quick rundown to help you decide which one is right for your project.
| Tool Type | Ease of Use | Customization Level | Best For |
|---|---|---|---|
| Online Converters | Very High | Low to Medium | Beginners or anyone wanting a quick, simple solution. |
| Photo Editing Software | Low | High | Artists with software experience who want total control. |
| Mobile Apps | High | Low | Creating smaller or simpler projects on the go. |
For most people, a dedicated online converter like PBNify hits the sweet spot between ease of use and getting a great-looking final template.
Transferring Your Template to Canvas
So, you have your digital file, but how do you get it onto a physical canvas? There are a couple of solid methods, and the one you choose really just depends on the gear you have and how precise you want to be.
- Carbon Transfer Paper: This is the old-school, hands-on technique. You just lay a sheet of carbon or graphite paper between your printed template and the canvas, then carefully trace the lines with a pen or a stylus. It’s cheap, it’s effective, and it works perfectly well, though it does require a steady hand.
- Digital Projector: If you’re aiming for maximum accuracy, projecting the image directly onto your canvas is the way to go. This method completely removes the risk of the image getting distorted while you trace and makes it easy to scale your template perfectly. Just project the image and trace the lines right onto the canvas with a light pencil.
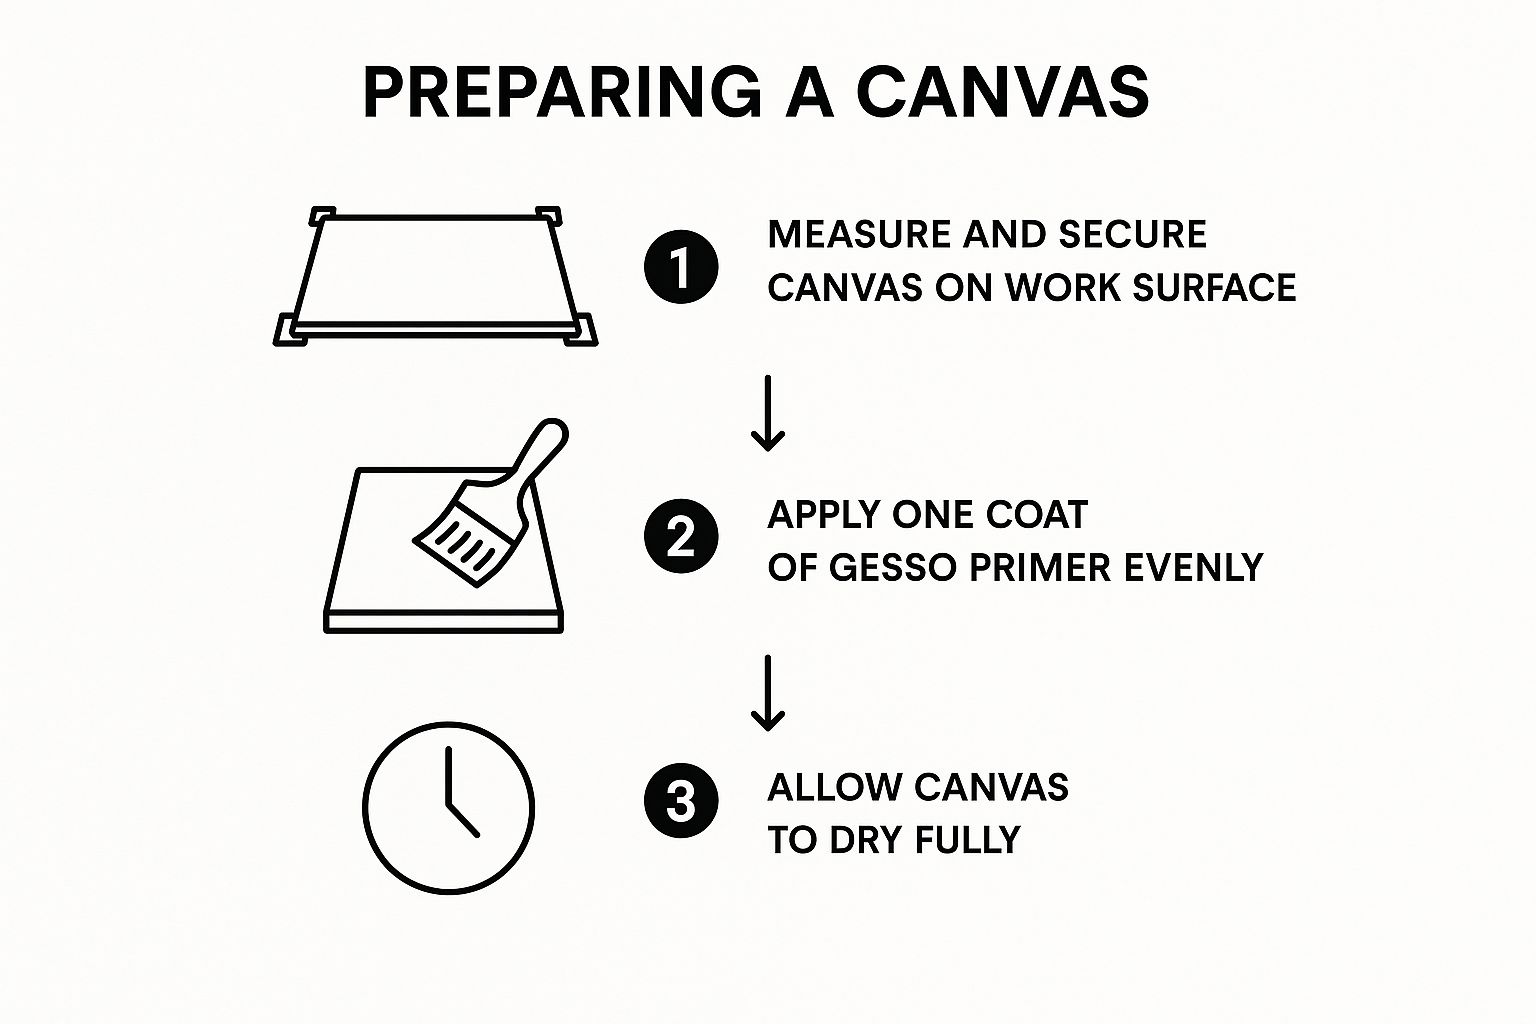
Whichever method you choose, a little prep work goes a long way. Making sure your canvas is properly primed ensures your paint will go on smoothly and the colors will pop exactly how you imagined them.
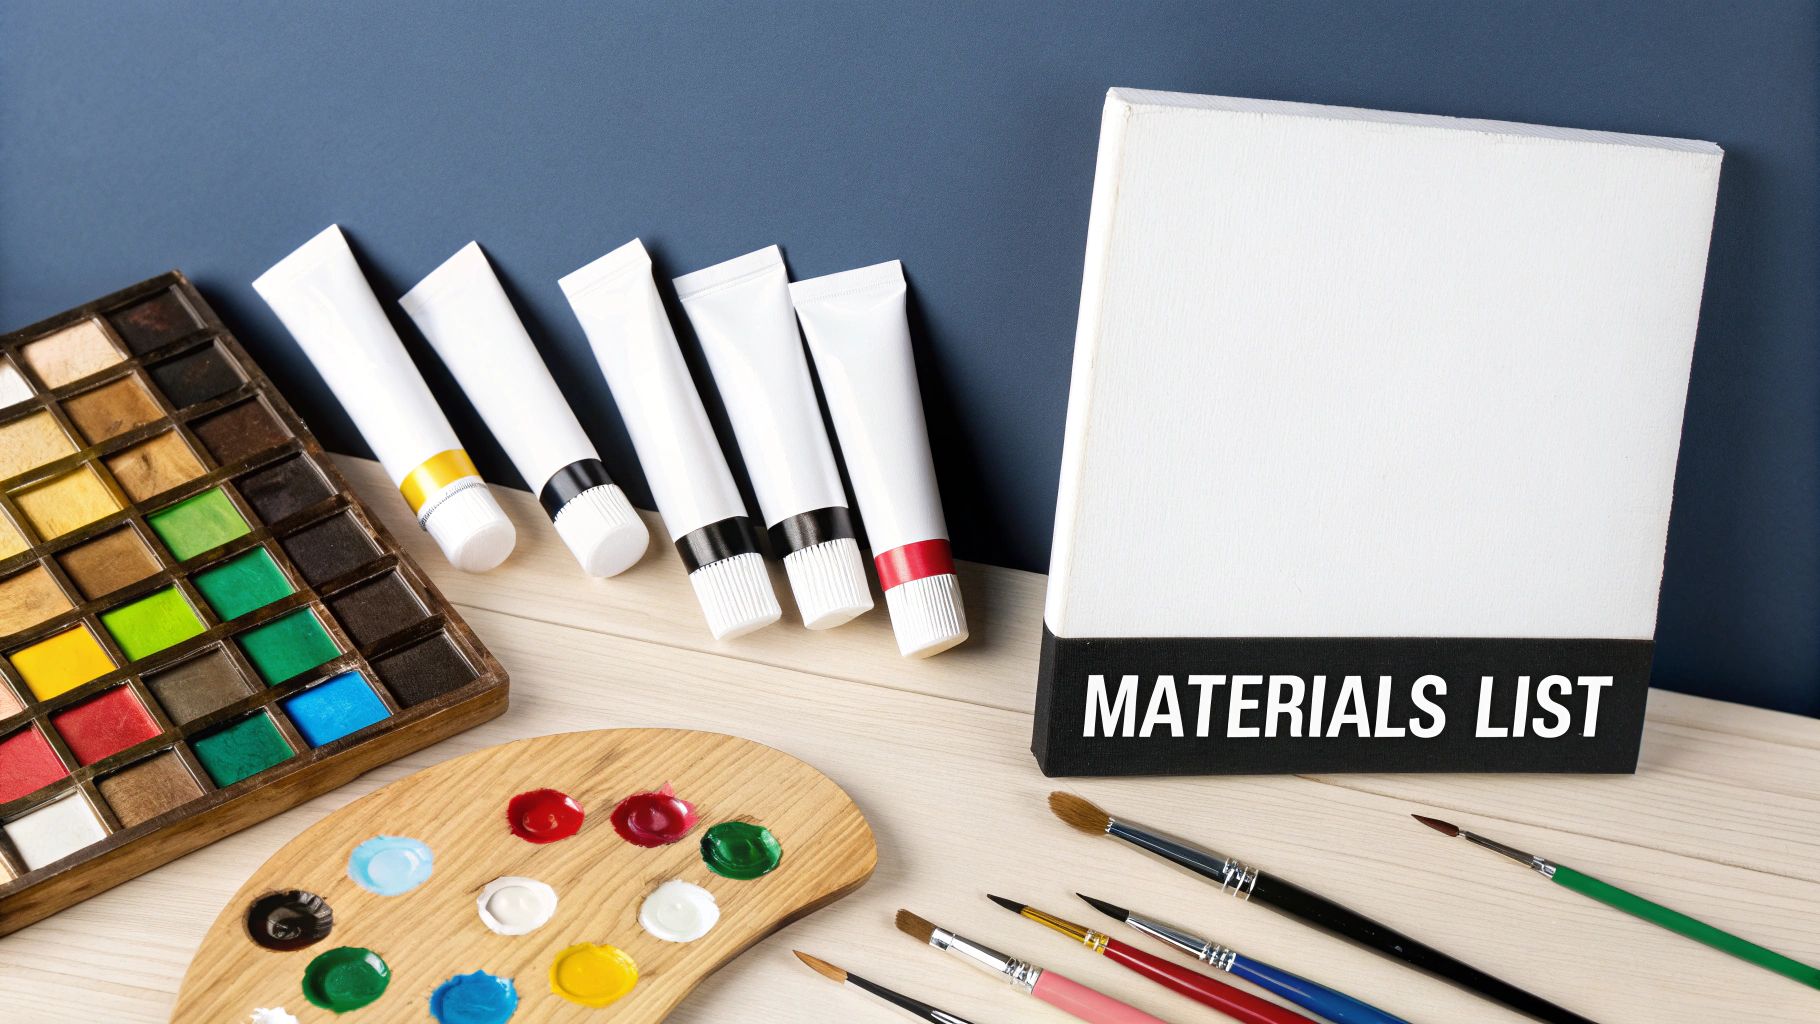
Assembling Your Custom Paint Kit
Now that you’ve got your numbered template, it’s time for the fun part: gathering the tools and colors to bring it all to life. This is where a custom project really shines. Instead of being stuck with the materials in a pre-made box, you get to hand-pick every element, from the canvas to the last drop of paint.
Think of yourself as the art director. You have total control over the quality of your supplies, which means you can choose the paints and brushes that feel right for you and your masterpiece.
Selecting Your Canvas and Paints
First things first, you need a surface to paint on. This choice is the foundation for your entire project, and while you could technically use heavy paper, a real canvas gives your finished piece that substantial, professional feel.
You’ll find a couple of great options at any art supply store, and the one you pick just depends on the final look you want.
- Canvas Boards: These are my go-to recommendation for beginners. They're basically rigid panels wrapped in canvas—super affordable, sturdy, and you don't have to worry about stretching them.
- Stretched Canvases: This is the more traditional route. The canvas is stretched over a wooden frame, which gives it a slight bounce under the brush. The best part? They’re ready to hang on the wall the moment you’re finished.
For paint, there’s really only one choice here: acrylics are the undisputed champion for paint-by-numbers. They dry fast, clean up easily with water, and are opaque enough to completely cover the numbers and lines on your canvas. A simple starter set with red, yellow, blue, black, and white is plenty to get you going—you can mix just about any shade from those.
Mastering Basic Color Mixing
Your template came with a color key, but now it’s up to you to mix those shades. Don’t let this part intimidate you; think of it as a fun science experiment. The trick is to work in small batches so you don't waste paint.
Here's a pro tip I learned the hard way: Always start with your white paint and slowly add tiny dabs of color to it. It takes a surprising amount of white to lighten a dark color, but just a single drop of dark paint can completely overpower a light one.
To keep your custom colors from drying out between painting sessions, you'll need some small, airtight containers. I usually grab a pack of those tiny plastic pots with lids from the craft store—you can often find them in the jewelry or beading aisle. Mix just enough for the sections of that color, snap the lid on tight, and don't forget to label it with the number from your key.
Choosing the Right Brushes
Finally, let’s talk brushes. A standard kit might throw in one or two, but building your own set lets you pick the perfect tool for the job. You really only need three to get started, but having the right sizes will make a world of difference.
- A Tiny Detail Brush (Size 0 or 00): This will be your best friend for all those tiny, intricate spots. It’s essential for getting those crisp, clean lines between colors.
- A Small Flat Brush (Size 2 or 4): This one is perfect for filling in those medium-sized areas where you still need good control.
- A Medium Round Brush (Size 6 or 8): For the big background sections, this brush will help you cover more ground quickly and lay down an even coat of paint.
With these three brushes in your toolkit, you’ll be ready for whatever your custom design throws at you, making the whole process smooth, relaxing, and way more enjoyable.
Bringing Your Painting to Life
You've done the prep work, your custom kit is ready, and now it's time for the best part: actually painting. This is where you get to see that image you chose slowly emerge from the blank, numbered canvas. It’s incredibly rewarding.
When it comes to the "how," there's no single right way to do it. It really boils down to what feels most comfortable for you.
A lot of painters, especially right-handers, like to work from the top-left corner and move down and across. It’s a purely practical move. This method keeps your hand and forearm from dragging through wet paint and smudging all your hard work. Simple, but it saves a lot of frustration.
Another popular strategy is tackling one color at a time. Pick a pot—say, number 7—and hunt down every single segment with a 7 on it. This helps you get into a nice flow and ensures all your reds, blues, or greens are perfectly consistent. Plus, there's something deeply satisfying about watching an entire color get checked off the list.
Achieving a Polished Look
As you start filling in the shapes, the goal is to keep your lines clean and crisp. That sharp definition between colors is what gives paint-by-numbers its classic, graphic charm. A steady hand is your best friend here, along with a good detail brush for those tiny, tricky spots.
Don't be surprised if some of the lighter colors need a second coat. It's totally normal. Colors like yellow, white, and pastels just don't have the same covering power as darker pigments, and you might still see the lines and numbers peeking through after the first pass.
The most important tip I can give you here is to let each layer dry completely before you even think about adding another. If you rush it, the paints will blend into a muddy mess. Patience really is the key to getting that bold, solid color that makes the final piece look amazing.
A quick second coat makes a world of difference. It deepens the colors, makes them look far more vibrant, and gives your painting a much more professional, finished feel.
Protecting and Finishing Your Artwork
Once that last section is filled in, step back and admire what you've made! But before you scout for the perfect spot on the wall, a couple of final steps will protect your art and really make it shine. Many people skip this, but applying a varnish is a game-changer.
A clear acrylic varnish does two key things:
- It shields your painting from dust and damaging UV light, which can make colors fade over time.
- It unifies the finish, giving the entire surface an even sheen. You can choose a matte, satin, or gloss varnish depending on the look you're going for.
Putting it on is easy. Just grab a clean, wide brush and sweep a thin, even coat over the entire painting once it's completely dry. Let it cure for at least 24 hours somewhere it won't attract dust, and then you're ready for the final touch.
Framing Your Masterpiece
Now for the final decision: how to display your creation. The right frame is what takes your canvas from a fun project to a genuine piece of decor.
If you painted on a canvas board, a standard picture frame is a great, simple option. Just pop out the glass—acrylic paintings look best and are safest without it.
For a stretched canvas, I highly recommend a floater frame. This style creates a small gap between the canvas edge and the frame itself, giving your art a cool, "floating" effect. It's a modern, gallery-style look that adds a truly professional touch to your custom artwork.
Common Questions About Custom Projects
Turning a personal photo into a paint-by-numbers canvas is a fantastic journey, but it's natural for a few questions to pop up along the way. I've been there. Think of this as your go-to guide for tackling those little hiccups that can happen when you're bringing your vision to life.

Knowing how to handle these common challenges beforehand will make the entire process feel less like a puzzle and more like pure creative fun. Let's get into the questions I hear most often.
How Many Colors Should I Use?
When you're just starting to figure out how to make paint by numbers, a palette of 20-25 colors is the sweet spot. Most of the online tools you'll use to convert your photo will let you set this limit right from the get-go.
Why that number? It gives you enough variety to capture the important details and shading in your image without leaving you to juggle dozens of tiny, confusing paint pots. It’s the perfect balance of detail and simplicity, keeping the project enjoyable rather than overwhelming.
Once you’ve got a project or two under your belt, feel free to get more ambitious and experiment with a higher color count.
It's an easy fix if you paint the wrong color in a section. Let the incorrect paint dry completely. Once it's dry, you can paint directly over it with the correct color. Because acrylics are opaque, it might take two or three coats to fully cover the mistake.
Should I Seal My Finished Painting?
You don't have to, but I always recommend it. Applying a clear acrylic varnish is that final touch that really makes your work look polished and protects it for the long haul.
A good varnish does two key things:
- It protects your art. A sealant acts as a barrier against dust and UV light, which can make those beautiful colors fade over time.
- It unifies the finish. Varnish gives the entire surface a consistent, professional-looking sheen. You can even choose between matte, satin, or gloss to get the exact look you're going for.
Taking that extra 15 minutes to apply a sealant ensures your custom piece stays as vibrant as the day you put the brush down. For a deeper dive, our guide on custom paint by numbers kits has more great tips on materials and finishing. It’s a small step that makes a huge difference.
Ready to turn your favorite photo into a work of art? At Custom Paint By Numbers, we make it easy to create a personalized painting experience. Upload your image today and receive a complete kit with everything you need to get started.


