

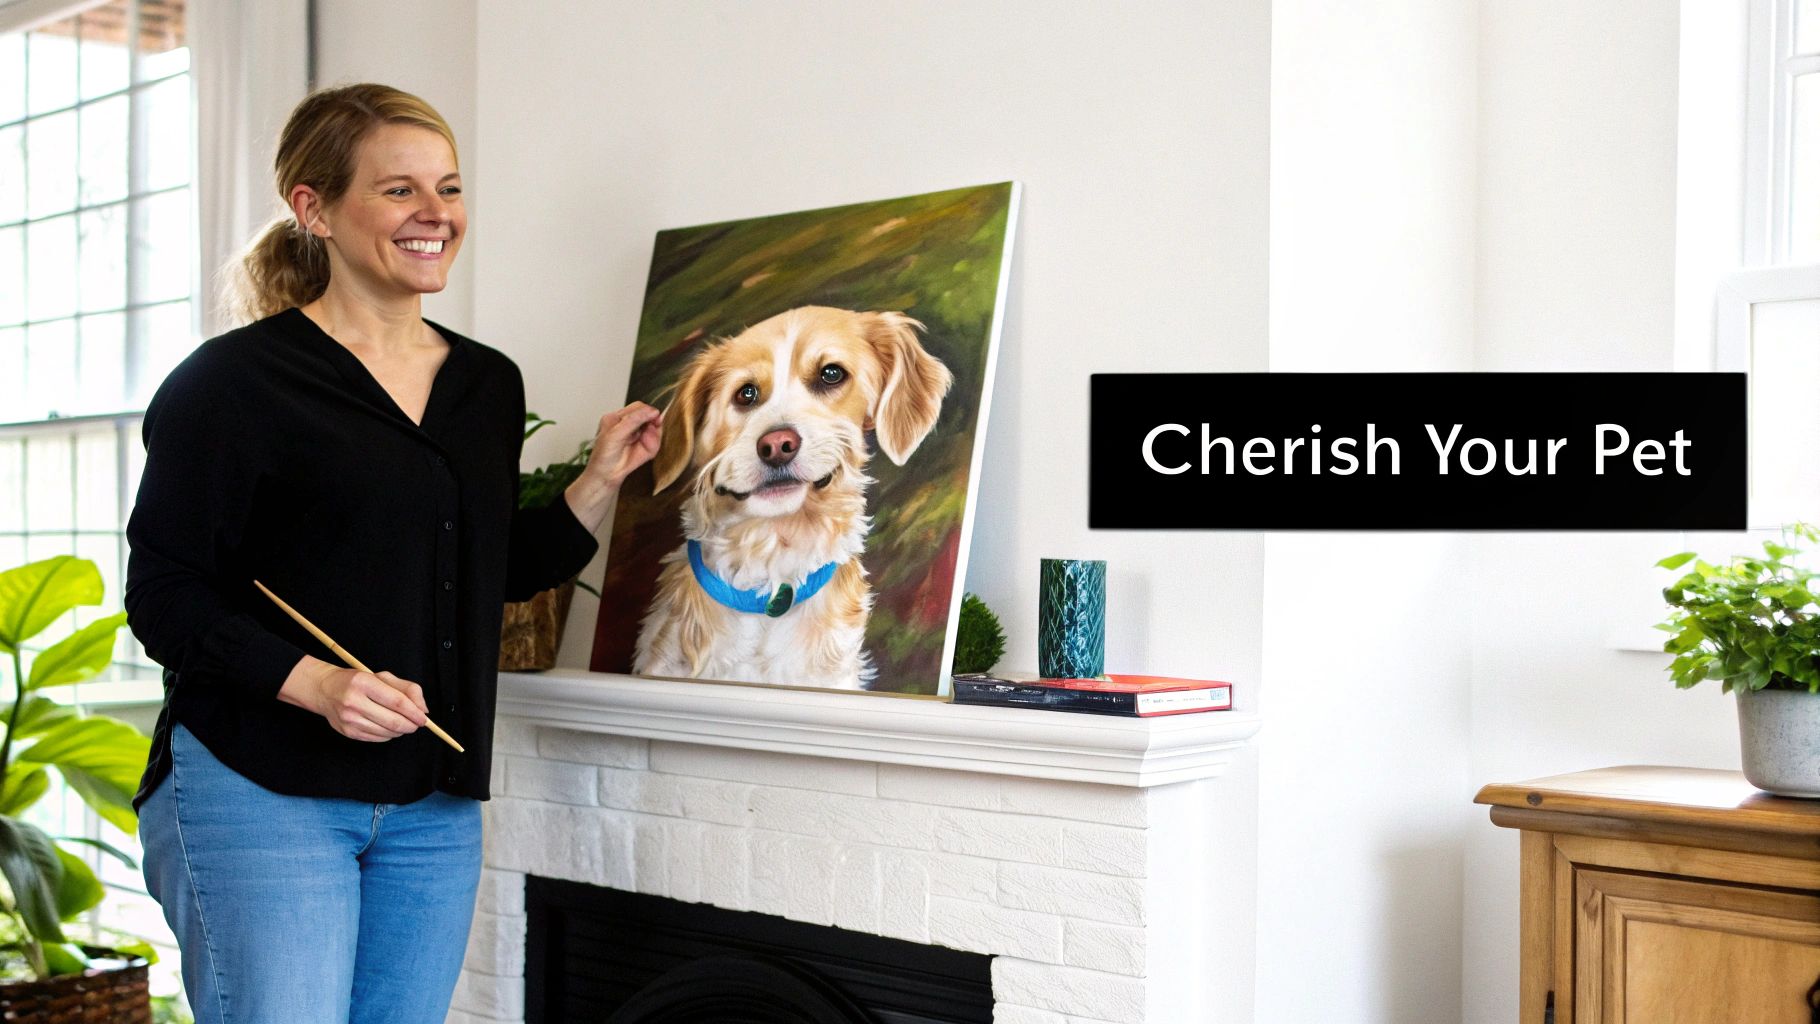
There's something incredibly special about turning a favorite photo of your pet into a piece of art you've painted yourself. It’s more than just a craft; it's a personal, heartfelt way to celebrate that one-of-a-kind bond you share. With a custom paint your pet kit, you get to transform that connection into a real painting, all while enjoying a relaxing, mindful activity that requires zero artistic experience.
Honestly, it’s all about creating a tangible memory, a piece of your shared story you can hang on the wall.
Why a Custom Pet Portrait Is So Meaningful
Painting a portrait of your pet is a true act of love. You're not just copying a picture; you're preserving a moment and capturing their unique spirit on canvas. Think about it—unlike snapping a quick photo, painting requires hours of your full attention. Every brushstroke is a reflection of your affection, making the whole process a powerful way to honor your furry family member.
The boom in DIY art kits has put this meaningful experience within everyone's reach. The global demand for painting tools is growing, showing just how much people are craving hands-on, creative activities. This trend is fueled by a massive paint manufacturing industry, which is expected to hit $45.2 billion in 2026 in the U.S. alone. You can dig into more stats on this market over at IBISWorld.com.
A Tribute for Every Stage of Life
A custom pet portrait can mean different things at different times, which is what makes it such a personal and heartfelt project.
- Celebrating Companionship: For the pets currently ruling your home, a painting is a vibrant celebration of their daily antics. It’s a way to capture that quirky head tilt or the soft, sleepy look you know so well.
- Creating a Memorial: For a pet who has crossed the rainbow bridge, the act of painting can be a comforting part of the healing process. It helps create a beautiful memorial that keeps their spirit and memory alive in your home.
The real value isn't just in the finished product, but in the focused, mindful process. Each numbered section you fill in is a small step in honoring a creature that brings immense joy to your life.
So, whether you're searching for a relaxing new hobby, a one-of-a-kind gift, or a way to pay tribute to a beloved friend, a paint your pet kit gives you everything you need to get started. It’s an opportunity to unplug from the noise and reconnect with that special bond you share, turning a simple photo into a masterpiece filled with love.
Picking the Perfect Photo for a Stunning Portrait
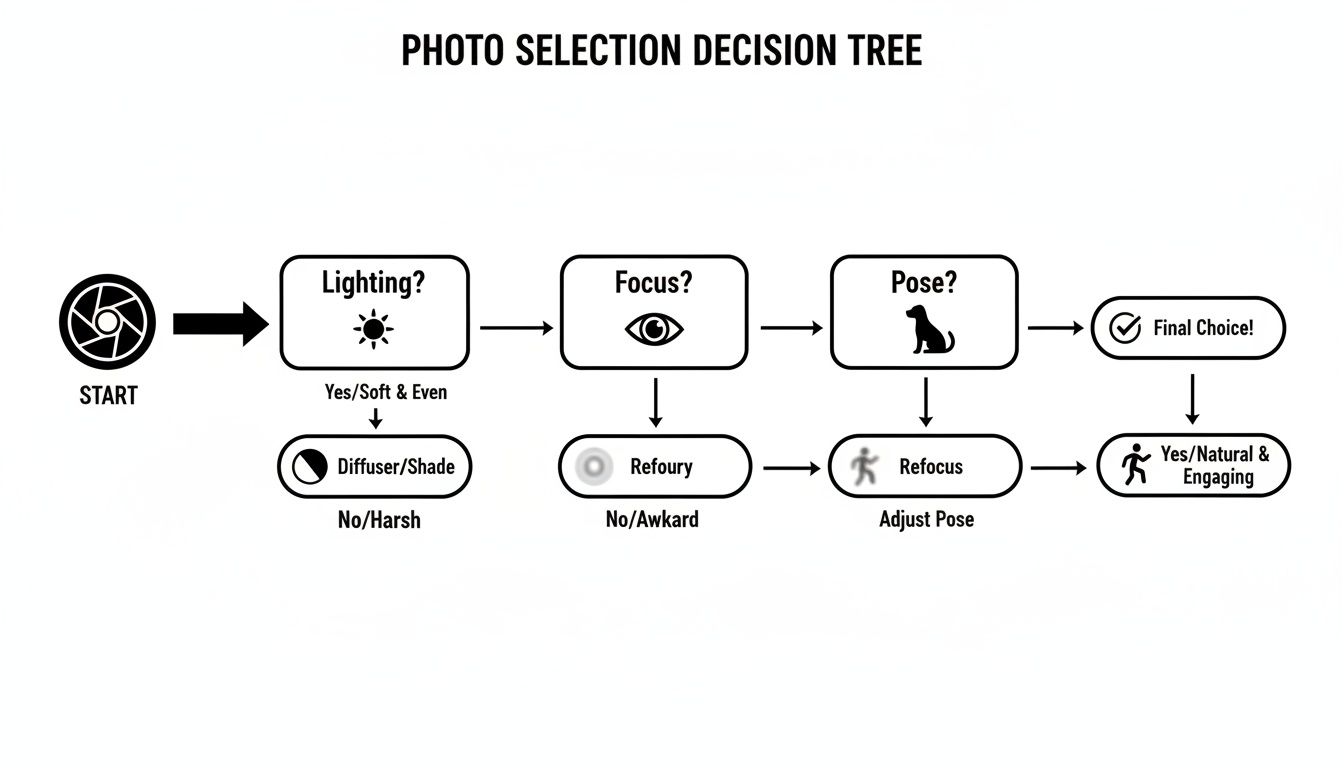
Let's be honest, the photo you start with is everything. It’s the single biggest factor that determines whether your finished pet portrait will be a masterpiece or just... meh. A great photo gives the custom kit designers a clear blueprint to work from, making sure every little detail, from the glint in their eyes to the texture of their fur, comes through.
Think about it—the company uses your photo to map out the entire numbered canvas. If your picture is blurry, too dark, or has their cute face hidden in shadow, the final canvas will inherit those same problems. For a painting you’ll be proud of, a sharp, well-lit image is non-negotiable.
Get the Lighting and Focus Just Right
Natural light is your secret weapon. Seriously. The best photos are usually taken outside on a day with light cloud cover or inside near a big, bright window. This soft, even light shows off your pet’s true colors and features without creating those harsh, dark shadows that can ruin a portrait.
Whatever you do, turn off the flash. Flash almost always creates a strange glare, the dreaded red-eye effect, and deep shadows that are impossible to paint well. It also tends to flatten out the beautiful texture of their fur, which is one of the best parts of a pet painting.
Focus is just as important. Before you commit to a photo, zoom way in on it and ask yourself:
- How do the eyes look? They should be crystal clear. The eyes give the portrait its soul, and blurriness here will make the whole painting feel flat.
- Can you see the fur? You don’t need to see every single strand, but you should be able to make out the texture and direction of their coat. This detail makes a huge difference.
- Is the nose sharp? As a central feature, a crisp nose helps anchor the entire face.
Here's a pro tip: Zoom in on your pet's eyes on your phone or computer. If they turn into a pixelated blob, find another picture. Sharp eyes in the photo mean soulful, realistic eyes in your painting.
Choose a Pose and Composition That Pops
Once you have a few clear, well-lit options, think about the pose. Are you going for a classic headshot or a fun, full-body shot? I usually recommend a head-and-shoulders view. It fills the canvas beautifully and puts all the attention right where it belongs: on your pet’s adorable, expressive face. This close-up view makes capturing their unique personality so much easier.
A full-body pose can be fantastic, too, especially if your pet has a signature stance or you want to show them in action. The key is to make sure they are still the star of the show. A simple, uncluttered background—think a plain wall, a blurry patch of grass, or a cozy blanket—is your best bet. It ensures your pet stands out and doesn't get lost in the noise.
For a deeper dive into photo selection, check out our guide on how to paint from a photo.
To make it even easier, I've put together a quick checklist. Use this to compare your favorite shots and find the absolute best one for your project.
Photo Selection Checklist for Your Pet Portrait
Use this quick reference to choose the best possible photo of your pet for a custom paint-by-numbers kit.
| Photo Quality Factor | What to Look For | What to Avoid |
|---|---|---|
| Lighting | Soft, natural light (overcast day, near a window) | Direct sunlight, harsh shadows, dark or backlit shots |
| Focus | Sharp, clear details, especially in the eyes and fur | Blurry, out-of-focus images, motion blur |
| Clarity | High-resolution photo; no pixelation when you zoom in | Low-resolution, grainy, or heavily compressed photos |
| Angle & Pose | Pet is looking toward the camera at eye-level | Photos taken from far above, below, or from a distance |
| Composition | Pet is the main subject, simple and uncluttered background | Busy backgrounds, other animals/people, distracting objects |
| Obstructions | Full face is visible, including both eyes and ears | Ears cropped off, face hidden by a toy, grass, or shadow |
Choosing the right photo might take a little extra time upfront, but I promise it's worth the effort. A great starting image is the first and most important step toward creating a pet portrait you'll cherish forever.
How to Customize Your Paint Your Pet Kit
Okay, you’ve picked out the perfect photo of your pet! Now for the fun part: turning that picture into a paint-by-numbers kit you can actually bring to life. This is where you get to make a few choices that will shape your entire painting experience and the final portrait.
Creating a custom painting of a beloved pet isn't just a niche hobby anymore; it's a huge trend. People want unique, personal ways to show off their furry family members. It's no surprise when you consider that over 70% of U.S. households own pets. This trend is part of a massive global art reproduction market, which is projected to hit an incredible USD 77.57 billion by 2032, according to Fortune Business Insights.
Choosing Your Canvas Size
First things first, think about where you want this masterpiece to live. Are you picturing it on your desk, tucked onto a bookshelf, or as a new addition to a gallery wall? If so, a smaller canvas like an 8x10 inch is probably your best bet.
If you want your pet's portrait to be the star of the show, go bigger. A 16x20 inch canvas makes a real statement and looks fantastic hanging on its own above a sofa or bed.
One little tip: a larger canvas usually means the numbered sections are bigger, which can feel a bit less intimidating if you're new to this. The size doesn't change the detail, though—that comes down to your next decision.
Deciding on the Paint Count
This is probably the most critical choice you'll make when customizing your kit. The number of paints you select will completely define the style of your finished artwork.
- Fewer Colors (e.g., 24 paints): This gives your painting a more stylized, almost graphic or pop-art feel. The colors will be bold, and you'll see more distinct blocks of color. It's a great choice if you're going for a vibrant, modern vibe.
- More Colors (e.g., 36 or 48 paints): This is the path to a more photorealistic portrait. All those extra shades create the subtle gradients and smooth transitions needed to capture the softness of fur and the depth in their eyes.
For a portrait that looks as close to your original photo as possible, always opt for the highest paint count available. Those extra colors make all the difference in capturing the tiny, nuanced tones that make your pet unique.
You'll also usually see an option for a rolled or pre-framed canvas. A framed canvas is fantastic because it's ready to hang the second you're done painting. A rolled one gives you more freedom to pick out your own custom frame later on. To see everything that comes in a kit, take a look at our complete guide on custom paint by numbers kits.
Setting the Stage for Your Painting Session
Half the fun of a paint-by-numbers project is creating a cozy little corner to work in. You don’t need a fancy art studio—just a quiet spot where you can settle in and focus. Setting up your space properly turns this from a simple craft into a relaxing escape. The goal is to have everything you need right at your fingertips so you can just get lost in the process.
Before you even think about popping open those paint pots, take a few minutes to prep. Lay down some old newspaper or a cheap plastic tablecloth to catch any rogue drips. Trust me, it’s much easier than scrubbing dried paint off your table later.
Your Workspace Checklist
A little organization goes a long way. Getting these items ready beforehand means you won't have to interrupt your creative flow to go searching for something.
- Good Lighting: This is non-negotiable. Natural light from a window is fantastic, but a good desk lamp works just as well. You need to see those tiny numbers clearly!
- Water Cup: Grab a sturdy mug or jar you don't mind getting messy. You'll use this constantly for rinsing brushes between colors.
- Paper Towels: Keep a small stack nearby. They're perfect for blotting extra water off your brush or wiping up small spills.
- Your Kit: Unbox everything and lay it all out. Your canvas, your little numbered paint pots, and your brushes should all be within easy reach.
A quick pro-tip: Rolled canvases sometimes arrive with creases. Don't worry! Just lay the canvas face down on an ironing board and gently go over it with an iron on the lowest heat setting. It’ll flatten out perfectly.
Organize Your Paints and Get Started
Here’s a simple trick that makes a huge difference: arrange your paint pots in numerical order. It seems obvious, but it saves you so much time hunting for the right color.
With your station all set up, you're ready for the best part—bringing your pet's portrait to life, one numbered section at a time.
Painting Techniques to Capture Your Pet's Personality
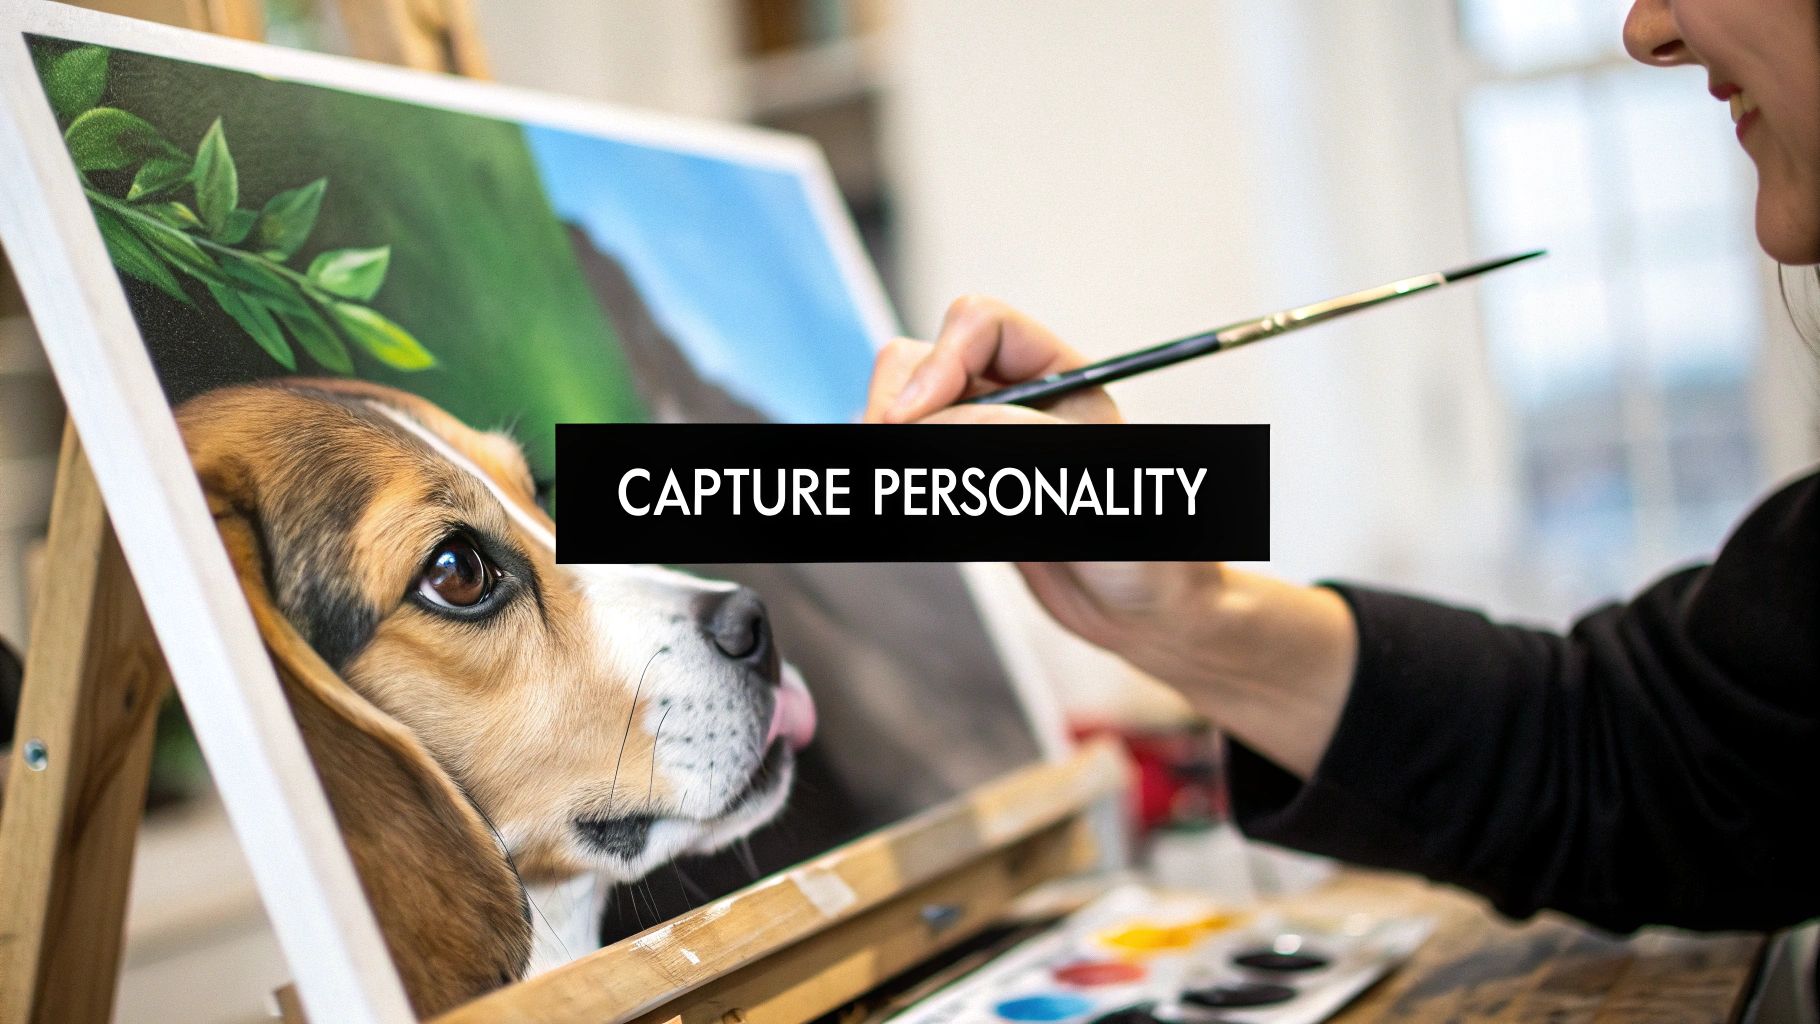
Alright, this is where the real fun starts. With your canvas ready and paints laid out, you’re about to turn those numbered shapes into a living, breathing portrait of your best friend. The secret isn't just about coloring inside the lines; it's about using a few simple techniques to add depth, texture, and a spark of life to your work.
Here’s a piece of advice that has saved me countless headaches: always work from the background to the foreground. By tackling the background areas first, you create a crisp, clean edge where your pet's fur begins. It’s a small step, but it stops you from accidentally smudging paint over your pet’s outline and really makes them pop off the canvas.
Making Their Eyes Sparkle
The eyes are everything in a portrait. Get them right, and the entire painting comes alive. Start by simply filling in the base colors for the iris and pupil, following the numbers on your canvas.
Once that base layer is dry, it's time for the magic touch—the highlight. This is the tiny white dot that mimics light reflecting off the eye. Grab your smallest brush, dip the very tip in white paint, and add a small, crisp dot to each pupil. It’s a tiny detail that makes a massive difference.
Pro Tip: Make sure you place the highlights in the exact same spot on both eyes, like in the upper-right corner. This simple trick creates a natural, focused gaze and instantly brings your pet's expression to life.
Painting Realistic and Textured Fur
Capturing the look and feel of fur can seem intimidating, but it all comes down to layering your paint and thinking about your brushstrokes. Don't just dab the paint on. Take a moment to consider the way your pet’s fur actually grows.
- For Short Coats (like a Beagle or Boxer): Use short, deliberate strokes that follow the natural direction of the fur. You’ll want to paint downward on their back but curve the strokes as you move around their face and legs.
- For Long, Flowing Coats (like a Golden Retriever or a Maine Coon): This calls for longer, more fluid brushstrokes. Layering is your best friend here. Start with the darker, underlying colors first, then add the lighter shades on top to create that beautiful sense of depth.
- For Curly Fur (like a Poodle): Think small, curved, or dabbing motions. This technique helps build up texture and gives the wonderful illusion of individual curls.
Remember, fur is never just one flat color. Your kit’s numbered paints are designed to work together to create highlights and shadows that give the coat dimension. If you want to take it a step further, you can learn more about creating a smoother finish with our guide on how to blend paint.
Mastering the Details
The more you understand about your pet, the better you can capture their unique spirit. For instance, knowing the subtle language of your cat's posture can change how you interpret the photo you're working from. Learning about things like cat tail meaning can add a whole new layer of appreciation to your painting process.
When you get to the tiny details that complete the portrait, here’s how to make them stand out:
- Whiskers: Whatever you do, don't use a thick brush for these. Wait until the face is completely dry. Then, take your finest detail brush, thin your white or black paint with a single drop of water, and use quick, confident flicks to paint them on.
- The Nose: A pet’s nose is almost always wet and reflective. After you've painted the base colors, add a small white highlight along the top curve or on one of the nostrils. This gives it that shiny, lifelike pop.
By focusing on these key techniques—starting from the back, breathing life into the eyes, and building up texture in the fur—you'll elevate your paint your pet project from a simple craft to a stunning piece of art that truly honors your companion.
Finishing and Displaying Your Pet Portrait
You’ve laid down that very last brushstroke. Take a step back and just admire what you’ve created. It’s an amazing feeling, isn't it? Before you rush to find the perfect spot on the wall, there are a couple of final touches that can really elevate your painting from a fun project into a lasting piece of art.
First up, let’s talk about varnish. Think of a clear, acrylic-safe varnish as an invisible shield for your masterpiece. It’s going to protect the paint from dust, moisture, and the biggest culprit of all—fading from UV light. As a bonus, it can also make the colors pop, giving them a richer, more vibrant look. If you go this route, just make absolutely sure your painting is 100% dry before you apply a thin, even coat.
Choosing the Perfect Frame
Nothing finishes a piece of art quite like the right frame. Some kits come with a basic DIY frame, which is great to get you started. But if you want to match your home’s style, you have some fantastic options that also protect the canvas edges.
Here are a couple of my favorite framing styles to consider:
- Traditional Frame: You can't go wrong with a classic. A simple wood or even an ornate, vintage-style frame can give your portrait that timeless, gallery-quality look.
- Floater Frame: This is a more modern approach. The frame leaves a small gap all around the canvas, making your artwork appear to be "floating." It's a really clean and professional look that I love for these portraits.
What you've created isn't just a painting anymore. It’s a truly unique and colorful pet portrait decoration that deserves to be shown off.
Gifting Your Heartfelt Creation
Honestly, a custom paint your pet portrait is one of the most personal and thoughtful gifts you can give. It’s perfect for holidays, birthdays, or just because—any pet parent would be absolutely thrilled to receive one.
I’ve also found that a hand-painted portrait can be an incredibly comforting tribute to a beloved pet who has passed away. It’s a beautiful way to honor their memory and celebrate the joy they brought into a person’s life.
So whether you hang it proudly in your own home or gift it to someone you love, your finished painting is so much more than a picture. It’s a memory, a tribute, and a little piece of your heart, brought to life with paint.
Answering Your Top Pet Painting Questions
It's totally normal to have a few questions buzzing around your head before you dip that first brush into the paint. Let's tackle some of the most common ones I hear, so you can start your project feeling confident and excited.
"What If I Make a Mistake?"
This is probably the #1 fear people have, but don't worry! If you accidentally use the wrong color, the fix is surprisingly simple.
Because these kits use acrylic paint, you just have to let the mistake dry completely. Once it's dry, you can paint the correct color right over the top. No one will ever know. It’s that forgiving.
"Help! I'm Running Out of a Color!"
Kits usually come with more than enough paint, but if you're a fan of applying thick, textured layers, you might run a little low on a popular color.
If you see a pot getting dangerously empty, just add a tiny drop of water and mix it in. This will thin the paint just enough to help it stretch a bit further without affecting the color.
"Can I Use an Old or Black and White Photo?"
Absolutely. This comes up a lot, especially when someone wants to paint a memorial portrait of a pet who has passed. The artists who design these kits are fantastic at working with vintage or monochrome images.
They can interpret the shades and tones to add realistic color, often based on the pet's breed or any notes you provide. The most critical thing is still clarity. A sharp, well-defined black-and-white photo will produce a much better canvas than a blurry color one.
Pro Tip: For the best results with an old photograph, scan it at a high resolution. Just snapping a picture of the photo with your phone can add glare and lose a lot of the crucial detail you'll want on your canvas.
"Can I Paint an Animal That Isn't a Dog or Cat?"
Of course! While dogs and cats are the most popular subjects, you can create a custom kit for any animal imaginable. I've seen people paint everything from bearded dragons and parrots to their favorite horse.
As long as you can provide a clear, high-quality photo, the process works exactly the same. Your beloved hamster deserves a portrait, too!
Ready to turn that favorite photo of your furry (or scaly!) friend into a piece of art you can treasure forever?
You can get your own kit started at Custom Paint By Numbers and begin creating a masterpiece that's uniquely yours.


