

There’s something incredibly special about turning a treasured photo into a real painting. It’s a way to bring a memory to life, and the best part is, you don’t need any artistic experience to do it. A custom paint-by-numbers kit makes the entire process not just possible, but genuinely fun and relaxing.
This guide will walk you through everything, from choosing that perfect snapshot to putting the final, professional-looking touches on your finished artwork.
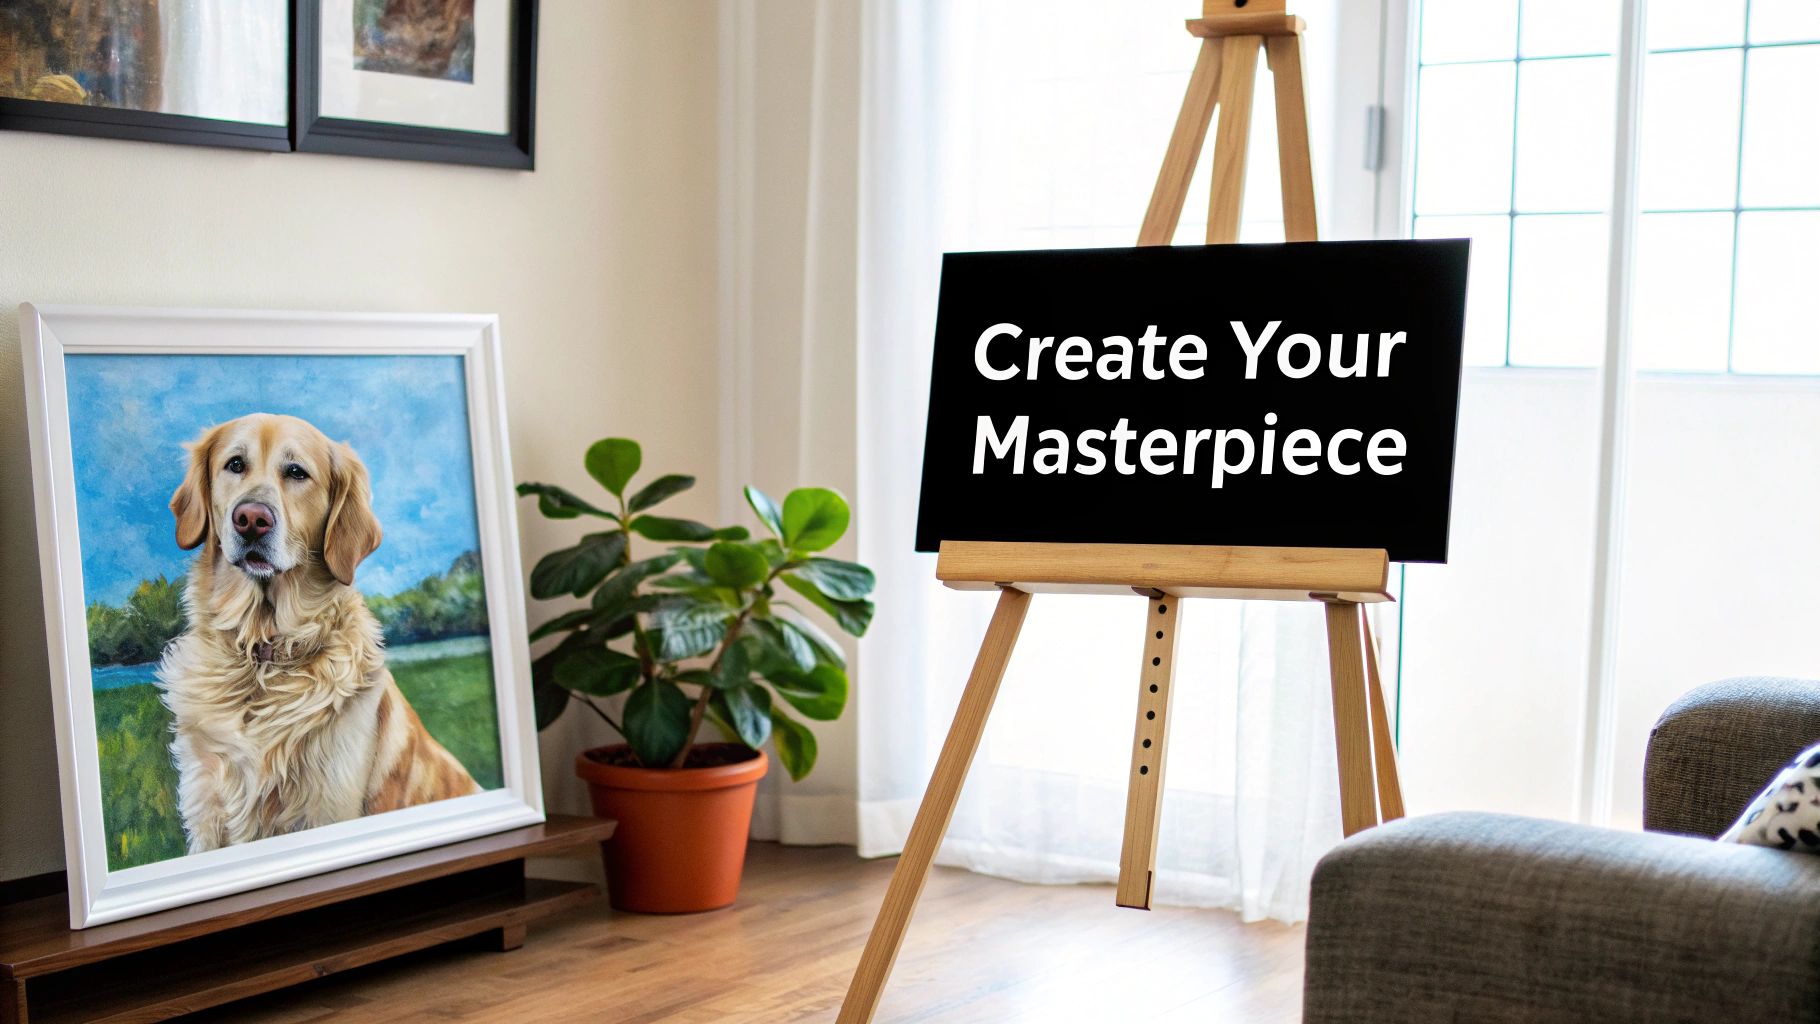
Your Guide to a Personal Masterpiece
Turning a photo into a painting is more than just a craft project; it's a way to create one-of-a-kind decor that means something to you. I’ll never forget my first one—a painting of my goofy golden retriever. The finished piece had so much more warmth and personality than a simple framed photo ever could.
We'll cover the practical steps you need to take to create a beautiful piece for your home or to give as an unforgettable gift.
This isn't just a niche hobby, either. It's part of a huge trend in personalized art. The global wall art market was valued at a staggering $63.61 billion and continues to grow, which shows just how much people want decor with personal meaning. You can read more about the growing trend of personalized wall art on Fortune Business Insights.
What to Expect on Your Journey
To help you get started, I’ve broken the whole project down into four simple stages. Seeing the road ahead makes the process feel much less intimidating and a lot more exciting. If you want to get into the nitty-gritty of ordering, our complete guide on creating a custom photo painting kit has all the details.
A Personal Touch: Remember, the magic here isn’t just in the final painting. It’s in the quiet moments you spend creating something meaningful with your own hands.
To give you a bird's-eye view, here's a quick summary of the journey you're about to take.
Your Photo-to-Painting Journey at a Glance
This table breaks down the four main stages of turning your favorite photo into a beautiful canvas painting. Think of it as your roadmap from start to finish.
| Stage | Key Action | What to Focus On |
|---|---|---|
| 1. Photo Selection | Choose your favorite picture | High resolution, good lighting, and clear subjects |
| 2. Kit Customization | Place your custom order | Select canvas size and paint complexity |
| 3. The Painting Process | Bring your canvas to life | Follow the numbered sections and use proper techniques |
| 4. Finishing & Display | Protect and showcase your art | Apply varnish and choose the perfect frame |
Each stage is a step toward creating a piece of art that’s completely, uniquely yours. Let's get started
Choosing the Perfect Photo for Your Painting
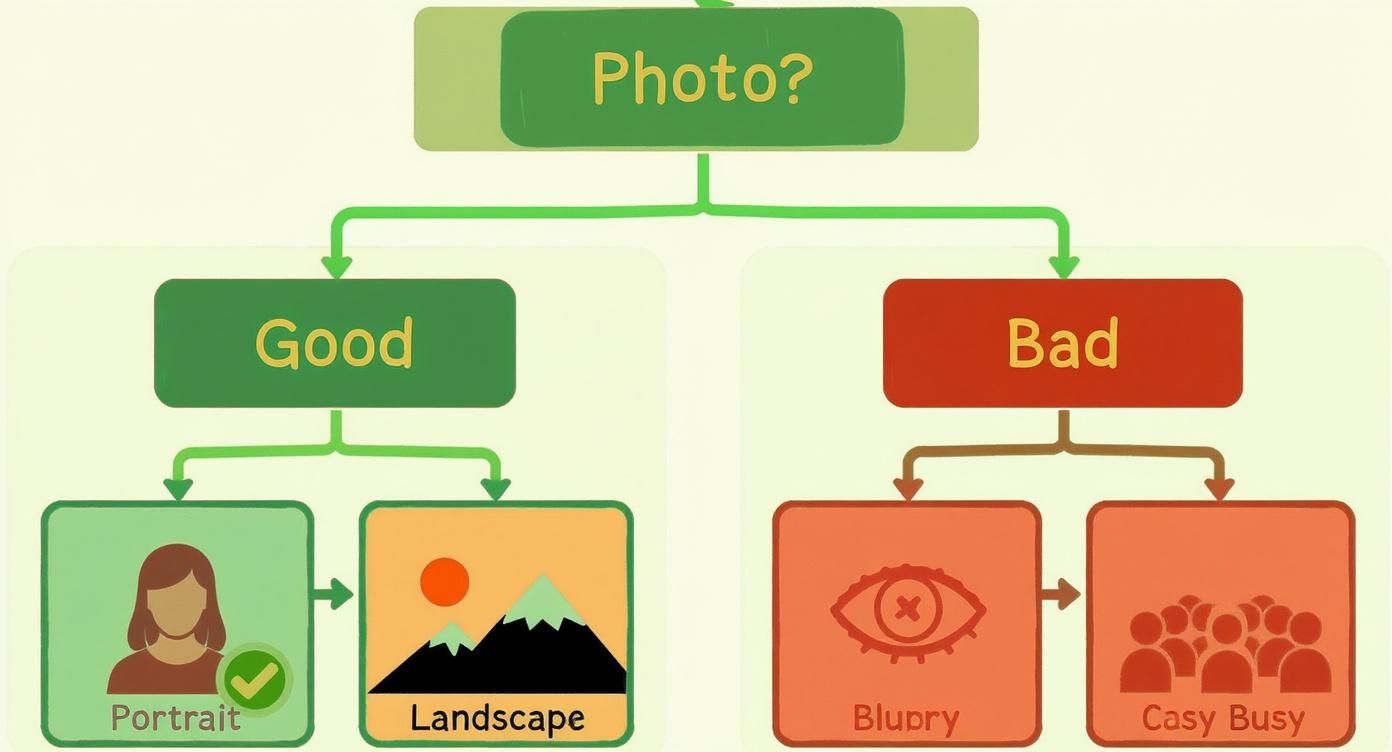
Your journey from a cherished photo to a finished painting all starts with picking the right image. This is probably the most critical step in the whole process, because not every snapshot is a great candidate for a canvas. Think of it like a chef choosing ingredients—the better the starting materials, the better the final result.
Good, strong lighting is your best friend here. A photo with clear light creates natural highlights and shadows, which is what gives your painting that sense of depth and realism. If you start with a flat or dimly lit picture, you'll likely end up with a painting that looks a bit muddy and undefined.
It also really helps to choose a photo where your main subject is sharp and clear against a simpler background. For instance, a portrait against a plain wall or a soft, blurry backdrop is much easier to translate into paint than a photo taken in a super cluttered room. That clean separation makes the subject pop and simplifies the painting process for you.
What Makes a Photo Great for Painting?
To help you narrow it down, here are the key things I always look for when choosing a photo for a custom paint-by-numbers project:
- High Resolution: The more pixels, the better. A high-resolution photo gives the design software more detail to work with, resulting in a much more accurate and clear paint-by-numbers outline. A blurry or pixelated photo will just lead to a confusing, fuzzy template.
- Simple Composition: Stick with photos that have just one or two main subjects. A close-up of your dog's face or a serene landscape will almost always turn out better than a busy group shot where tiny faces can lose all their detail.
- Good Contrast: You want an image with a nice balance of light and dark areas. This contrast is exactly what the paint colors will mimic, creating a piece that feels dynamic and visually interesting.
My Go-To Tip: Don't hesitate to do a little pre-editing! Sometimes, all a photo needs is a quick crop to focus on the best part, or a slight boost in brightness to make it shine. These simple tweaks can make a world of difference.
This image shows a great example of why resolution is so important.
See how the high-resolution version keeps all those crisp details? That’s exactly what you’re aiming for to get a fantastic canvas template.
Photos to Politely Pass On
Knowing what not to choose is just as important as knowing what works well. I’ve seen certain types of photos consistently cause issues when they're turned into a paintable design.
Definitely steer clear of images that are way too dark. Any details lurking in the shadows will completely disappear in the final outline.
You should also be cautious with photos that have incredibly busy backgrounds—think of someone standing in front of a dense, leafy forest. All those overlapping shapes and colors can quickly become a jumbled mess, taking all the attention away from your subject. Getting a feel for what makes a good picture, like exploring the art of photography, can really help you make a better choice from the start.
Ultimately, by beginning with a strong, well-composed photograph, you're setting yourself up for a beautiful painting you'll be proud of.
Placing Your Custom Paint By Numbers Order
You’ve picked out the perfect photo, and now comes the fun part: turning that memory into a real work of art. Placing your order is where you'll make a few key decisions that will shape how your final painting looks and feels.
First up is the canvas size. A bigger canvas can make for a stunning statement piece with plenty of room for all those tiny details. Just remember, a larger size also means more time with your brush in hand. Think about where you plan to hang the finished piece and how much time you want to dedicate to your project.
Picking Your Paint Complexity
The most critical choice you'll make is the number of paint colors in your kit. This decision directly impacts the style of your painting and how challenging it will be to complete. More colors mean more detail, but also more tiny spaces to fill.
As the infographic shows, a great painting starts with a great photo. A clear, well-lit image is your best foundation, no matter which color count you end up choosing.
Your choice of paint count is really a creative one. Are you going for a fun, artistic interpretation of your photo, or do you want a detailed, true-to-life replica?
To help you decide, here’s a quick breakdown of how the number of colors changes the game.
Choosing Your Paint Complexity Level
| Complexity Level (Colors) | Artistic Style | Best For | Difficulty |
|---|---|---|---|
| 24 Colors | Graphic, Poster-like | Beginners, modern art lovers, or photos with bold, simple subjects. | Low |
| 36 Colors | Balanced Realism | The sweet spot for most photos, capturing good detail without being overwhelming. | Medium |
| 48 Colors | Photorealistic | Experienced painters or anyone seeking a highly detailed, lifelike result. | High |
Ultimately, there's no "wrong" choice. A 24-color kit will give you a cool, stylized painting, while a 48-color kit will look incredibly close to the original photograph. It all comes down to the look you're after and the journey you want to have.
The world of personalized art is booming. In fact, the artist canvas market was valued at $3.36 billion and is expected to hit $5 billion soon, which just goes to show how much people enjoy creating their own unique decor.
If you’re curious about different services that can transform your photo, you can check out the wishmate.ai homepage. To see all of our options and get an even deeper look, take a look at our guide to custom paint-by-numbers kits.
Bringing Your Canvas to Life With Paint
Alright, your custom kit has arrived—this is where the real fun starts. Before you even dip a brush, find your spot. You'll want a comfortable chair and, most importantly, good lighting. A well-lit space lets you relax and really get lost in the process without straining your eyes.
A classic rookie mistake is jumping around the canvas and painting random spots. Trust me on this one: work methodically. If you’re right-handed, start in the top-left corner and work your way down and across. This simple habit keeps your hand from smudging any wet paint along the way.
It’s this kind of structured, satisfying process that’s making personalized art so popular. The demand for prepared canvases, the very foundation for projects that turn photo into canvas painting, is part of a huge market valued at around $500 million USD. It's a niche that just keeps growing as more people discover the joy of DIY art. You can check out more details about the growing prepared canvas market on Data Insights Market.
Developing Your Painting Strategy
There isn't one "right" way to tackle a paint-by-numbers canvas. The key is finding a rhythm that feels good to you. Here are a couple of popular approaches I’ve seen work well.
-
One Color at a Time: This is my personal favorite. You stick with one color and fill in every corresponding number on the canvas before moving on. It helps you get into a flow and means less time spent cleaning brushes.
-
Darkest to Lightest: Another great method is to start with your darkest colors first. This immediately gives your painting depth and structure, making the lighter shades pop when you add them later.
Pro Tip: Go easy on the paint. Loading up your brush might seem faster, but a small amount gives you way more control, especially for those tiny, intricate spots. You’ll get much cleaner lines, which really makes the final piece look polished.
Make sure to give your brushes a good rinse in water between colors to keep your painting looking vibrant and crisp. Remember, this isn't a race. Put on some music, pour a drink, and just enjoy watching your favorite photo come to life, one brushstroke at a time.
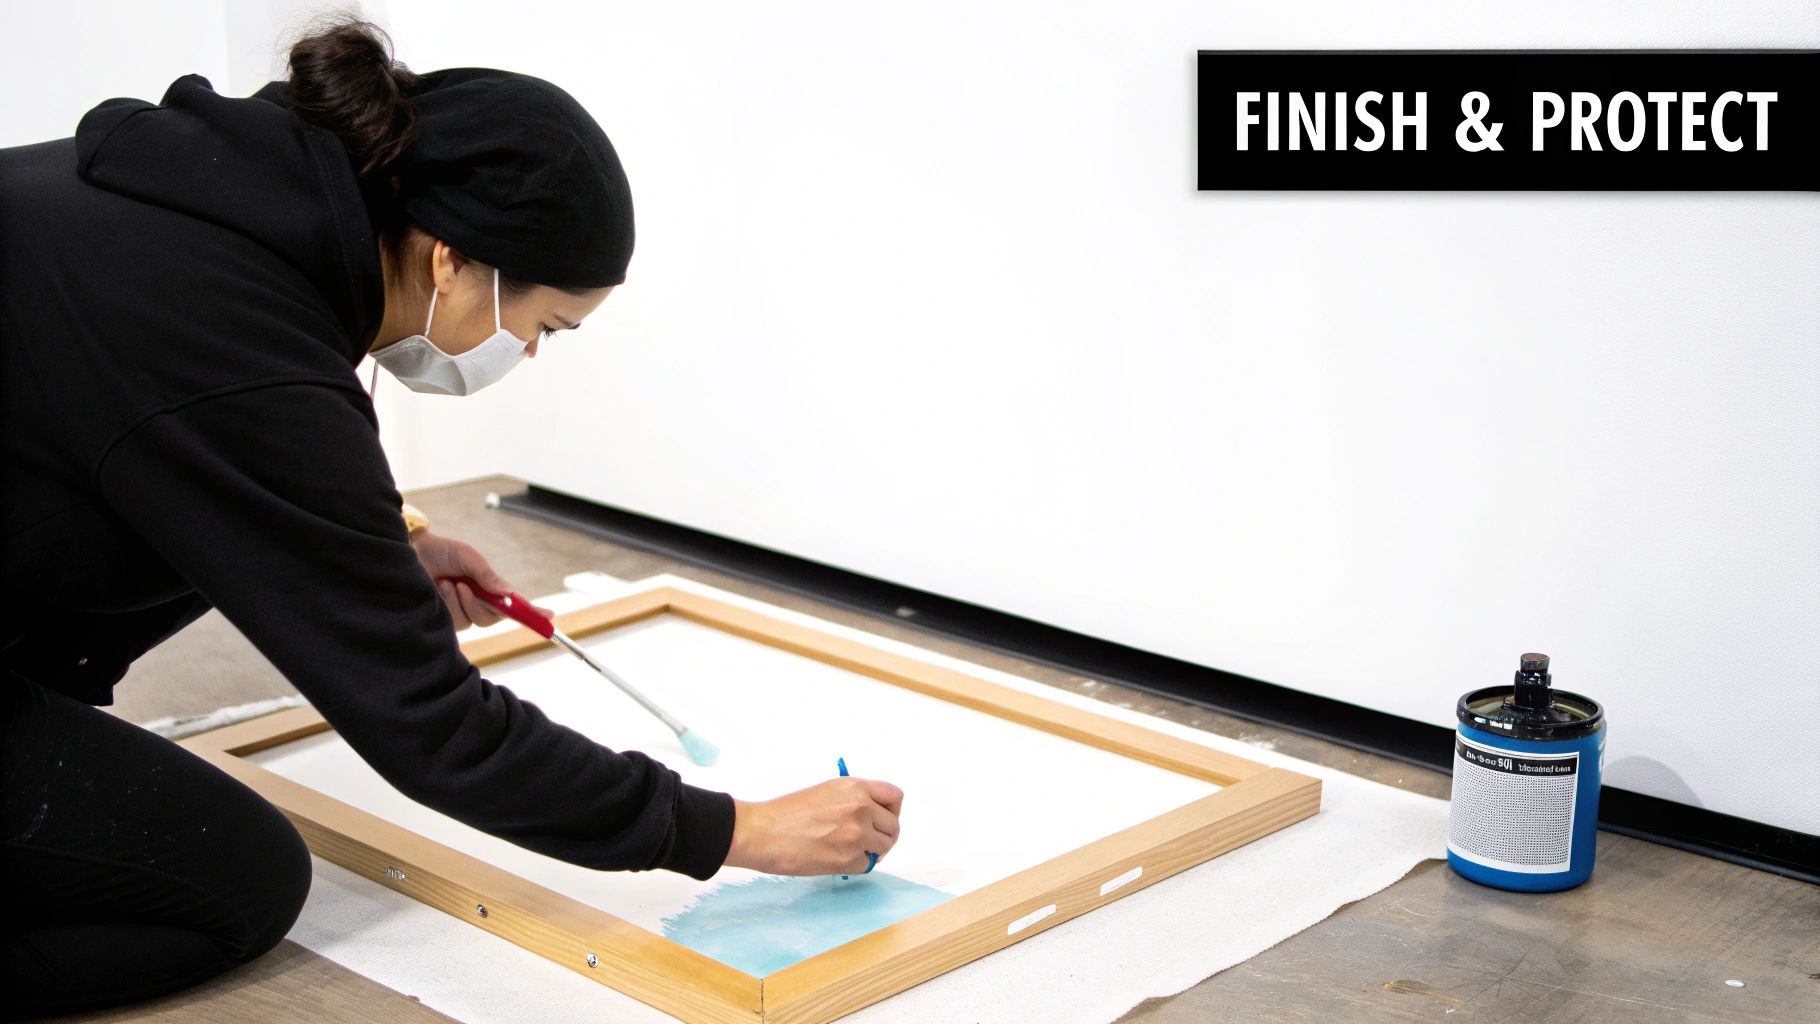
Finishing Touches for a Professional Look
You’ve painted the last number and your canvas is complete—what a feeling! But before you hang it up, there are a couple of final steps that will take your artwork from a fun project to a lasting piece of art. The most important one? Sealing your painting.
Applying a clear varnish is the secret to giving your canvas a truly professional look. It does two crucial things: it protects the acrylic paint from dust and grime, and it shields it from UV rays that can make those beautiful, vibrant colors fade over time.
Think of it as the final, protective layer that locks in all your hard work.
Varnish and Framing Choices
When it comes to varnish, you basically have two choices, and the one you pick really comes down to personal preference.
- Gloss Finish: This is my go-to for making colors pop. It gives the painting a vibrant, almost wet look that deepens the darks and brightens the lights.
- Matte Finish: If you prefer a more modern, subtle look without any glare, a matte varnish is the way to go. It offers the exact same protection but with a flat, non-reflective surface.
If you want a step-by-step guide on the application process, check out our tutorial on how to seal acrylic paint on canvas. After the varnish has fully cured, it's time to think about framing.
Choosing a frame is where your personal style comes in. My advice? A simple, clean frame usually works wonders. It lets your artwork shine without competing for attention.
Try to match the frame to the style of the room where you'll hang it or pull a subtle color from the painting itself. Taking these final steps ensures that when you turn photo into canvas painting, you create a masterpiece that’s ready to be admired for years.
Got Questions About Turning Your Photo into a Canvas Painting?
It's completely normal to have a few questions before you dive into turning a cherished photo into a painting. Getting these cleared up beforehand means you can start your project feeling confident and excited, without any second-guessing. Let's walk through some of the things people often ask.
Will My Photo Work? And How Long Will This Take?
One of the first things people ask is, "Is my picture good enough?" For the best results, you'll want to pick a high-resolution photo with a clear subject and good lighting. Think about a great portrait with a simple background, a close-up of your beloved pet, or a beautiful landscape shot.
Photos that are blurry, too dark, or have super busy backgrounds with lots of tiny, intricate details can be a real challenge. They often don't translate well into a clean, easy-to-follow paint-by-numbers pattern.
The next big question is usually about the time commitment. This really comes down to the size of the canvas and how detailed the painting is (which means more colors).
- A small, simple canvas might take you somewhere between 8 to 12 hours.
- A large, more detailed canvas could easily take 25 to 40 hours, or even more.
The best approach is to see it as a relaxing hobby you can chip away at over a few weeks, not a sprint you have to finish in one go.
Do I Need to Be an Artist? What if I Mess Up?
"Do I need any artistic skill?" I hear this one all the time, and the answer is a big, emphatic NO! That's the whole point of a custom paint-by-numbers kit. It takes all the guesswork out of the equation. Your canvas comes with the design pre-printed, and each little section has a number that matches a specific paint pot. It's a guided, creative experience.
And don't stress about making a mistake—it happens, and it's surprisingly easy to fix.
The secret is the acrylic paint. It’s opaque, which means it covers what's underneath it. If you paint the wrong color in a spot, just let it dry completely. Then, simply paint right over it with the correct color. You might need a second coat to hide it perfectly, but your little slip-up will completely disappear.
This whole process is designed to be foolproof, letting anyone create something they can be proud of, no matter their experience level. It's all about enjoying the simple, mindful act of painting and watching a special memory come to life one brushstroke at a time.
Ready to create your own masterpiece? At Custom Paint By Numbers, we make it simple to transform your favorite photo into a work of art. Create your personalized kit today!


