

So, you’ve got a finished canvas and you're ready to give it the presentation it deserves. Framing might seem intimidating, but it's really about a few key steps: measuring carefully, getting the alignment just right, and using the right hardware to hold everything together.
Your Guide to Flawless Canvas Framing
Whether you've just finished a custom paint-by-numbers kit or you're getting a treasured piece of art ready for the wall, a good frame is what truly completes the picture. It's not just about looks—the right frame protects your canvas and makes it a real centerpiece.
This guide will walk you through the entire process, so you can feel confident you're doing it right. We'll cover all the common scenarios you're likely to run into.
- Standard Stretched Canvases: We’ll look at fitting your art into traditional frames that have a recessed lip, or "rabbet."
- Modern Floater Frames: I'll show you how to get that cool, gallery-style "floating" effect for your artwork.
- Unstretched or Rolled Canvases: If you have a canvas from a kit or one that's been rolled up, we'll cover how to stretch it first—a crucial first step.
With the explosion of DIY art, knowing how to frame your own work is a more valuable skill than ever. The canvas painting kit market alone is a huge part of the art world, with global revenues estimated between $2.5 billion and $3 billion. This sector is growing fast, expanding at 7% to 10% each year, all thanks to people rediscovering crafts and the fun of paint-by-number kits. You can dig deeper into these trends over at MarketReportAnalytics.com.
Your Essential Canvas Framing Toolkit
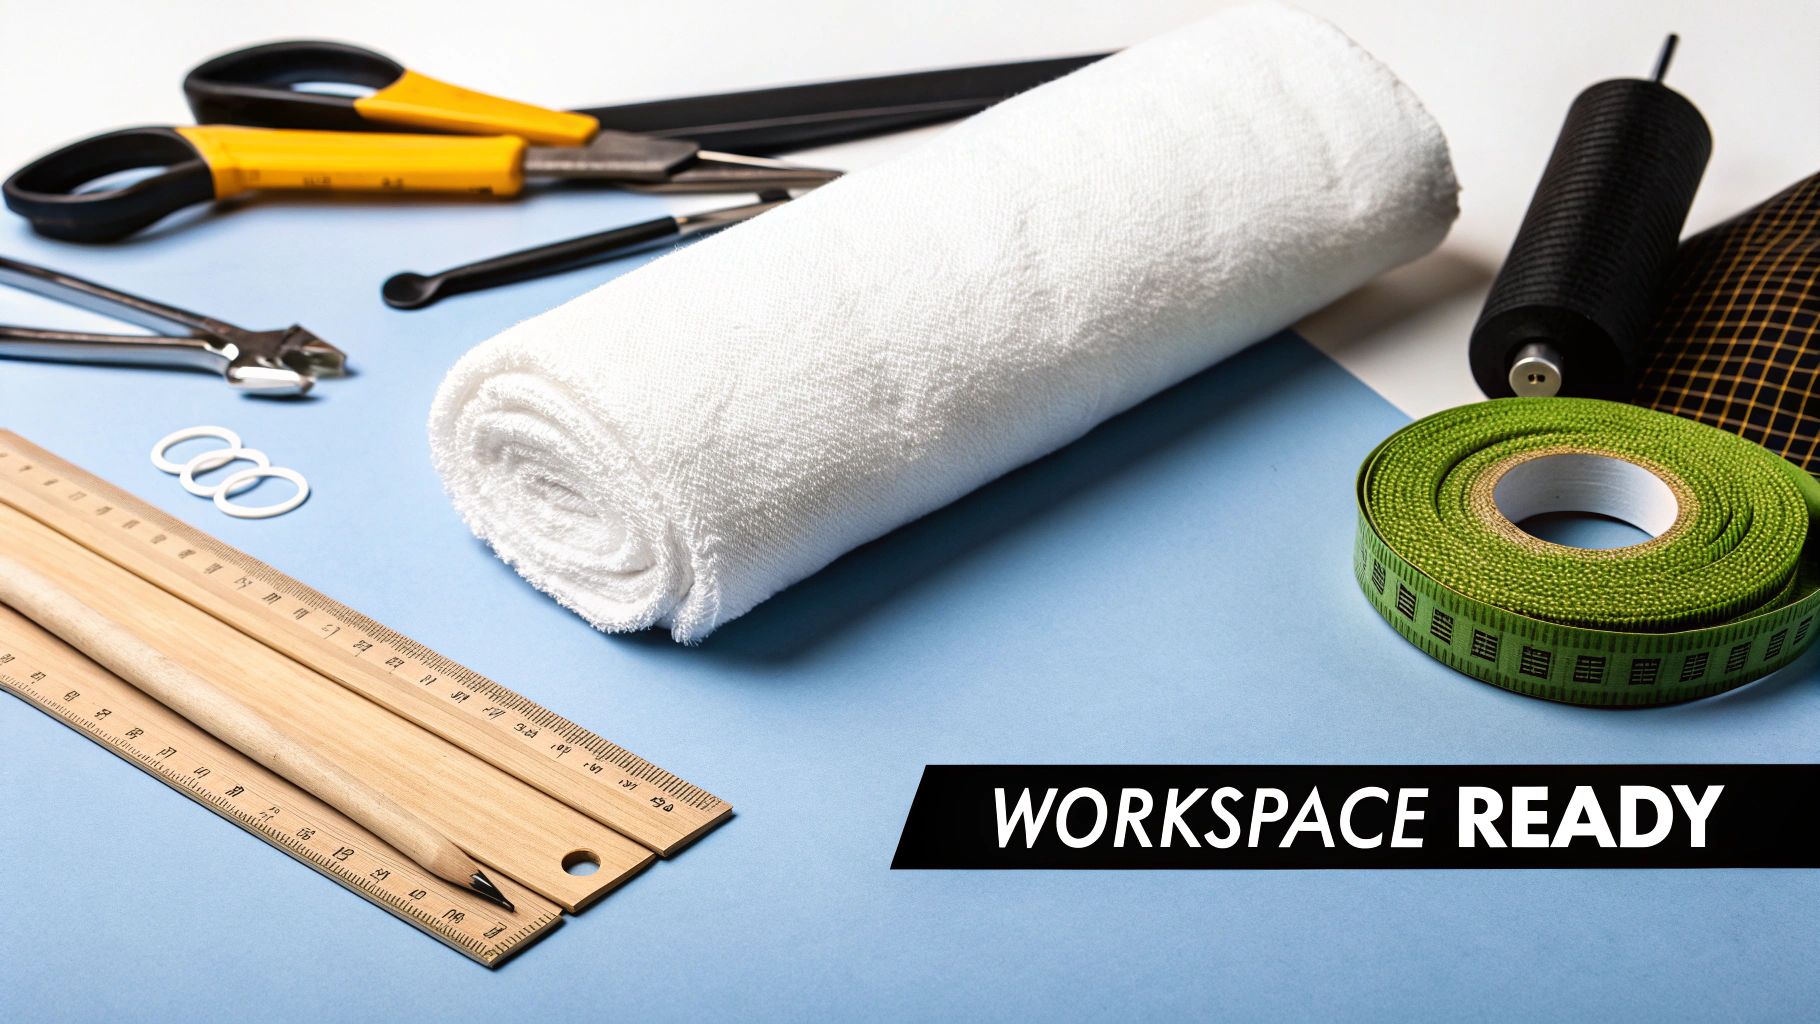
Before you even think about putting your canvas near a frame, let's get your toolkit sorted. Having everything you need laid out and ready to go makes the whole process smoother and helps you avoid any frustrating pauses or accidental damage to your art.
A well-prepared workspace is an artist's best friend. Clear a flat, clean surface and lay down a soft cloth or towel to prevent scratches on your frame or canvas.
Here’s a quick rundown of the gear I recommend having on hand for most canvas framing jobs.
| Tool or Material | Primary Use | Pro Tip |
|---|---|---|
| Measuring Tape | Ensuring accurate dimensions of both the canvas and frame. | Always measure twice. Check the length, width, and depth of your canvas. |
| Offset Clips | Securing the canvas into a standard frame with a rabbet. | Choose clips with the correct depth to bridge the gap between the canvas back and the frame. |
| Screwdriver/Drill | Installing offset clips, D-rings, and other hardware. | A small, handheld electric screwdriver makes the process much faster and easier. |
| Picture Wire & D-Rings | Creating a secure and level hanging system on the back of the frame. | Attach D-rings about one-third of the way down from the top of the frame for balanced hanging. |
Once you've gathered these items, you're officially ready to start framing like a pro.
Getting Your Workspace and Materials Ready
Before you jump into framing, taking a few minutes to get organized will save you a world of frustration. Trust me, it’s the difference between a clean, professional finish and a frame full of dust with a crooked canvas.
Find a large, flat area to work—a clean floor or a dining table is perfect. I always lay down an old, soft blanket or a sheet of craft paper first. This protects both the frame from scratches and your table from any dings. Good lighting is also key; you need to see exactly what you're doing to get the alignment just right and spot any stray dust before it's too late.
Your Toolkit: The Essentials
Having everything you need within arm's reach makes the whole process smoother. You'll obviously need your canvas and frame, but here’s a quick list of other tools I always have on hand:
- A good metal measuring tape: Don't rely on a flimsy one; precision is your friend here.
- Pencil: For making small, light marks you can easily erase.
- Hardware: This will depend on your frame, but it usually includes offset clips or framer’s points, D-rings, and picture wire.
- Microfiber cloth: Essential for a final, fingerprint-free wipe-down.
- Small pliers: You’d be surprised how often these come in handy for tightening wire or grabbing tiny screws.
It's no secret that DIY art projects have become incredibly popular. The global art paint market, which was valued at USD 2.9 billion in 2025, is expected to climb to nearly USD 5 billion by 2034. A big part of that is how easy it's become to buy supplies online—the number of artists buying online jumped from 61% in 2019 to 72% in 2021.
Measure Twice, Frame Once
This is where so many people go wrong. A measurement that's off by even a tiny fraction can ruin the look, creating awkward gaps or making it impossible to fit the canvas at all. You need to get two sets of measurements absolutely right.
First, measure your canvas. Get the exact height and width with your tape measure. If you're using a floater frame, you'll also need the depth of the canvas—just measure from the face of the artwork to the back of the wooden stretcher bar.
My Go-To Tip: Always measure the height and width of your canvas in a couple of different spots. Stretcher frames aren't always perfectly square, and taking the largest measurement ensures you won't have any nasty surprises when you try to pop it in the frame.
Next, flip the frame over and measure its opening from the back. This recessed lip where the canvas sits is called the rabbet. Measure the height and width of that opening. For example, a frame sold as a 16x20 should have a rabbet that's just slightly larger, giving you a little bit of breathing room.
Having a sturdy setup, like a proper art desk or easel, can make this whole process much easier. If you find yourself painting and framing often, looking into the best types of easels for painting canvas is a smart move that pays off in both your painting and framing quality.
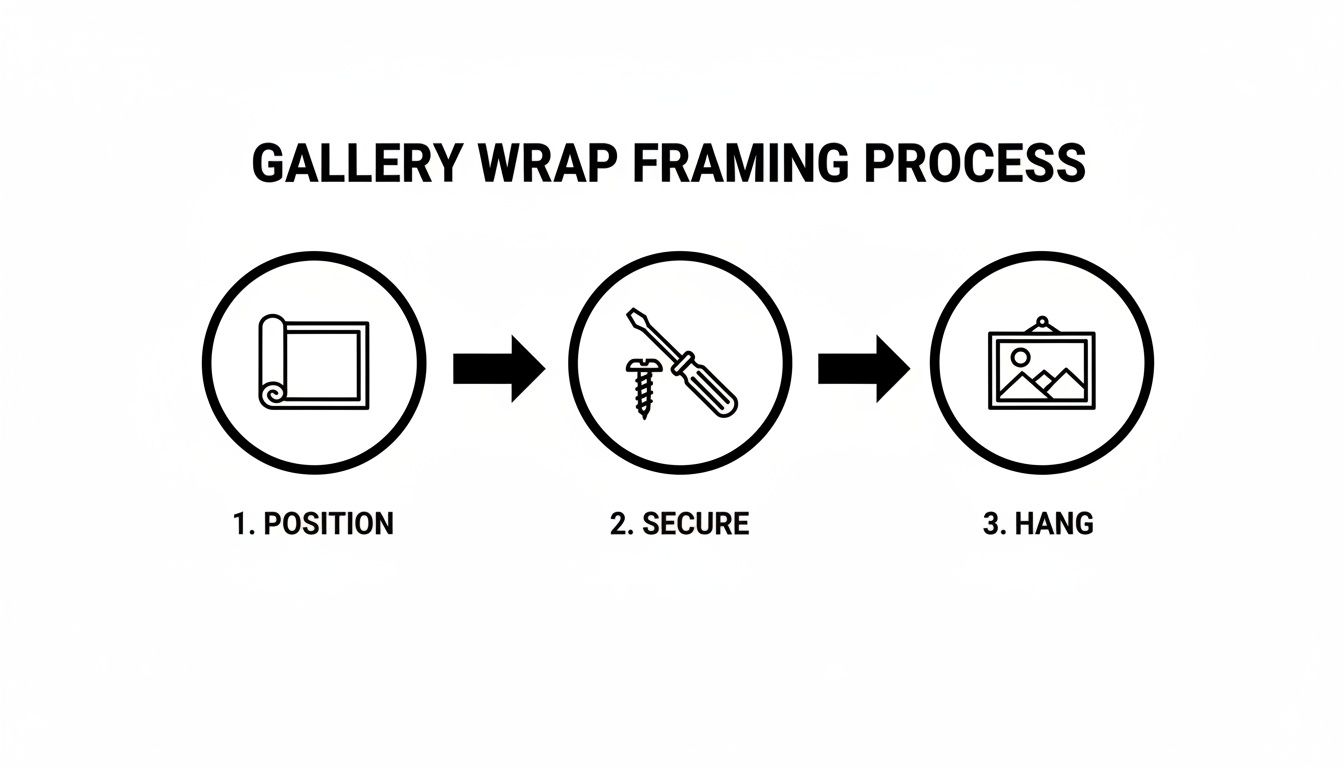
Framing a Standard Stretched Canvas
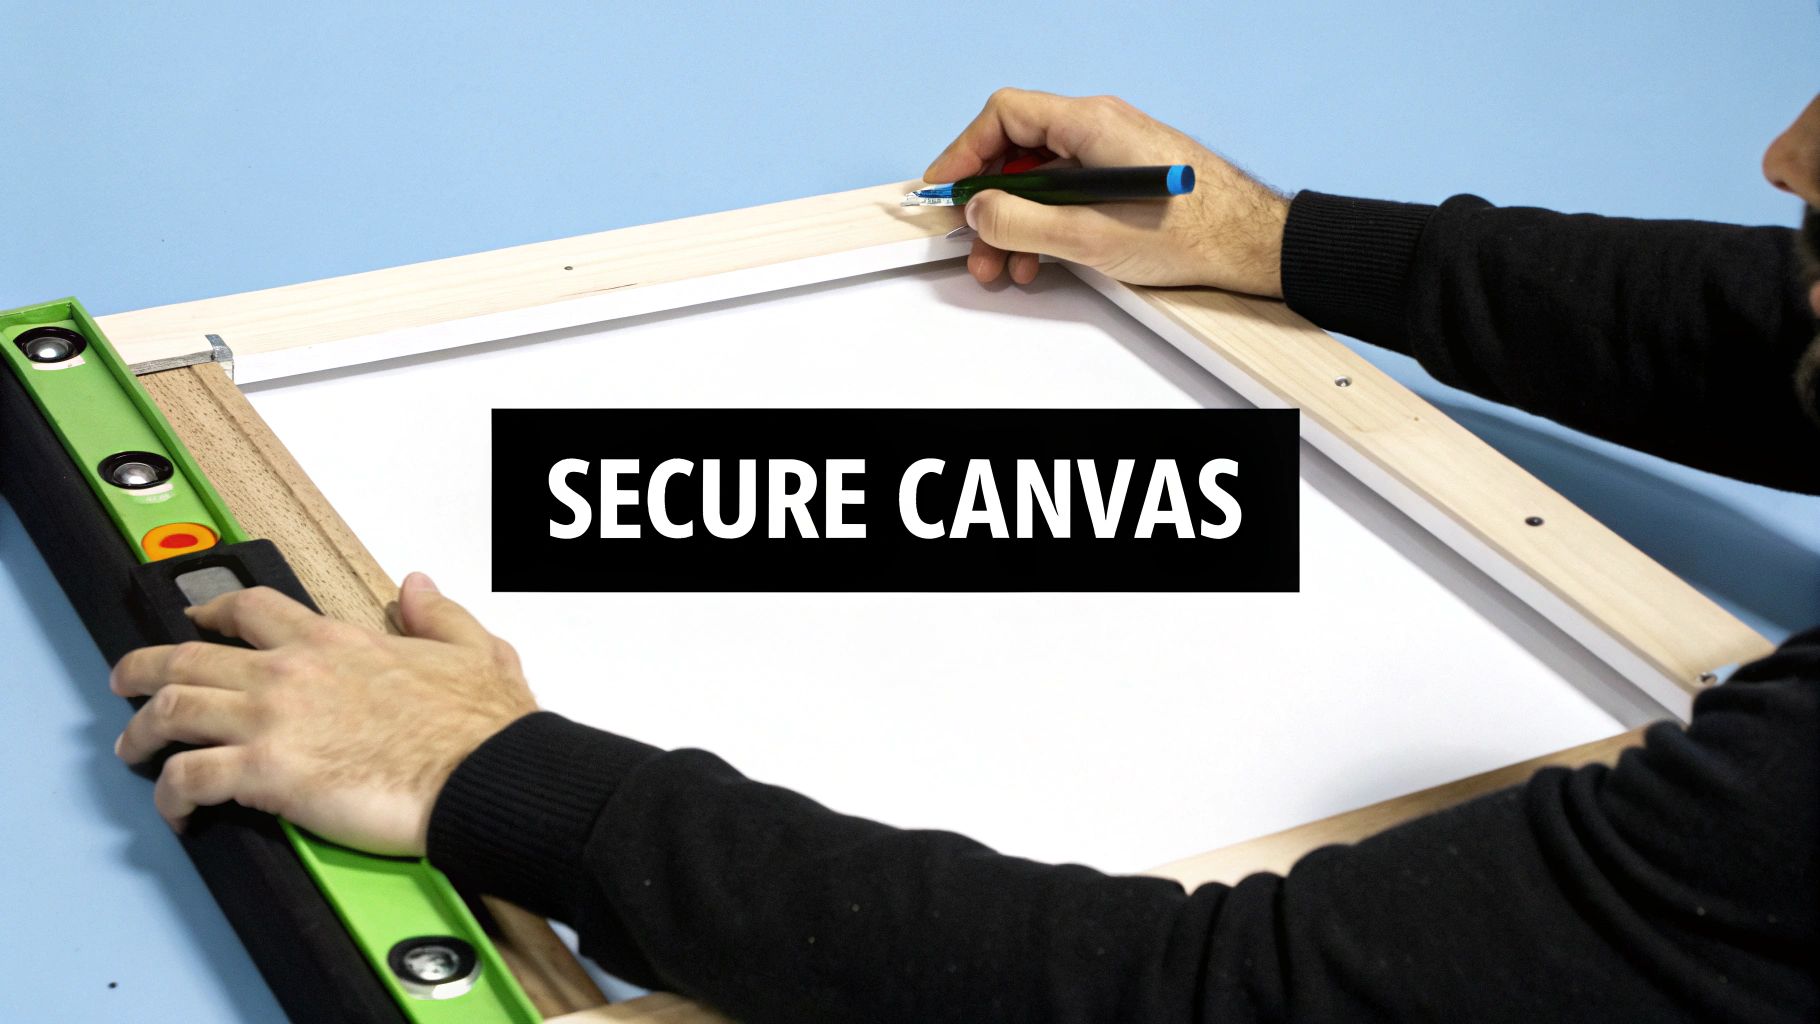
This is probably the most familiar scenario you'll run into: you've got a beautiful canvas already stretched over a wooden frame, and you want to give it that final, polished look. The whole idea here is to nestle the canvas securely inside the frame's inner lip, which is called the rabbet. A good fit is a snug fit.
Start by laying your frame face-down on a clean, soft surface to avoid any scratches. Now, carefully pick up your stretched canvas and lower it, painting-side down, into the frame's opening. It should drop right into place and sit flush within that rabbet, with just a tiny bit of breathing room.
Quick side note: if your artwork came rolled up in a tube, you've got a preliminary step to tackle first. You'll need to get it onto stretcher bars before it's ready for a frame. We've got a great walkthrough on how to stretch a painted canvas that will guide you through that process.
Choosing Your Fasteners
With the canvas sitting pretty in the frame, the next move is to lock it in place. You’ve got a few solid options for this, and your choice will likely depend on what tools you have handy and how "pro" you want the back of your frame to look.
There isn't a single "right" way to do it, but some methods are definitely better suited for certain situations. Let's look at the most common choices.
Comparing Fasteners for Stretched Canvases
A look at the most common methods for securing a stretched canvas in a standard frame.
| Fastener Type | Best For | Ease of Use | Professionalism |
|---|---|---|---|
| Offset Clips | Creating a very secure, professional hold that's also easily removable. | Simple. Requires only a screwdriver and a steady hand. Great for beginners. | Very High |
| Framer's Points | Quick, low-profile fastening, especially when framing multiple pieces. | Moderate. Requires a special point driver tool for best results. | High |
| Staple Gun | A fast, no-frills DIY approach using common workshop tools. | Easy. Just requires a heavy-duty staple gun. | Good (DIY) |
Honestly, each of these methods works perfectly well. Your decision really comes down to balancing budget, available tools, and how you want the finished piece to look from the back.
If you're just starting out, I always suggest going with offset clips. They're incredibly forgiving. You just need a small screwdriver, and they create a rock-solid connection between the frame and the canvas that looks clean and professional.
Installing the Hardware for a Secure Fit
Whichever fastener you've picked, the basic strategy is the same. The key is to apply even pressure across the board to prevent the canvas from getting skewed or warped inside the frame.
Think of it like tightening the lug nuts on a car tire—you work in a star pattern. Start by putting your first fastener in the middle of one of the long sides. Then, place the next one directly across from it on the opposite side. As you do this, apply a bit of gentle downward pressure on the canvas to make sure it stays tight against the frame's rabbet.
Next, do the same for the two shorter sides, again starting in the middle. Once those four central points are anchored, you can start filling in the gaps. Work your way out towards the corners, adding another clip or staple every few inches until it feels completely secure. If you’re using staples, driving them in at a slight angle will give you a little extra grip.
Don’t skip the final inspection! Once you think you're done, hold the frame up and take a good look from the front. Scan the perimeter where the canvas meets the frame. See any gaps? If you do, it's usually an easy fix. Just loosen the fasteners on that side, gently push the canvas tighter into the corner, and re-secure it. Getting that alignment perfect is what separates a decent framing job from a great one.
Making Floater Frames and Gallery Wraps Look Their Best
Floater frames are my go-to for a clean, modern look, especially for gallery-wrapped canvases where the art wraps around the edges. Unlike a traditional frame that overlaps the art, a floater frame creates a cool illusion—it looks like your canvas is hovering inside the frame, with a stylish shadow gap all around.
Getting this high-end, gallery-ready presentation is easier than you might think. The whole secret is centering the canvas perfectly so that the gap—the "float"—is identical on all four sides. It’s a small detail, but it’s what separates a professional job from an amateur one.
Getting the Canvas Positioned Just Right
First things first, find a clean, soft surface (a blanket or towel works great) and place your floater frame face down. Carefully set your gallery-wrapped canvas inside it, also face down. You'll see that the frame already has holes drilled in the back; these are for attaching the canvas.
Now for the critical part: setting the gap. Before you even think about screws, you have to get the spacing perfect. Some floater frame kits come with little plastic or foam spacers to make this easy. If yours didn't, no problem—it's simple to make your own.
- Using Spacers: If your frame came with them, wedge one spacer between the canvas and the frame on each of the four sides, right in the middle.
- DIY Spacers: No spacers? Just cut a few identical squares from a piece of mat board, foam core, or even some sturdy cardboard. In a pinch, I've even used a stack of business cards. The only thing that matters is that they are all the exact same thickness.
- Double-Check the Gap: With your spacers in place, your canvas should be sitting perfectly centered. It’s worth taking a second to flip it over (carefully!) and check from the front. Does that float gap look even all the way around?
The most common mistake I see is an uneven gap. It immediately cheapens the look. Spending an extra five minutes getting the spacing perfect with your shims or spacers makes all the difference. This is what creates that polished, professional finish.
Once everything looks spot on, you're ready to lock it in place.
Attaching the Canvas from the Back
Holding the canvas and spacers firmly, it's time to secure everything. You’ll use screws that go through the pre-drilled holes in the frame and bite directly into the wooden stretcher bars of your canvas.
I like to start with one screw in the middle of one of the long sides, but don't tighten it down completely. Then, move to the opposite side and put a screw in there. This is a classic trick for applying even pressure, kind of like tightening the lug nuts on a car tire. After that, do the same for the two shorter sides.
Before you crank everything down, give it one final check from the front to make sure nothing slipped. If the gap is still perfect, go ahead and tighten those first four screws until they're snug. Be careful not to overtighten, or you could strip the wood or even warp the stretcher bar.
Finally, go around and add the rest of the screws. Most frames will have two or three holes per side, depending on the size of the piece. Once all the screws are in, you can pop out your spacers. Your canvas is now officially "floating" and ready for a wire and a spot on the wall.
How to Frame an Unstretched Canvas
If you've ever ordered a paint-by-numbers kit or an art print online, you're probably familiar with this scenario: it arrives rolled up in a tube. Before you can even think about a decorative frame, you have to give that canvas some structure. This means stretching it over a simple wooden frame, often called stretcher bars.
Don't let that sound intimidating. Most kits that come with a rolled canvas also include a basic DIY stretcher frame, so you have everything you need to get started. The whole point is to turn your flexible piece of art into a tight, flat, and solid canvas that's ready to hang or pop into a more elaborate frame.
Assembling the Stretcher Bars
Your DIY frame will likely show up as four pieces of wood with interlocking corners. Putting it together is usually a breeze—just slot the corners together to make a rectangle. Make sure you’ve got perfect 90-degree angles. You can gently tap the joints together with a rubber mallet for a really snug fit, but honestly, a little hand pressure is often all it takes.
My Go-To Tip: Before you go any further, check if the frame is truly square. Grab a tape measure and check the distance from one corner to the one diagonally opposite it. Then, measure the other diagonal. If those two numbers match, you’re golden. If not, give the frame a little wiggle until they do. A square start prevents a crooked finish.
With a solid, square frame ready to go, it's time for the main event: stretching the canvas.
The Art of Stretching the Canvas
Find a clean, flat surface and lay your canvas artwork face down. Center your assembled frame on top of it. You'll want a heavy-duty staple gun for this part. The real secret to a professional-looking result is to work from the middle of each side outwards, always pulling against the side you just stapled to keep the tension even.
Here’s how I tackle it to get that perfect, drum-tight finish:
- Start in the Middle: Pick one of the longer sides, pull the canvas over the edge of the bar, and pop a single staple right in the center of the wood on the back.
- Move to the Opposite Side: Now, head directly across to the opposite side. Using canvas pliers (or just your fingers and some muscle), pull the canvas nice and taut. Secure it with one staple in the center, directly opposite your first one.
- Repeat on the Short Sides: Do the exact same thing for the two shorter sides—one staple in the middle of each, pulling tight each time.
- Work Your Way Out: With the center anchored, start adding more staples, working from the middle out toward the corners. Keep alternating between opposite sides to maintain that even tension.
- Fold the Corners: When you get to the corners, fold them neatly like you're wrapping a present. A couple of staples on each folded corner will hold them securely in place.
This process transforms your rolled art into a gallery-ready piece.
The popularity of these DIY projects is skyrocketing. The art and craft tools market is set to grow from USD 3.96 billion in 2025 to a whopping USD 6.39 billion by 2032. It’s also expected that personalized kits—just like the ones that need canvas stretching—will make up around 40% of the adult market by 2027, according to market analysis from Fortune Business Insights.
Once your canvas is stretched and secure, you can treat it just like any other canvas. It’s ready to be fitted into a standard frame or a floater frame using the methods we've already covered.
Finishing Touches and Common Mistakes to Avoid
A truly professional framing job is just as neat on the back as it is on the front. Getting these final details right not only makes your artwork look finished but also ensures it hangs securely and stays protected for the long haul.
The most critical part here is attaching the hanging hardware correctly. For a sturdy, level hang, you can't go wrong with two D-rings and picture wire. I always measure about one-third of the way down from the top of the frame and mark that spot on both sides. This positioning is the sweet spot—it keeps the frame from leaning forward off the wall. Just screw the D-rings in so they face inward, and you're ready for the wire.
Sealing the Back for Protection
Don't skip the paper dust cover on the back. It's a simple step, but it makes a huge difference by sealing the artwork off from dust, bugs, and shifts in humidity.
All you need is some kraft paper. Cut a piece that’s a little bigger than the frame opening, run a thin line of glue around the back edge of the frame, and carefully press the paper down. You want a nice, taut finish. Once the glue is dry, just trim the excess paper away with a craft knife for a super clean edge.
Pro Tip: Before you seal everything up, give the front of your artwork and the inside of the frame one last check for any stray dust or debris. Once that dust cover is on, there’s no going back to clean it out.
Common Framing Mistakes to Sidestep
It’s easy to make a few small missteps when you're so close to the finish line. Knowing what to watch out for can save you a lot of frustration and ensure your work looks flawless.
- Wrong Sized Clips: This is a big one. Using offset clips that are too shallow or too deep will create uneven pressure on the canvas. Over time, this can actually warp the stretcher bars.
- Over-tightening Hardware: It feels right to crank down on the screws to make sure everything is secure, but resist the urge. Overtightening can easily damage a delicate frame or even crack the stretcher bars. Just make sure they're snug.
- Forgetting to Protect the Art: The surface of your painting is delicate. If you haven't already, it's a good idea to learn how to seal acrylic paint on canvas to protect it from UV light and dust, ensuring its vibrancy for years to come.
While you typically don't put canvas behind glass, some very valuable pieces might warrant extra archival protection. If that's the case, you can explore ultra-clear glass options that minimize glare and block UV rays.
A Few Common Canvas Framing Questions
Even with a good guide, you're bound to run into a few head-scratchers when framing a canvas for the first time. It happens to everyone. Let's tackle some of the most common questions I get asked.
Can I Just Use a Regular Picture Frame with Glass for My Canvas Painting?
That's a definite "no" for me, at least not without some adjustments. Oil and acrylic paintings need to breathe, and pressing them directly against glass is a recipe for disaster. It traps moisture, which can lead to mold, discoloration, or the paint literally sticking to the glass over time.
If you absolutely must have that glass for protection, you need to create an air gap. You can do this by using matting or, more commonly for canvases, little plastic spacers that clip onto the edge of the glass. This keeps the glass from touching the art, giving it the breathing room it needs.
What’s the Real Difference Between a Standard Frame and a Floater Frame?
It all comes down to how the frame holds and presents the canvas.
-
A standard frame has a lip, or what we call a "rabbet," that covers the very front edge of your canvas. It's the classic look where the frame overlaps the art just a little bit.
-
A floater frame, on the other hand, lets you see the entire front and sides of your canvas. The artwork is mounted inside the frame, leaving a small, even gap all the way around. This creates the cool illusion that your art is "floating" inside the frame. It's the go-to choice for gallery-wrapped canvases where the painted edges are part of the piece.
The simplest way to remember it is this: standard frames overlap the canvas edge, while floater frames reveal it.
Help! My Canvas Is a Little Warped. Can I Still Frame It?
Yes, absolutely! A slight warp is pretty common, and a good, solid frame can often work wonders to straighten it out. The trick is how you secure it.
When you're attaching the canvas with your offset clips, don't just start at one corner and work your way around. Instead, apply gentle, even pressure and secure the middle of each of the four sides first. From there, work your way out towards the corners. This method gradually pulls the stretcher bars back into alignment with the frame, usually correcting any minor warping.
Ready to create a piece of art that's truly your own? At Custom Paint By Numbers, we turn your favorite photos into beautiful, personalized paint-by-number kits that are perfect for framing. Start your artistic journey and make something special for your home today at https://paint-by-number.com.


