

There's something incredibly satisfying about paint-by-numbers. It's more than just a craft—it's a way to tap into your creative side, even if you don't think you have an artistic bone in your body. You get the mindfulness of a quiet hobby and the genuine pride of creating a piece of decor with your own two hands. It’s the simple joy of watching a blank, numbered canvas slowly transform into a vibrant work of art.
Why Painting On Canvas Is So Rewarding

There’s a special kind of magic in seeing a detailed image emerge from a pre-printed canvas, one numbered shape at a time. That guided approach takes all the pressure off. No more staring at a blank canvas and wondering where to start! You don't need a deep understanding of color theory or fancy brush techniques to jump right in.
Instead, you can just relax and fall into the therapeutic rhythm of painting. It's become such a popular way to unwind and de-stress for a reason. Focusing on matching the right paint to the right number helps quiet down all that mental chatter, giving you a much-needed break from the day-to-day grind.
The Power of Personalization
What’s really taken painting by numbers on canvas to the next level is customization. These days, you can upload your own photos and turn them into a unique painting project. Imagine taking a favorite family portrait, a breathtaking vacation photo, or a goofy picture of your pet and recreating it on canvas.
This shift has made the whole experience so much more personal and meaningful. You're not just painting a picture; you're bringing a cherished memory to life. It’s a wonderful way to create sentimental, one-of-a-kind art for your home or to give as a truly thoughtful gift.
This personal touch turns a simple hobby into a form of storytelling. Your finished painting becomes more than just something to hang on the wall—it’s a conversation piece and a tangible link to a moment that matters to you.
The real reward isn't just the final painting, but the entire journey. It's the quiet hours spent focusing, the satisfaction of completing each small section, and the pride in knowing you created something beautiful and meaningful with your own hands.
An Accessible Creative Outlet
If you've always wanted to paint but felt like you lacked the "natural talent," these kits are the perfect gateway. They're designed to build your confidence by ensuring a great result, which can often be the spark that encourages you to explore other artistic avenues. For more guidance, check out our helpful tips for beginning a paint-by-number project.
At the end of the day, painting by numbers offers a structured yet creative escape that delivers a real sense of accomplishment. It’s a hobby that’s both wonderfully relaxing and incredibly fulfilling.
How to Choose a High-Quality Canvas Kit
The secret to a great paint-by-numbers project isn't just picking a pretty design—it all starts with the quality of your kit. A good set of materials can be the difference between a frustrating, messy afternoon and a truly relaxing, rewarding experience that leaves you with a piece of art you're proud of.
Think of it this way: you wouldn't try to cook a gourmet meal with subpar ingredients. The same logic applies here. A premium kit simply sets you up for success from the very beginning.
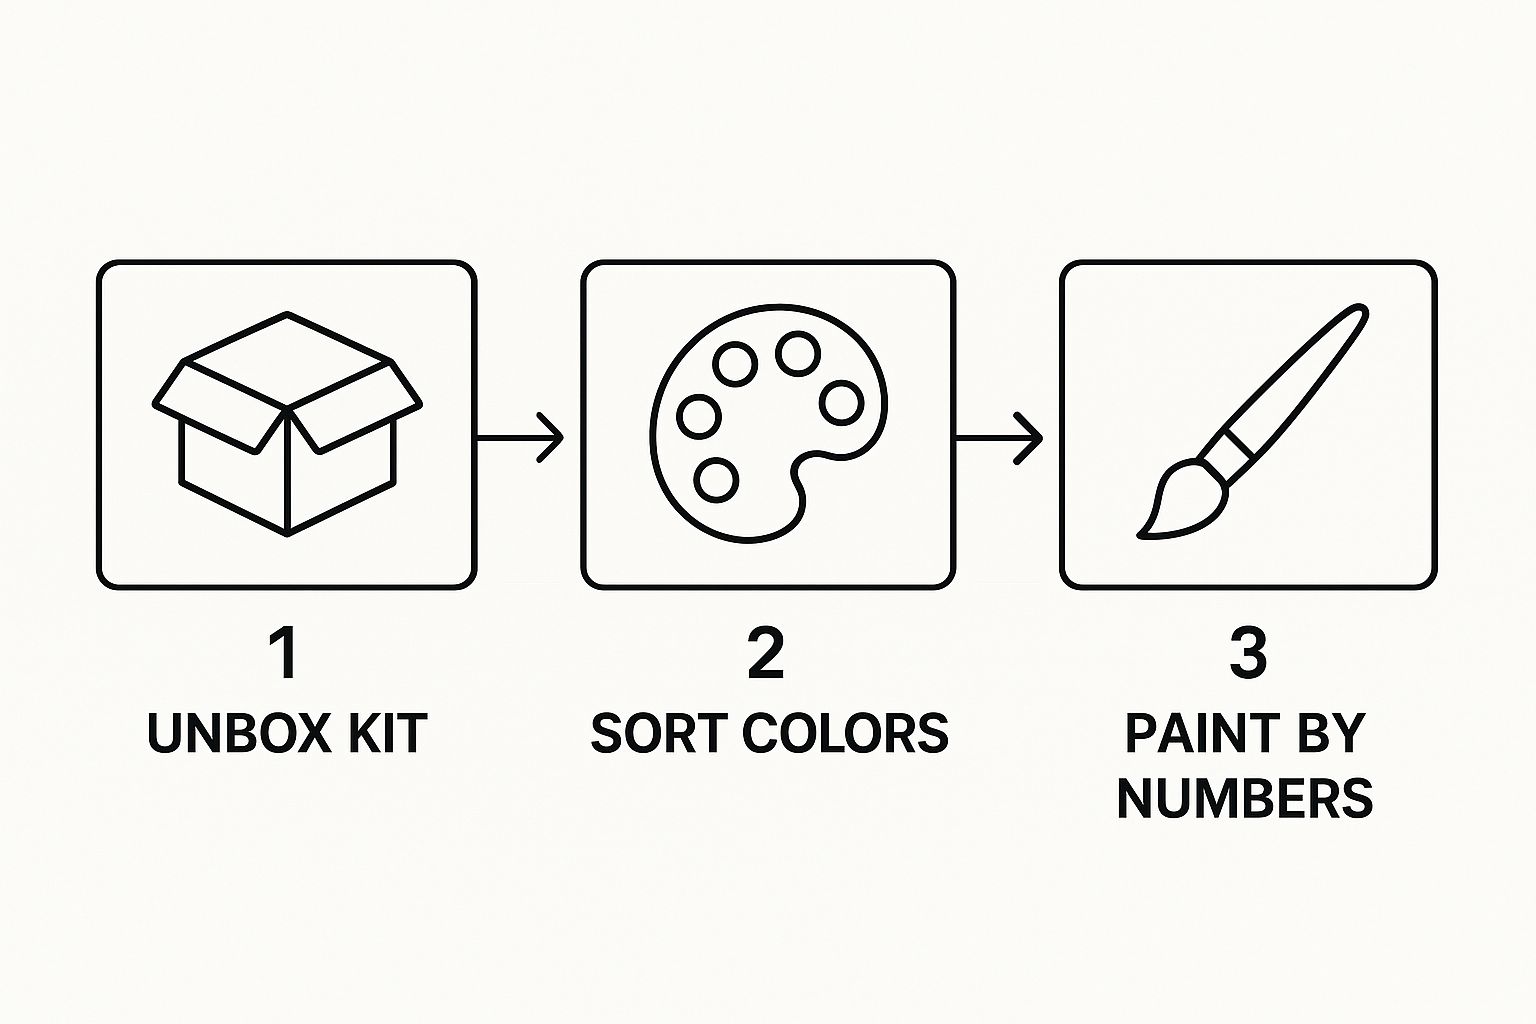
As you can see, getting started is straightforward, but having the right tools makes every step smoother and more enjoyable.
What to Look for in a Kit
Let's start with the foundation of your painting: the canvas. You want a kit that provides a pre-primed, heavier fabric, like a good quality cotton or even linen. That primer is essential—it stops the paint from just soaking into the fibers, which keeps your colors bright and bold. A flimsy, thin canvas is a real headache to work on and won't look great if you decide to frame it later.
Next up are the paints and brushes. The best kits provide fresh acrylic paints in small, numbered pots. A tell-tale sign of a quality kit is when these pots are vacuum-sealed. This tiny detail is a lifesaver, as it guarantees the paints haven't started to dry out on their way to you, which is a common problem with cheaper sets.
The included brushes are also a big deal. You should get at least three different sizes: a fine-tip one for those tiny, intricate spots, a medium flat brush for bigger sections, and maybe a round brush for everything in between. Check the bristles—they should feel firm but still have some flex, not splay out after one rinse. While you can always upgrade your brushes, a solid starter set makes a huge difference. If you want to see what a well-rounded kit looks like, check out our guide to the best paint by number kits available.
To make it easier to spot a winner, I've put together a quick checklist of what to look for when you're shopping.
Essential Kit Components Checklist
This table is a handy reference to quickly gauge whether a kit has the quality components you need for a great painting experience.
| Component | What to Look For | Why It Matters |
|---|---|---|
| Canvas | Pre-primed, thick-weave cotton or linen. | Prevents paint from soaking in, ensuring vibrant colors and a durable finish. |
| Paints | Vacuum-sealed acrylic paint pots. | Guarantees the paint is fresh and hasn't dried out during shipping. |
| Brushes | A set of at least 3 different sizes with firm bristles. | Gives you the right tool for both fine details and large areas, preventing frustration. |
| Reference Sheet | A separate, printed copy of the numbered canvas. | Helps you double-check numbers if you accidentally paint over one. |
Having these key items in your kit really does pave the way for a more professional-looking result and a much more enjoyable process.
The main takeaway here is simple: the quality of your materials directly shapes your painting journey. Spending a little more on a kit with a better canvas, fresher paints, and decent brushes is an investment in your own enjoyment and the final outcome.
Prepping Your Workspace and Canvas
Before you even think about opening that first pot of paint, a few minutes of prep can make all the difference. If your canvas came rolled up, it probably has a few creases. No worries, that's an easy fix.
- First, lay the canvas face down on a thick towel or ironing board.
- Set your iron to a medium heat setting, but make sure the steam is off.
- Gently mist the back of the canvas with a little water and carefully iron out the wrinkles.
This quick step gives you a perfectly smooth, flat surface to work on. The demand for high-quality, ready-to-use materials is growing fast. In fact, the global artist canvas market was valued at $3.36 billion in 2024 and is projected to reach $5 billion by 2035, which just goes to show how much people appreciate convenience and quality.
Finally, get your painting station ready. Find a spot with good lighting, lay down some newspaper to protect your surfaces, and have a cup of water ready for rinsing your brushes. I also find it helps to arrange the paint pots in numerical order. Getting organized now means you can just relax and get into the creative flow once you start.
Bringing Your Canvas Painting to Life
Alright, your workspace is set up and your canvas is prepped. This is the moment we’ve been waiting for—where the real magic happens and you start bringing this picture to life. Forget about rigid rules; think of this as a creative conversation between you, the paint, and the canvas.
A lot of guides will tell you to start with the lightest colors first. I’m going to let you in on a little secret from years of painting: do the exact opposite. Starting with your darkest colors can be a total game-changer for your workflow.
Darker acrylics are almost always more opaque, which means they do a much better job of covering up the printed lines and numbers in a single go. This trick also saves you from the dreaded smudge. If your hand slips while painting a light area next to a wet dark one, that dark paint is going to bleed right in. By working dark-to-light, you sidestep that whole problem.
Smart Painting Strategies
Think of your canvas as a map and give yourself a clear path to follow. The most common approach is to work from the top down. This is a lifesaver for right-handed painters because it keeps your hand from dragging through wet paint. If you’re a lefty, just flip it—work from right to left, or stick with top-to-bottom.
Another great strategy is to tackle one color at a time. Pick a number—let’s say #12—and fill in every single #12 section on the canvas before moving on. This method helps you find a nice, steady rhythm and keeps you from constantly opening and closing the same paint pot, which makes it dry out faster.
This methodical approach has a few real benefits:
- Consistency: It helps you apply the color with the same thickness and texture everywhere.
- Efficiency: You'll spend way less time stopping to clean your brushes.
- Mindfulness: Honestly, the repetitive motion of hunting for one number can be incredibly relaxing.
By focusing on one color at a time, you can really immerse yourself in the process without feeling overwhelmed by the whole picture.
Remember, this isn't a race. The real joy of paint-by-numbers comes from the process itself—the calm focus, watching the image slowly emerge, and the satisfaction of each completed section.
Mastering Your Brush and Paint
How much paint you load onto your brush is more important than you’d think. You're looking for that "Goldilocks" amount—not too much, not too little. Just dip the very tip of your brush in, getting enough to coat the bristles without a big glob on the end.
This gives you smooth, controlled strokes that cover the numbers without leaving behind thick, messy ridges. If you do scoop up too much, just gently wipe the excess on the rim of the pot. It only takes a little practice to get a feel for it.
Keeping your paints fresh is also a big deal. Acrylics dry out fast once they hit the air, so you need to be disciplined.
- One At a Time: Only open the paint pot you’re actually using.
- Listen for the Snap: When you're done with a color, even for a short break, press the lid down until you hear a definite "snap." That's how you know it's sealed.
- Store Smart: At the end of your session, double-check that every pot is snapped shut and store your kit away from direct sunlight or heat.
Tackling Those Tricky Tiny Spots
Every kit has them: those tiny, ridiculously detailed sections that seem impossible to fill. Don't let them intimidate you! This is where you get to be a little creative.
For the absolute smallest spots, even your tiniest brush might feel clumsy. When that happens, grab a simple wooden toothpick. It's the perfect secret weapon. Just dip the very tip into the paint and carefully dot it into the area. You’ll be amazed at the precision it gives you for those final, delicate details.
Going Pro: Advanced Tips for a Flawless Finish
You’ve carefully painted within the lines and watched your picture emerge. Awesome! But what’s the secret to taking that finished piece from "nice kit" to a genuinely impressive work of art? It all comes down to the finishing touches.
A few extra techniques are all it takes to elevate your work, making it look less like a guided project and more like something you’d proudly show off. This is where you get to move beyond the numbers and start making your own artistic calls.
The Magic of Blending for a Seamless Look
One of the tell-tale signs of a paint-by-numbers kit is the hard, distinct lines between colors. While that can be a cool, graphic style, softening those edges is what creates a more professional, painterly feel. The technique for this is called blending.
The whole idea is to create a smooth gradient between two colors right next to each other. The trick is to do it while the paint is still wet.
- Move fast. Lay down your first color.
- Add the neighbor. Without waiting, paint the section right next to it, letting the wet edges of the two colors touch.
- Blur the line. Grab a clean, slightly damp brush and use gentle, sweeping motions back and forth across that border. You'll see the hard line soften into a beautiful, gradual transition.
This works wonders on things like skies, water, or grassy fields—anywhere you want a more natural flow. It might take a little practice to get the hang of it, but the results are absolutely worth it.
Seriously, don't be afraid to experiment here. This is your first real step toward making the painting your own. You're adding a layer of subtlety and depth that the numbers alone can't provide.
Add a Second Coat for Rich, Solid Color
Ever finish a section only to notice you can still see the faint outline of the number or line through the paint? This happens all the time, especially with lighter colors like yellows, whites, or pastels. The pro fix is super simple: a second coat.
Lighter acrylic paints just aren't as opaque as the darker ones. Adding another layer gives you that solid coverage you need to completely hide the guides, making the colors look far more vibrant and intense.
It couldn't be easier:
- Let that first layer dry 100%. I mean it—painting on top of tacky paint will just lead to a smeary, frustrating mess.
- Once it's bone dry, go back over the area with a thin, even coat of the same color.
- Keep an eye on your edges to maintain those crisp lines.
This little bit of extra time makes a huge difference. It’s a small effort for a big payoff in a much cleaner, more polished-looking painting. The colors will practically jump off the canvas.
Inject Your Own Artistic Flair
Think of the numbered guide as your starting point, not the final word. The best way to make your painting by numbers on canvas truly unique is to add your own details after the main work is done. Once all the areas are filled in, take a step back and really look at your piece.
Ask yourself, "What could I add?" For instance, in a portrait, a couple of tiny white dots in the eyes can bring them to life with a convincing sparkle. Painting a landscape? Maybe you could flick in a few extra blades of grass in the foreground for texture or add some delicate highlights on the water to mimic sunlight.
These little custom details are what make the painting yours. It’s how you transform a fun project into a one-of-a-kind piece of art.
Finishing and Framing Your Masterpiece
That moment you paint the very last numbered section is pure magic. But don't put those brushes down just yet! A few final touches can take your painting from a fun project to a stunning piece of art ready for the wall. Sealing and framing are what give your work that polished, gallery-worthy finish.
Why You Should Seal Your Canvas
Once your paint is completely dry, the most important thing you can do is apply a varnish. Think of it as a protective shield for all your hard work. It's what stands between your painting and the dust, dirt, and damaging UV light that can make those beautiful colors fade over time.
Beyond just protection, a good sealant really makes your painting pop. It evens out any differences in the paint's sheen—some colors naturally dry glossier than others—and gives the whole piece a consistent, professional look. It's the secret to making sure your artwork stays as vibrant as the day you finished it.
You've got three main choices for the finish, and each one offers a unique vibe:
- Matte Varnish: This gives you a flat, non-reflective finish that completely cuts out any glare. It’s a great choice for a modern, subtle look.
- Satin Varnish: My personal favorite for most projects, this one provides a gentle, low-level sheen. It's the perfect middle ground that adds a touch of richness without being too shiny.
- Gloss Varnish: Want those colors to look deep and saturated? Go with gloss. It delivers a highly reflective, shiny finish that mimics the look of a classic oil painting.
Choosing the Perfect Frame
Framing is what really transforms your painting by numbers on canvas into a true piece of home decor. The right frame doesn't just hold the canvas; it complements the artwork and helps it fit perfectly with the style of your room.
A really popular and clean-looking option right now is the floating frame. This style creates a tiny gap between the canvas edge and the frame, giving the cool illusion that your artwork is just floating in space.
Another great method is stretching the canvas onto a wooden stretcher frame. This gives you that classic gallery-wrapped look—clean, minimalist, and ready to hang as-is without any outer frame at all. If you've never done it before, don't worry. We have a complete guide that walks you through the process right here: how to frame canvas paintings.
Taking the time to properly finish and frame your piece is an investment in your own creative effort. It’s the final act that honors the hours you spent and prepares your artwork for display.
This final step connects you to a huge global community of art lovers. The canvas market was valued at nearly $4 billion in 2024 and is expected to climb to about $6.11 billion by 2033. That growth shows just how much people around the world love creating and displaying their own art—which makes your finished piece even more special. You can find more details on global canvas market trends on marketdataforecast.com.
Got Questions? We’ve Got Answers.
Even with the numbers to guide you, you’re bound to hit a snag or two. It happens to everyone! Think of this as your go-to guide for those little "oops" moments that pop up while you're in the creative zone. We've tackled the most common questions artists run into.
What If I Painted the Wrong Color?
First thing's first: don't worry. This is probably the most common mistake in the book, and thankfully, it’s a simple fix. The most important rule is to let the incorrect paint dry completely. If you try to wipe it away while it's wet, you'll end up with a muddy smear that's much harder to deal with.
Once the mistake is totally dry, you can just paint right over it with the correct color. Acrylic paint is a painter's best friend because it's so opaque.
A pro tip: When you're trying to cover a dark color with a much lighter one, you might need a couple of coats. Just apply the first layer of the correct color, let it dry, and then add a second (or even third) coat until the old color is completely hidden.
My Paint is Too Thick. What Should I Do?
Every now and then, you’ll pop open a paint pot and find the contents are a bit thick or paste-like. This is an easy one. A tiny bit of water will bring it right back to life.
Just add one or two drops of water into the pot and give it a good stir with a toothpick. The key is to start small—too much water will make the paint thin and watery, which won't cover the numbers on the canvas very well. This little trick should get you back to a smooth, creamy consistency.
How Do I Get Rid of Creases in My Canvas?
Your canvas likely arrived rolled up, which means you’ll probably have a few creases to contend with. For a perfectly flat surface (which makes painting much easier), your household iron is the perfect tool.
Here's how to do it safely:
- Protect the Front: Always place the canvas face down on a thick towel. You never want to apply direct heat to the printed side, as it could damage the lines and numbers.
- Set the Iron: Turn your iron to a medium-heat setting and make sure the steam is switched off.
- Iron with Care: Lightly spritz the back of the canvas with a little water from a spray bottle. Then, gently press the iron and keep it moving across the entire surface.
This quick press will relax the canvas fibers, leaving you with a beautifully smooth surface to start your project.
Ready to transform a cherished photo into a painting you can be proud of? Get your own personalized kit from Custom Paint By Numbers. Start your custom painting project today!


