

Paint by numbers offers a uniquely satisfying way to create stunning artwork, regardless of your skill level. It combines the structured guidance of a pre-printed canvas with the creative freedom of painting, making it an accessible and relaxing hobby for everyone. While the concept is simple, a few strategic techniques can elevate your project from a simple craft to a polished masterpiece. The difference between a good painting and a great one often comes down to the small details in your process.
This guide provides a comprehensive collection of actionable tips for paint by numbers, designed to help you achieve professional-looking results. We'll move beyond the basic instructions included in your kit and dive into specific methods for managing your paints, mastering brushwork, and correcting common mistakes with ease. You'll learn how to properly prepare your workspace, apply paint for smooth, even coverage, and maintain your tools for long-term use.
Whether you're a complete beginner eager to start your first canvas or an experienced PBN artist looking to refine your skills, these practical insights will unlock your full potential. By implementing these proven strategies, you can avoid common frustrations and ensure every painting session is both enjoyable and successful, resulting in a beautiful piece you'll be proud to display.
1. Start with Smaller, Lighter Colors First
One of the most effective tips for paint by numbers is to adopt a strategy used by traditional artists: tackle the smaller, lighter-colored sections first. This approach involves identifying all the areas designated for your lightest paints, like whites, pale yellows, and light blues, and filling them in before moving on to darker, more dominant colors. This method creates a strong foundation for your painting and significantly reduces the chance of frustrating mistakes.

The logic is simple: it’s much easier to paint over a light color with a dark one than the other way around. If you accidentally paint a dark brown or black into an area meant to be sky blue, correcting it can be difficult. The dark pigment may show through the lighter paint, requiring multiple layers to cover, which can lead to a clumpy, uneven texture. Starting light gives you a safety net for cleaner, sharper lines.
Why This Method Works
This technique is all about control and easy corrections. By filling in the lightest and often smallest areas first, you establish the brightest points of your painting. These areas act as guides for the surrounding darker tones, helping you build depth and contrast more effectively as you progress. It prevents the muddying of colors that can happen when a wet, dark paint accidentally bleeds into a lighter section.
Key Insight: Painting light-to-dark is a proactive way to manage errors. Correcting a misplaced light color is as simple as painting over it with the intended darker shade, leaving no trace of the mistake.
Practical Implementation
To put this into practice, scan your canvas before you even open a paint pot. Mentally group the numbers corresponding to the lightest shades.
- Portrait Kits: Begin with the whites of the eyes and the brightest facial highlights on the nose and cheeks before adding flesh tones and darker shadows.
- Landscape Scenes: Paint the clouds and bright sky sections first. Then, move to distant, lighter mountains or fields before tackling the darker foreground trees and shadows.
- Floral Paintings: Start with the highlights on the petals and any white or pale yellow flowers before filling in the darker leaves and background.
This methodical process not only ensures a cleaner final product but also helps you build momentum. Completing the small, detailed areas first provides an early sense of accomplishment, making the larger sections feel less daunting.
2. Use Proper Brush Technique and Maintenance
One of the most transformative tips for paint by numbers involves mastering your tools, specifically your brushes. Adopting proper brush handling and maintenance techniques ensures smooth, even paint application and prevents frustrating issues like color contamination or streaky coverage. This means learning how to load your brush correctly, using the right strokes for different areas, and committing to a thorough cleaning routine between colors and after each session.
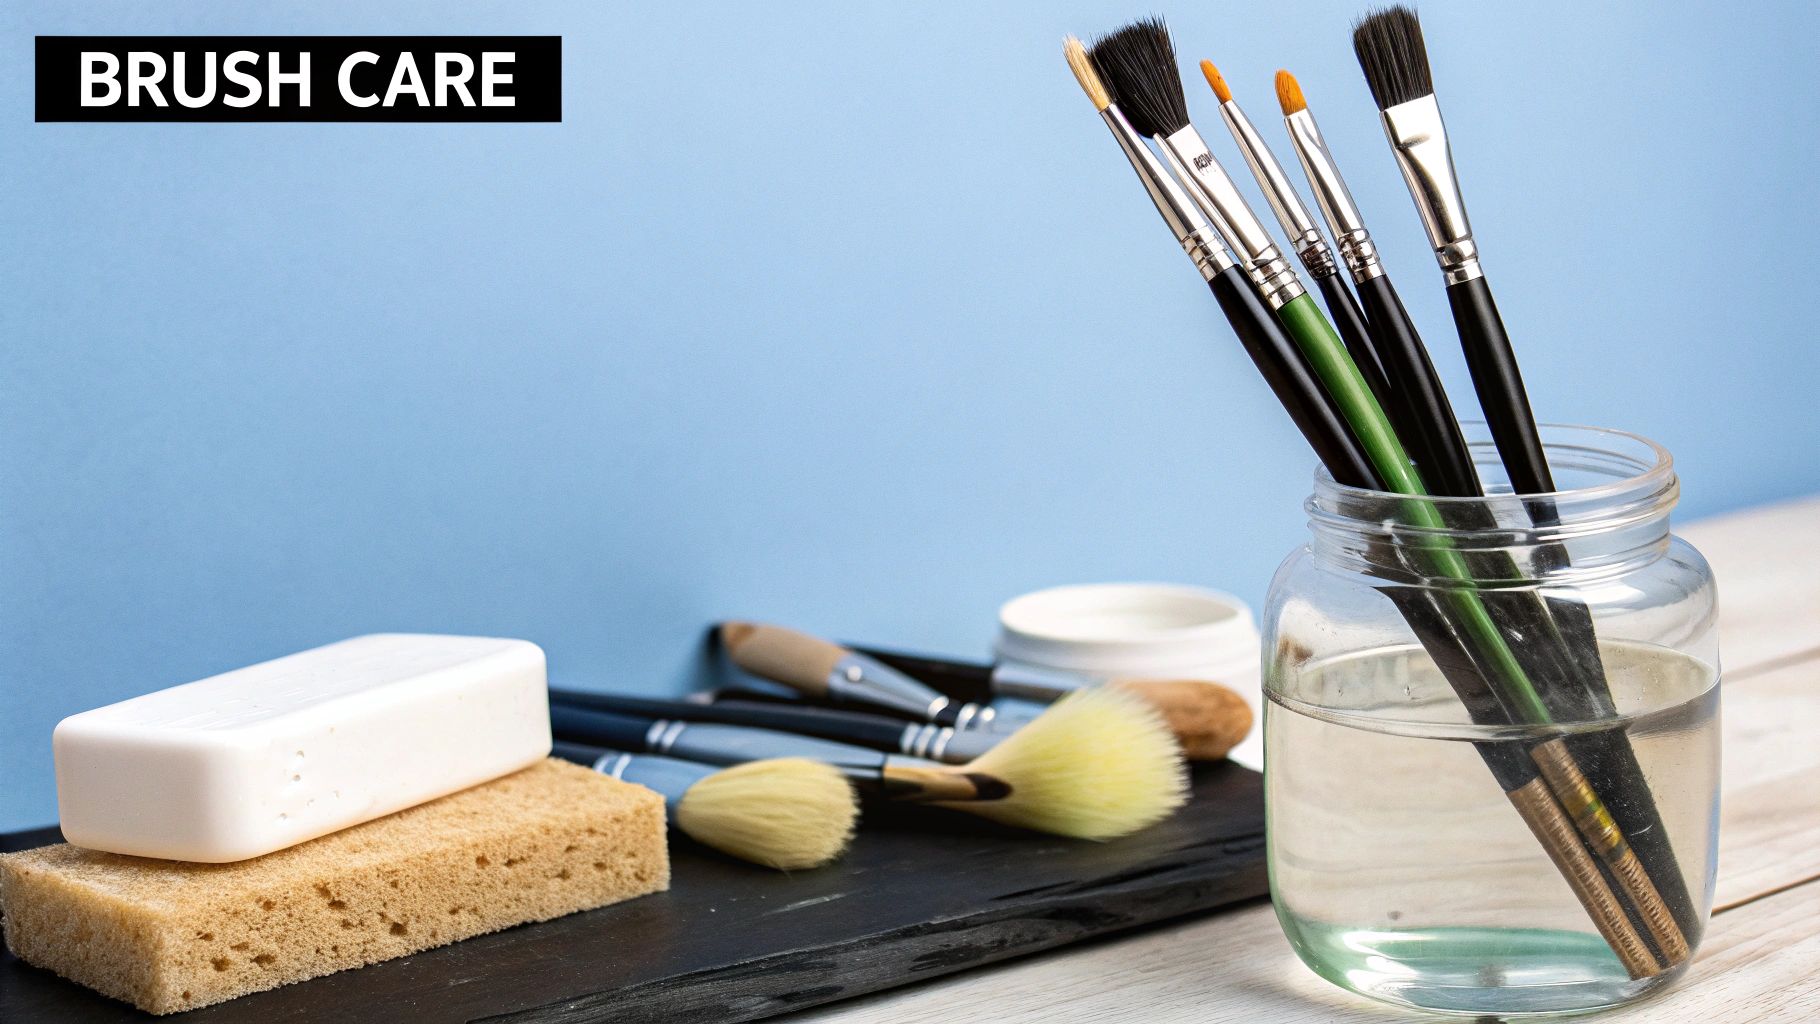
The quality of your finished painting is directly linked to the condition of your brushes. A clean, well-shaped brush allows for precise control, letting you fill in tiny sections and create crisp lines with ease. Neglecting your brushes can cause paint to dry and stiffen the bristles, making smooth strokes impossible and potentially ruining the tool for future use.
Why This Method Works
Proper technique and maintenance are all about maximizing control and preserving your tools. A brush loaded with the right amount of paint (about one-third of the way up the bristles) gives you a consistent flow without messy blobs. Thoroughly cleaning brushes between colors is non-negotiable; even a tiny amount of dark pigment left in the bristles can muddy a light color, dulling the vibrancy of your painting. Well-maintained brushes retain their shape, allowing you to execute detailed work accurately.
Key Insight: Your brushes are your most important asset in paint by numbers. Treating them with care not only improves your current project but extends their life, making every future painting experience better.
Practical Implementation
Incorporate good brush habits from the very beginning of your project. Before starting, have two cups of water ready: one for initial rinsing and one for a final, clean rinse.
- Handling Techniques: Use the fine-tipped round brushes for small, detailed areas and curved lines. For larger, open sections and straight edges, a flat brush will provide better coverage. Experiment with a stippling (dabbing) motion for creating texture in foliage or clouds.
- Brush Loading: Dip only the tip of your brush into the paint. Overloading it can lead to drips and a loss of control, making it difficult to stay within the lines.
- Cleaning Routine: Swirl the brush in your first water cup immediately after finishing with a color. Gently press it against the bottom or side to work the pigment out, then give it a final rinse in the clean water cup. Dab it on a paper towel before dipping into a new color. For a deep clean, you can learn more about how to clean paint brushes on paint-by-number.com.
This disciplined approach ensures your colors stay pure and your application remains precise, elevating your final artwork from a simple craft to a polished piece.
3. Organize Your Workspace and Materials
One of the most overlooked yet impactful tips for paint by numbers is creating an efficient and organized workspace. A well-planned setup is not just about tidiness; it’s about creating an environment where you can focus on your art without distractions or interruptions. By systematically arranging your paints, brushes, and supplies and ensuring proper lighting, you reduce the chance of errors, speed up the painting process, and make the entire experience far more relaxing and enjoyable.
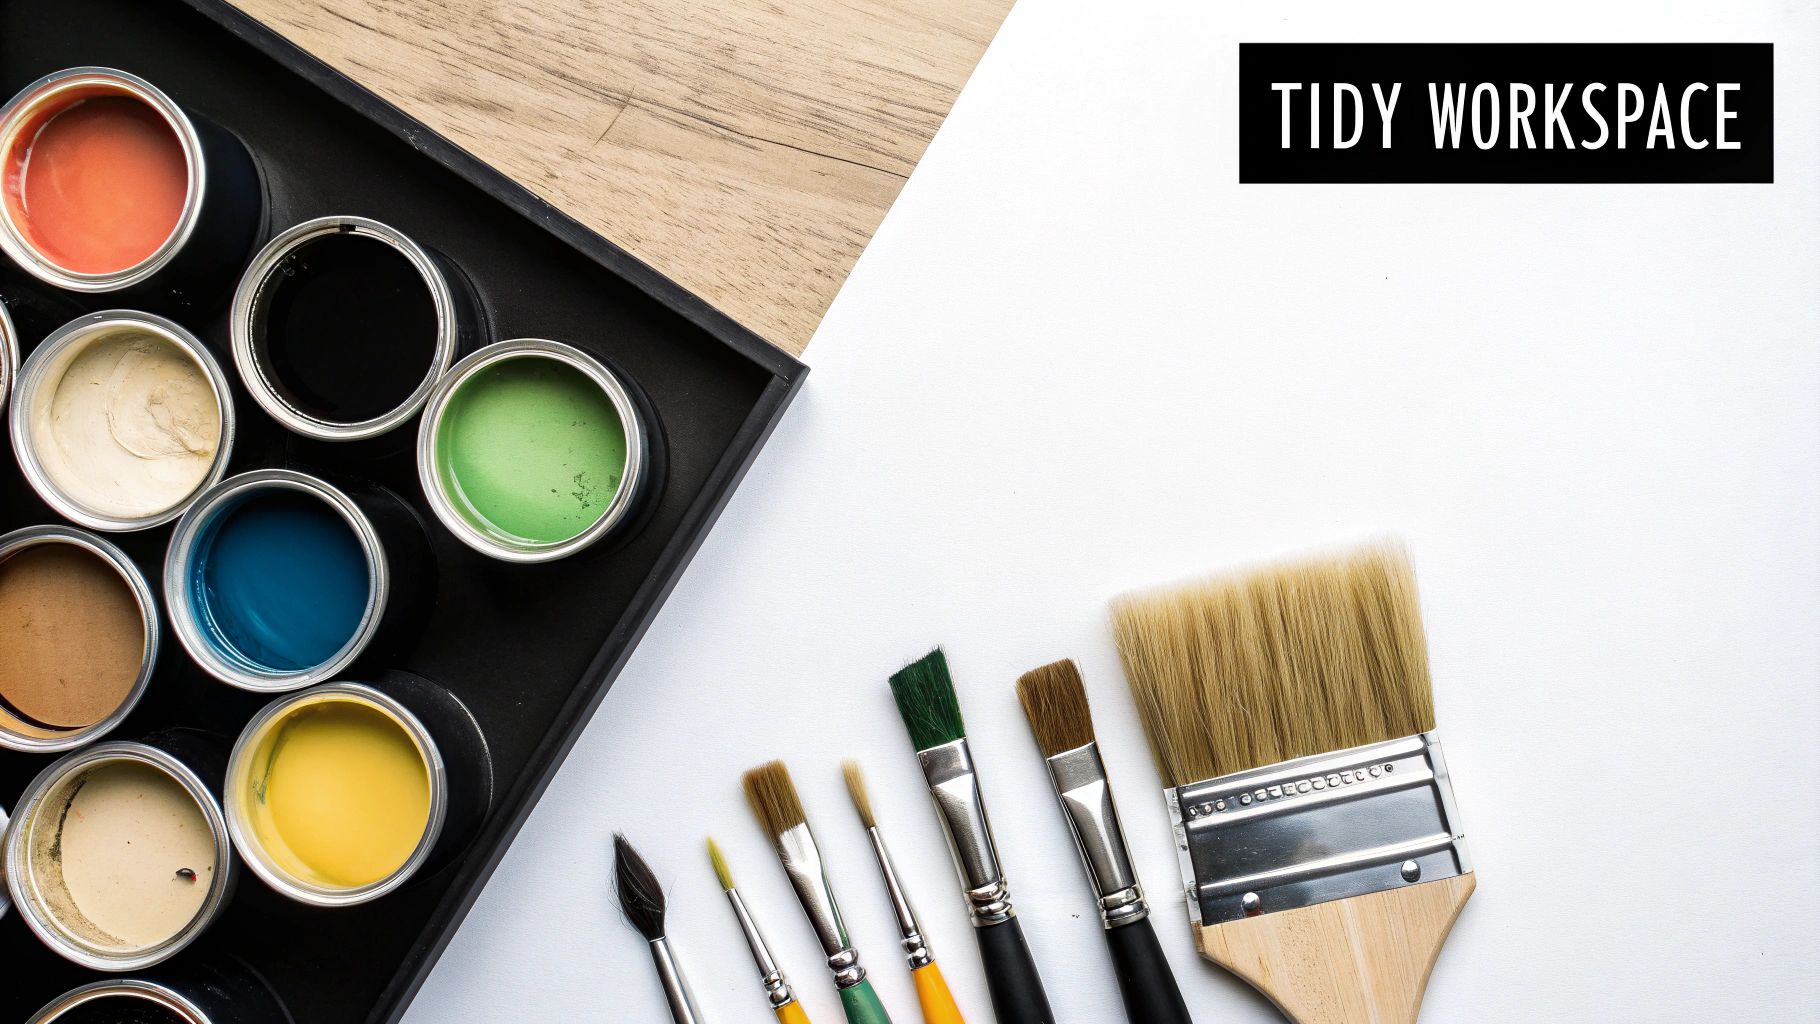
The logic behind this is straightforward: a cluttered space leads to a cluttered mind. Searching for a specific paint pot or brush breaks your creative flow and can lead to frustration. A prepared station means everything you need is within arm's reach, allowing you to transition smoothly from one color to the next and fully immerse yourself in the meditative process of painting.
Why This Method Works
This approach is all about minimizing friction and maximizing focus. When your materials are laid out logically, you spend less time on logistics and more time on the creative act of painting. Proper lighting prevents eye strain and helps you accurately see the numbers and lines on the canvas, while good ventilation is essential for comfort during longer sessions. An organized space also prevents common mistakes, like knocking over a water cup or dipping your brush into the wrong color.
Key Insight: A dedicated and organized workspace transforms painting from a potentially messy task into a seamless, therapeutic activity. Your environment directly influences your ability to relax and create effectively.
Practical Implementation
Setting up your ideal painting station doesn't require a dedicated art studio. A clear corner of a desk or table is all you need.
- Arrange Your Paints: Lay out your paint pots in numerical order. This simple step saves you from constantly hunting for the next color. Some artists use a lazy Susan for even quicker access.
- Establish Your Work Zone: Always keep a cup of clean water for rinsing brushes and a stack of paper towels for dabbing excess paint within easy reach. Cover your surface with newspaper or a plastic sheet to protect it from spills.
- Optimize Your Lighting: Position yourself near a north-facing window for consistent, neutral daylight. For evening sessions, use a bright, adjustable desk lamp to illuminate your canvas directly, eliminating shadows. For more great ideas, learn more about how to organize art supplies on paint-by-number.com.
By taking just a few minutes to prepare your space before you begin, you set yourself up for a successful and stress-free painting session. This habit ensures every part of the process, from opening the first pot of paint to applying the final stroke, is a source of joy.
4. Work in Sections and Take Breaks
One of the most valuable tips for paint by numbers is to approach large canvases not as a single, overwhelming task but as a series of smaller, manageable projects. This strategy involves dividing your canvas into sections and taking regular breaks, which helps prevent creative fatigue, maintain focus, and drastically reduce the likelihood of making mistakes. By segmenting your painting sessions, you can keep your enthusiasm high and ensure consistent quality from the first brushstroke to the last.
The idea behind this approach is rooted in principles of mindfulness and productivity, like the Pomodoro Technique. Long, unbroken hours of focusing on tiny, numbered areas can strain your eyes and hands, leading to rushed work and smudged paint. Breaking the process down makes it less intimidating and transforms it into a relaxing, mindful activity rather than a race to the finish line.
Why This Method Works
This technique is all about sustaining both energy and precision. By working in focused bursts, you maintain a high level of concentration, ensuring cleaner lines and more accurate color application. Regular breaks give your eyes a chance to rest, preventing the visual fatigue that can make you misread numbers or paint outside the lines. It also allows sections to dry properly, preventing accidental smearing when you move to an adjacent area.
Key Insight: Treating your painting like a marathon, not a sprint, preserves your enjoyment and improves your final result. Each small section you complete provides a sense of accomplishment, motivating you to continue.
Practical Implementation
Before you begin, decide how you want to divide your canvas. This can be done physically by drawing light pencil lines to create quadrants or mentally by focusing on specific elements.
- Landscape Scenes: Dedicate one session to the sky, another to a mountain range, and a third to the foreground. This allows you to fully immerse yourself in one part of the scene at a time.
- Complex Portraits: Focus on one feature per session, such as completing all the numbered sections for the eyes or the hair. This method is great for maintaining detail and consistency in intricate areas.
- Large Floral Paintings: Tackle one flower or a small cluster of flowers at a time before moving on to the leaves and background.
To maximize this method, set a timer for 45-60 minutes of painting. When it goes off, take a 10-15 minute break to stretch, rest your eyes, and step away from the canvas. This rhythm helps you stay fresh and engaged throughout the entire project.
5. Master Paint Consistency and Application
One of the most transformative tips for paint by numbers is learning to control the consistency of your paint. The acrylic paints included in most kits can sometimes be too thick or dry, leading to a streaky, uneven finish. By mastering how to adjust your paint and apply it correctly, you can achieve the smooth, opaque coverage seen in professional artwork. This involves thinning paint when needed and building up color in thin, even layers.
The goal is to achieve a paint consistency that flows smoothly from the brush without being watery or transparent. A single, thick coat of paint often looks clumpy and can obscure the fine details of your canvas. In contrast, two or three thin, well-applied layers will create a vibrant, solid block of color with a flawless texture. This technique gives you far more control over the final appearance of your painting.
Why This Method Works
This approach is all about achieving professional-grade coverage and a clean finish. Properly thinned paint glides across the canvas, making it easier to fill in areas neatly and create sharp, defined edges. It eliminates the drag and friction that comes with using overly thick paint, which can cause bristles to leave streaks. Building color in layers also ensures maximum opacity, preventing the printed numbers and lines from showing through your lighter colors.
Key Insight: The ideal paint consistency is like melted ice cream or warm honey. It should be fluid enough to spread easily but thick enough to provide solid coverage without dripping or running.
Practical Implementation
Before you begin painting a section, test the consistency of the paint on a spare piece of paper or a corner of the canvas border.
- Adjusting Consistency: If the paint feels thick or pasty, add a single drop of water or an acrylic flow improver to the pot and mix thoroughly with a toothpick. Add more only if necessary; it’s easier to add more water than to fix overly thinned paint. For an in-depth guide, you can learn more about acrylic paint mixing on paint-by-number.com.
- Applying Even Coats: For large areas like skies or fields, load your brush and use long, smooth, and even strokes in the same direction. Work quickly to blend the edges of your strokes before the paint starts to dry, which prevents visible overlap marks.
- Building Opacity: Apply a thin, even first coat and let it dry completely. If the number or lines are still visible, apply a second thin coat. This layering technique is especially crucial for transparent colors like yellows, oranges, and some reds to achieve full, rich vibrancy.
By taking a few extra moments to manage your paint’s consistency, you will significantly elevate the quality of your finished piece, moving from a standard craft project to a polished work of art.
6. Handle Mistakes and Make Corrections Properly
Even the most careful artist makes mistakes, and knowing how to fix them is one of the most valuable tips for paint by numbers. From painting outside the lines to using the wrong color, errors are a natural part of the creative process. Learning proper correction techniques will save your project from frustration and transform potential disasters into minor setbacks, ensuring a polished and professional-looking final piece.
The key is to address mistakes calmly and with the right method for the situation. Wet paint requires a different approach than dried paint, and a small smudge is easier to fix than an entire section painted with the wrong hue. By mastering a few simple correction skills, you can paint with more confidence, knowing that no mistake is truly permanent and that every error is an opportunity to learn and improve your technique.
Why This Method Works
This approach is about damage control and maintaining the integrity of your artwork. Acting quickly on wet mistakes prevents them from setting and becoming harder to fix, while letting dry mistakes cure completely allows for clean, effective cover-ups. This preserves the smooth texture of your canvas and prevents the muddying of colors that can occur from panicked, improper corrections. It empowers you to take creative risks without fear of ruining your work.
Key Insight: The best correction method depends on whether the paint is wet or dry. Addressing wet paint immediately is about removal, while fixing dry paint is about effective concealment.
Practical Implementation
Your correction strategy will change based on the type of error you've made. Keep a small toolkit handy with a few cotton swabs, a toothpick, and clean water.
- For Wet Paint Mistakes: If you paint outside a line or drip paint, act fast. Dip a cotton swab or the tip of a fine brush in clean water, gently squeeze out the excess, and carefully lift the misplaced paint off the canvas. A toothpick can be used to scrape away a small, stubborn blob of wet paint.
- For Dried Paint Mistakes: If you notice you've used the wrong color in a section and it has already dried, do not panic. Simply take the correct color and paint directly over the mistake. You may need two or even three thin coats to completely cover the darker color underneath, but be sure to let each layer dry fully before applying the next.
- For Uneven Coverage: If an area looks patchy or the number is still visible through the paint, wait for it to dry completely and apply another thin, even layer of the same color. Trying to fix it while the paint is still tacky will only create clumps and streaks.
Ultimately, remember that minor imperfections can add character to a hand-painted piece. Learning these correction techniques gives you the skill to decide which mistakes to fix and which to embrace as part of your unique creation.
6 Essential Paint by Numbers Tips Comparison
| Technique | Implementation Complexity 🔄 | Resource Requirements ⚡ | Expected Outcomes 📊 | Ideal Use Cases 💡 | Key Advantages ⭐ |
|---|---|---|---|---|---|
| Start with Smaller, Lighter Colors First | Moderate 🔄 | Low ⚡ | Cleaner layering, easier corrections 📊 | Detailed areas, light color sections first | Prevents smearing, easier error correction |
| Use Proper Brush Technique and Maintenance | High 🔄 | Medium ⚡ | Smooth, professional finish 📊 | Varied section sizes, textured effects | Extends brush life, precise control |
| Organize Your Workspace and Materials | Low to Moderate 🔄 | Low to Medium ⚡ | Efficient, error-reduced process 📊 | Large projects, multi-material setups | Reduces mistakes, faster workflow |
| Work in Sections and Take Breaks | Moderate 🔄 | Low ⚡ | Consistent quality, less fatigue 📊 | Large canvases, complex projects | Maintains motivation, prevents hand strain |
| Master Paint Consistency and Application | High 🔄 | Medium ⚡ | Professional finish, even coverage 📊 | Areas requiring smooth opacity and layering | Better color vibrancy, prevents cracking |
| Handle Mistakes and Make Corrections Properly | Moderate 🔄 | Low to Medium ⚡ | Saved projects, higher quality 📊 | Fixing errors throughout any project | Builds confidence, improves overall results |
Your Next Masterpiece Awaits
You’ve journeyed through the essential techniques that transform a simple paint-by-numbers kit from a casual hobby into a true artistic endeavor. From the strategic application of light colors to the meticulous care of your brushes, each tip is a stepping stone toward creating a painting you can be proud of. The path to a beautiful finished piece isn't about raw talent; it's about patience, practice, and applying the right methods at the right time.
By embracing these tips for paint by numbers, you are no longer just filling in shapes. You are building a foundation of good habits that will serve you across every future project. A well-organized workspace clears your mind, working in manageable sections prevents burnout, and mastering paint consistency gives you ultimate control over your canvas. These aren't just rules to follow; they are tools to unlock your creative potential and ensure the process is as rewarding as the final result.
From Novice to Confident Creator
The real magic happens when you see these individual pieces of advice come together. Remember the importance of a systematic approach:
- Color Strategy: Starting with lighter colors protects you from frustrating smudges and makes corrections far simpler.
- Brush Mastery: Treating your brushes with care ensures crisp lines and smooth coverage, project after project.
- Process Over Perfection: Don't be afraid of mistakes. A misplaced dab of paint is not a failure but an opportunity to practice your correction techniques.
The goal is to move beyond simply following the numbers and to start making conscious artistic choices. You now understand why you should work from top to bottom, how to thin or thicken your paints for the desired effect, and when to step back and take a break. This knowledge empowers you to tackle more complex kits and even add your own personal flair to the canvas.
Ultimately, the most crucial takeaway is that anyone can create something beautiful. Paint by numbers is a wonderfully accessible medium that demystifies the artistic process, providing a clear roadmap to a stunning outcome. As you apply these tips, you will build confidence, sharpen your focus, and enjoy the profound sense of accomplishment that comes from bringing a blank, numbered canvas to vibrant life. Your next masterpiece isn't a distant dream; it’s waiting for you at the tip of your brush.
Ready to turn your most cherished memories into a work of art? Custom Paint By Numbers allows you to upload your own photos and transform them into a unique, high-quality kit. Apply all the expert tips for paint by numbers you’ve learned today to a project that is truly personal by visiting Custom Paint By Numbers.


