

The best easy pictures to paint are usually the ones with clear subjects, bold shapes, and not too many colors. Think of things like sunsets, simple abstract designs, or a single flower. These subjects let you get lost in the fun of painting without getting tangled up in tiny, complicated details.
Why Simple Paintings Are the Best Creative Start
Diving into a new creative hobby can be a little scary, especially when you're staring at a blank canvas. That "where do I even start?" feeling is real. This is exactly why kicking things off with easy pictures to paint is such a game-changer. It shifts the whole experience from feeling like a high-pressure test to just being about pure enjoyment.
Using a guided method, like one of our custom paint-by-numbers kits, takes all the guesswork out of the equation. It lets you build those core skills with confidence. Instead of stressing over composition or getting the drawing just right, you can focus on what really matters when you're just starting out:
- Developing Brush Control: Simply getting a feel for the brush in your hand and figuring out how to lay down a smooth, even coat of paint.
- Understanding Color Interaction: You get to see firsthand how different colors pop next to each other and work together to create a real sense of depth.
- Building Confidence: There's nothing like finishing a painting and thinking, "I made that!" It's a huge boost that makes you want to keep going.
The Mental Benefits of an Easy Start
It's not just about the technical skills, either. The mental rewards are huge. The step-by-step process of a simple painting project is fantastic for mindfulness. It helps you silence the day-to-day noise and get into a creative flow state, which is an amazing stress-buster. If you're looking for a simple, tangible starting point, something like the Skout Organic Coloring Book offers ready-made outlines that are perfect for this.
The real magic happens when you realize you’re not just filling in spaces—you’re creating something beautiful. This accessible process makes art feel less like an exclusive club and more like a welcoming activity for everyone.
This approach has really taken off. The paint-by-numbers kit market is on track to hit USD 2.87 billion by 2033, and a huge number of adults are turning to it for art therapy. In fact, studies show that about 70% of users feel less stressed after finishing a kit, which really speaks to its power as a tool for well-being.
Choosing a Subject You Will Love to Paint
The best part of any painting project happens before you even touch a brush. It's that spark of excitement when you find an image you can't wait to bring to life. Finding easy pictures to paint isn't about following a strict formula; it's about discovering a subject that makes you genuinely eager to start creating.
That personal connection is everything. When you're painting a photo from a memorable trip or a snapshot of a beloved pet, the whole experience shifts. It’s no longer just a task—it becomes a passion project, and you’ll find joy in every single brushstroke.
Popular Subjects for Beginners
When you're just starting, some subjects are definitely more forgiving than others. The right choice helps you build confidence and learn the ropes without feeling overwhelmed. Let's walk through a few go-to categories that work wonderfully for a first custom paint-by-numbers kit.
-
Landscapes and Seascapes: These are a fantastic starting point. Think about it: big, simple shapes like skies, mountains, and water. The colors often blend together beautifully, so you don't have to stress about razor-sharp lines. A sunset is a perfect example—its magic comes from those soft, gentle gradients.
-
Pets: Is there anything more rewarding than painting your furry best friend? To set yourself up for success, pick a photo where your pet is the star of the show. A clear, well-lit shot against a simple background is far easier to manage than a cluttered picture with other animals or distractions.
-
Abstract Designs: If you're all about color and form, abstract art is your sandbox. There's no pressure to create something realistic. You get total freedom to just enjoy the feeling of applying paint and watching a vibrant design emerge.
What Makes a Picture Easy to Paint
So, what should you look for when you’re scrolling through your camera roll? A few key things make a photo much easier to translate into a painting. Keep an eye out for images with clear, defined shapes and a simple color scheme. A picture with a handful of distinct colors will be a breeze compared to one with dozens of similar, tricky shades.
Try to avoid photos with tons of tiny, complex details. A panoramic shot of a crowded city street might look incredible as a photograph, but it can quickly turn into a painting headache. Instead, think simpler. A close-up of a single flower or a portrait with clean, strong lighting is a much better bet.
The secret is to simplify. A great painting doesn’t need to capture every single detail. It needs to capture a feeling. Choosing a photo with a strong focal point and an uncluttered background sets you up for success from the very beginning.
Choosing to paint is part of a huge movement. The global art paint market is expected to hit an incredible USD 4.99 billion by 2034, driven by more and more people discovering the pure joy of creating. For those into art therapy, wellness reports show that finishing a kit can boost dopamine by 25% per session. Even families are getting in on it, finding that painting together creates 60% more bonding time. You can dive deeper into these trends with insights from Business Research Insights.
Your choice of subject is the first step into that rewarding world. To make that choice a little easier, let's break down the most common beginner-friendly subjects.
Comparing Beginner-Friendly Painting Subjects
This table compares some of the most popular starting subjects to help you decide which one is the perfect fit for your first custom paint-by-numbers project.
| Subject Type | Why It's Easy for Beginners | Potential Challenges | Best For |
|---|---|---|---|
| Simple Landscapes | Large blocks of color (sky, water, fields). Forgiving lines and organic shapes. | Blending colors smoothly can take practice. Small details like trees can be tricky. | Painters who want a relaxing and forgiving first experience. |
| Close-Up Pet Portraits | Strong emotional connection. Usually has a clear focal point and simple background. | Capturing fur texture. Getting the eyes just right to show personality. | Animal lovers who want to create a meaningful keepsake. |
| Abstract & Geometric | No rules of realism! Focus is on color and shape. Great for practicing brush control. | Choosing a color palette that works well together. Keeping lines crisp in geometric designs. | Creative spirits who love color and want total artistic freedom. |
| Botanicals & Flowers | Clear, defined shapes. Often involves a simple, repetitive color palette. | Delicate details like veins on leaves or thin petals can be challenging. | Anyone who appreciates nature and wants a bright, cheerful subject. |
Ultimately, the best subject is the one that speaks to you. Whether it's a calming landscape or a playful pet portrait, picking something you love is the key to a fantastic painting experience.
Turning Your Photos Into Easy Custom Paintings
There's something incredibly special about turning a favorite photo into a piece of art you created yourself. It’s like bottling up a memory and putting it on a canvas. The whole process is much simpler than you might think, and if you keep a few things in mind, you can create one of the easiest—and most meaningful—paintings you'll ever make.
It all starts with picking the right photo. Honestly, not every picture is a great fit for a paint-by-numbers kit. The best ones usually have a clear subject, good lighting, and a background that doesn't steal the show. A well-lit portrait of your pet, for example, will work much better than a busy family photo with a chaotic background.
When your subject is clear, the numbered outline we create will be clean and easy to follow. That makes the actual painting part way more fun and less frustrating.
Selecting the Perfect Photo
As you scroll through your phone, keep an eye out for pictures that check these boxes:
- Strong Lighting: Look for photos with obvious highlights and shadows. This contrast is what translates into those distinct, easy-to-paint color blocks on your canvas. Photos that are too dark or completely washed out tend to lose their definition.
- A Clear Focal Point: Your main subject should be front and center, taking up a good chunk of the frame. A close-up of your dog's goofy grin is a much better choice than a wide shot of them running around a cluttered park.
- An Uncluttered Background: Simple backgrounds are your best friend here. They make your subject pop and prevent the canvas from getting cluttered with dozens of tiny, complicated sections. A soft, blurry background is ideal.
This visual guide breaks down how to approach subject selection, whether you're interested in landscapes, pets, or even abstract art.
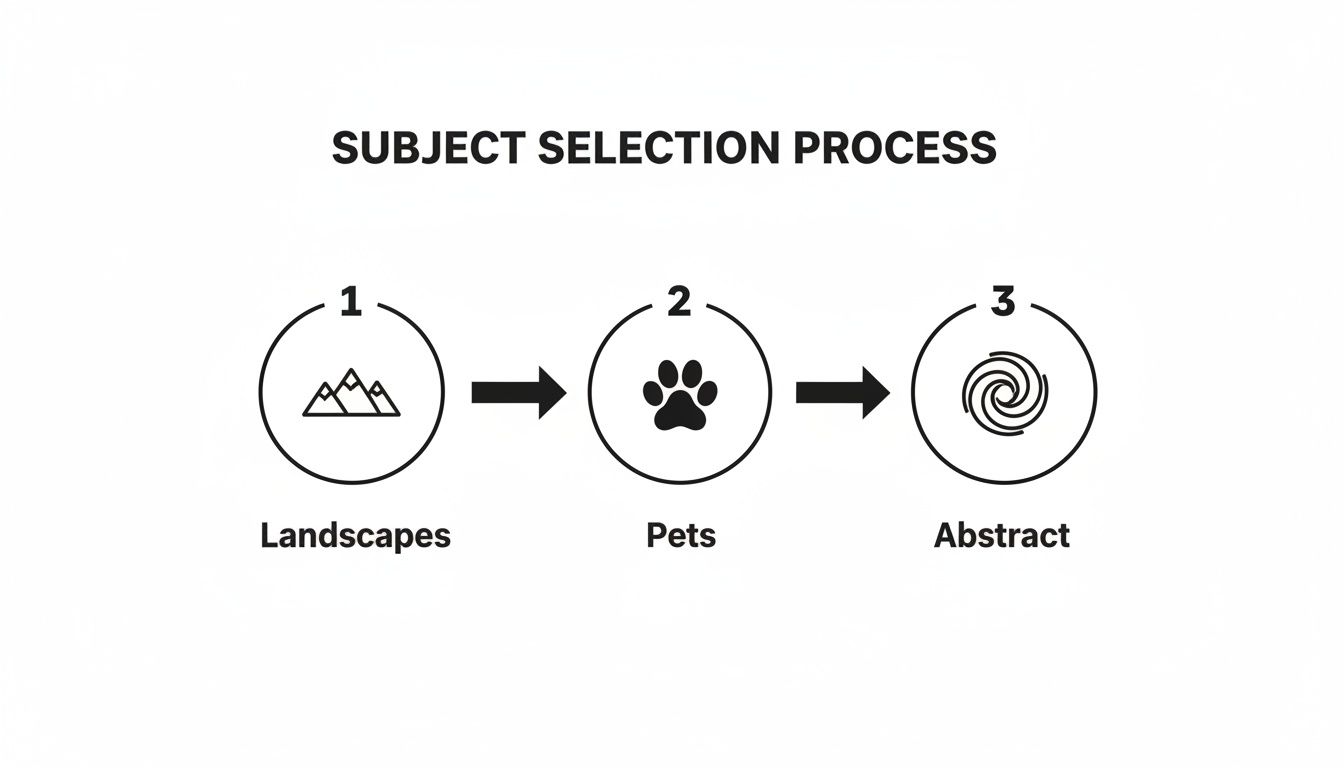
As you can see, zeroing in on a single, clear theme is the surest way to a painting experience you'll actually enjoy.
Customizing Your Kit for Simplicity
Once you’ve landed on the perfect photo, you get to customize your kit. This is where you have the power to make your project as easy or as detailed as you want. The two big decisions are canvas size and the number of paints.
While a larger canvas can mean larger areas to paint, the most important choice by far is the paint count. Think of it as your painting's difficulty setting.
A lower paint count, like 24 colors, will simplify your photo into bigger, bolder shapes. This is the way to go if you're a beginner or just want a more graphic, modern vibe. A higher count, such as 36 or 48 colors, will capture more detail and subtle shading for a result that looks closer to the original photo.
If your main goal is to create an easy picture to paint, the 24-color option is your best bet. It captures the spirit of your photo without overwhelming you, guaranteeing a relaxing and successful project. For more tips on getting this just right, take a look at our guide on how to convert photos to paint by numbers.
Taking a personal memory and turning it into art should be a fun, confidence-building experience. And it all begins with finding that one perfect picture.
Setting Up Your Workspace for Success
That moment when your Custom Paint By Numbers kit lands on your doorstep? That's when the real fun starts. Opening the box feels like unwrapping a creative promise, and getting your space set up right is the first step to making the whole experience relaxing and rewarding.
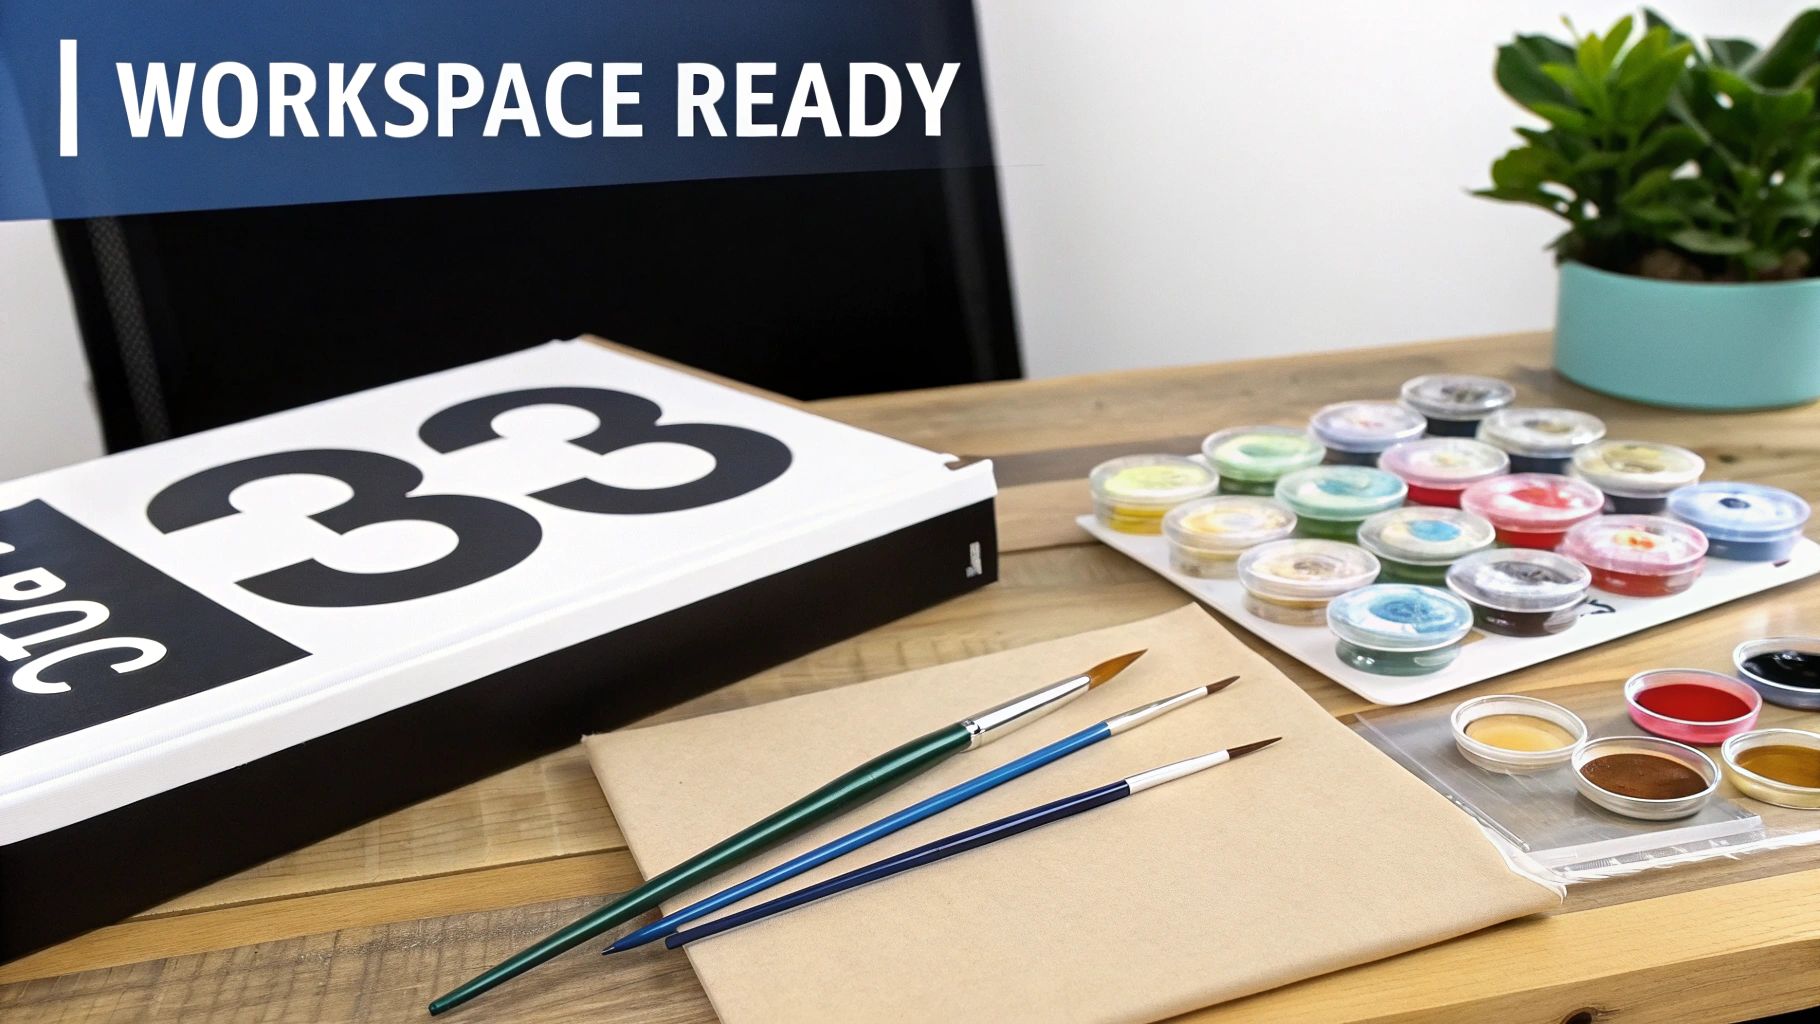
Inside, you've got everything you need to dive in: the pre-printed linen canvas with all its numbered sections, a full set of vibrant acrylic paints, and three different brushes for tackling both broad areas and the tiniest details. It's designed so you can start painting pretty much right away.
Still, a little prep work goes a long way. Before you even think about dipping a brush, spend just ten minutes creating a comfortable, organized painting nook. Trust me, this small setup will help you find your creative flow without any frustrating interruptions.
Creating Your Ideal Painting Nook
You absolutely don't need a dedicated art studio. A clear corner of the kitchen table or a desk is perfect. The goal is simply to carve out a zone for creativity, even if it's just temporary.
First things first, protect your surfaces. While acrylic paint is water-based and cleans up easily when it's wet, it's permanent once it dries. Lay down some old newspaper, a cheap plastic tablecloth, or a flattened cardboard box to catch any drips. This simple step lets you relax and paint freely without worrying about making a mess.
Good lighting is non-negotiable. It's probably the most important part of an enjoyable painting session. Natural light from a nearby window is fantastic, but a bright desk lamp you can aim right at your canvas works just as well. You'll avoid eye strain and be able to see all those tiny numbers and lines clearly.
Next, grab a few household items to keep within arm's reach. Having these ready will make your painting process so much smoother and help keep your brushes in good shape.
- A Cup of Water: You’ll need this to rinse your brushes when you switch colors. A heavy mug or a wide-bottomed jar is a great choice because it won't tip over easily.
- Paper Towels or an Old Rag: Keep a few handy to blot your brushes after rinsing them. If your brush is too wet, it can water down the paint, so drying it off is a crucial little step.
- A Comfortable Chair: You could be sitting for a good while, so pick a chair with decent support. When you're comfortable, it's much easier to relax and lose yourself in the process.
With these basics ready to go, you can stay in the zone instead of constantly getting up to find things. For a deeper dive, check out our full guide to beginner acrylic painting supplies. Now that your workspace is set, you're officially ready to bring your easy picture to paint to life.
Beginner Techniques for a Professional Look
Okay, your workspace is all set up and the canvas is waiting. This is the fun part—time to actually start painting! Even though paint-by-numbers is designed to be super simple, a few little tricks can make a huge difference. We're not just coloring here; these tips will help you create a piece that looks clean, polished, and ready to hang on the wall.
A great way to get into a good rhythm is to tackle one color at a time. Pick a number, find all the matching spots on the canvas, and fill them all in before you wash your brush. This keeps your colors looking consistent and helps you work more efficiently instead of jumping all over the place.
Another pro tip? Start with the darker colors first. It might sound backward, but it’s a lifesaver for fixing any little slip-ups. Lighter paints are usually thicker and more opaque, so they’ll easily cover any dark paint that accidentally went over the line.
Achieving Smooth and Crisp Lines
Getting that sharp, professional look really comes down to how you handle the brush. Your kit includes different brush sizes for a reason—use them! Grab the smallest one for those tiny, intricate details and switch to the larger ones for filling in the big areas. This one simple habit gives you so much more control.
To get those perfectly crisp edges, try not to glob too much paint on your brush. A little bit is all you need. Use just the tip of the bristles to carefully trace the outline of a section first, then go back and fill in the middle. It's way easier than trying to nail the whole shape in one messy swipe.
Don't stress about going outside the lines. Seriously, it happens to everyone! Just let the mistake dry completely, then paint right over it with the correct color. Acrylic paint is incredibly forgiving that way.
Remember, the whole point is to relax and have fun. Every brushstroke is part of the process, and finding easy pictures to paint is as much about enjoying the journey as it is about the final piece.
Even the most seasoned painters make a mistake now and then. It’s all part of the creative process! Here’s a quick guide to fixing some common hiccups you might run into.
Quick Fixes for Common Painting Mistakes
| Common Mistake | Why It Happens | How to Fix It |
|---|---|---|
| Painting Outside the Lines | Too much paint on the brush, or using a brush that's too large for the area. | Let the mistake dry fully. Then, use the correct color to carefully paint over the error. Use a smaller brush for better control. |
| Paint is Too Thick or Clumpy | The paint pot was left open for too long, or the paint is old. | Add 1-2 drops of water or acrylic flow improver to the paint pot and stir thoroughly with a toothpick until smooth. |
| Visible Numbers Through Paint | Lighter paint colors can sometimes be a bit transparent. | Apply a thin coat of white paint or gesso over the number first and let it dry. Then, apply the intended color. Two coats might be needed. |
| Accidental Smudges | Touching wet paint on the canvas or resting your hand where you just painted. | If the smudge is small, let it dry and paint over it. For a larger wet smudge, gently wipe it with a damp cloth, let it dry, and repaint the area. |
Don't let a small error discourage you. Most "mistakes" are completely fixable and are just opportunities to learn more about how the paint works.
Taking Your Skills to the Next Level
Once you’ve got the basics down and you're feeling a bit more adventurous, you can try blending colors to soften the hard lines between sections. This works beautifully for creating realistic-looking sunsets, skies, or water where colors naturally flow into each other.
The easiest way to start is to paint two neighboring sections while the paint is still wet. Then, take a clean, slightly damp brush and gently sweep it back and forth over the line where the two colors meet. This will blur the edge and create a smooth, beautiful transition. It's a simple technique that adds a surprising amount of depth.
To really elevate your work, getting familiar with an essential color mixing chart will give you the confidence to experiment even further.
For a deeper dive, check out our guide on how to blend acrylic paint on canvas for more detailed steps.
Have Questions About Easy Paintings? We've Got Answers
Jumping into a new hobby always brings up a few questions. It's totally normal! To make sure you feel confident and ready to start your artistic journey, we’ve answered some of the most common things beginners ask about finding easy pictures to paint.
What Actually Makes a Picture Easy to Paint?
The real secret to an easy painting lies in simple shapes and colors. For a beginner, the best kind of picture has big, clear areas of color instead of a ton of tiny, fussy details that demand a perfectly steady hand. Think bold and straightforward.
A limited color palette also makes a huge difference. When you have fewer colors to manage, you'll spend less time switching and cleaning brushes, which lets you really get into a nice, creative rhythm. When you're picking one of your own photos for a custom kit, keep an eye out for an image with:
- A really obvious focal point.
- A simple, uncluttered, or even blurry background.
- Good, strong lighting that creates clear, defined shadows.
These qualities make for a numbered outline that’s easy and genuinely satisfying to fill in.
How Do I Pick the Right Number of Paints for My Kit?
Think of the paint count as the difficulty dial for your project. It's the simplest way to control how detailed your final painting will be, letting you match the artwork to your own comfort level.
For a first project that’s both relaxing and stylish, the 24-color option is a fantastic starting point. This choice simplifies your photo into larger, graphic blocks of color, giving it a cool, modern vibe. If you’re a bit more ambitious and want to capture all the subtle shading of your original photo, then going with 36 or 48 colors is your best bet. That’ll give you a much more photorealistic painting with tons of rich detail.
When in doubt, start with fewer colors. You can always tackle a more complex project next time after you've got a feel for it. The whole point is to have fun with it, not get stressed out.
What if I Mess Up and Use the Wrong Color?
Don't worry, it happens! One of the best things about acrylic paint is how forgiving it is. If you accidentally fill in a spot with the wrong color, the most important thing is to just let it dry completely.
Seriously, don't try to wipe it while it's wet—that just creates a smeary mess. Once the mistake is totally dry, you can simply paint over it with the correct color. The acrylics in your kit are nice and opaque, so one or two coats of the right paint will cover the error completely. No one will ever know!
Do I Need to Go Out and Buy Extra Art Supplies?
Nope! A Custom Paint By Numbers kit is designed to be an all-in-one experience. Everything you need to create your masterpiece comes right in the box, so you can dive in the moment it shows up at your door.
Here’s what you’ll find inside:
- Your pre-printed, numbered linen canvas.
- A full set of numbered acrylic paints for your specific image.
- A set of three brushes in different sizes, perfect for both large areas and tiny details.
The only other things you might want are a cup of water for rinsing brushes and a paper towel or an old rag for drying them—stuff you already have lying around the house. It’s that easy.
Ready to turn a favorite memory into your own work of art? At Custom Paint By Numbers, you can upload any photo and get a complete kit with everything you need to create a beautiful painting. Start designing your personalized kit today at https://paint-by-number.com.


