

A paint by number portrait is a pretty incredible thing. It's a custom art kit that takes a photo you love and turns it into a numbered canvas. You get a set of paints that match the colors in your picture, and suddenly, you're able to recreate a treasured memory with your own hands—no art degree required.
Bringing Your Favorite Memories to Life with Paint
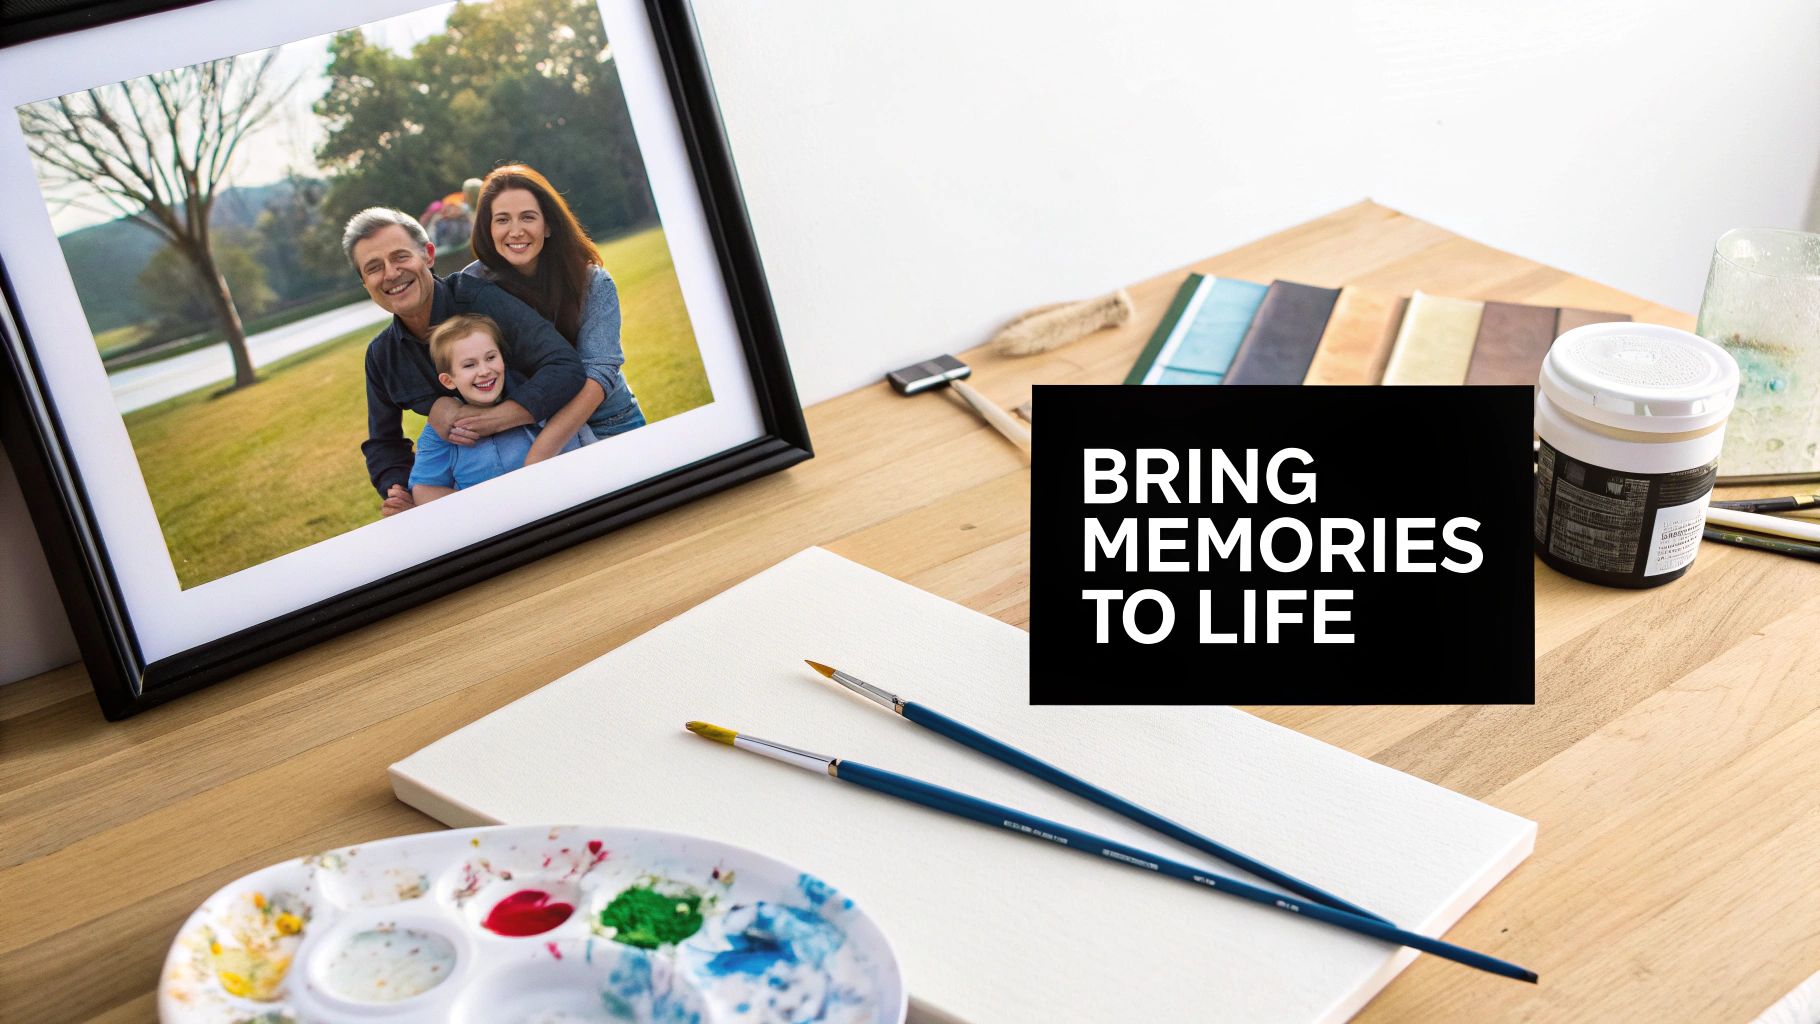
There’s something truly special about turning a photograph into a real painting. It’s more than just a craft project; it's a way to spend time with a moment, a person, or a pet that means the world to you. As you fill in each tiny, numbered section, you watch a blank canvas slowly transform into a vibrant image you know by heart.
That's what this guide is all about. We’re going to walk through the entire journey together, from picking the right photo to putting the final frame on your masterpiece. The best part? You don't need any natural artistic talent. The paint-by-number system provides the structure, ensuring you get a great result, but the experience is all yours.
A Modern Take on a Classic Hobby
Painting by numbers has been around for a while. Back in 1951, Max S. Klein and William J. Hobby kicked off a cultural craze with their "Craft Master" kits. It was a massive hit—by 1954, they were selling an incredible 2 million kits a year. People loved having a structured way to create something beautiful.
Today, that same idea is making a huge comeback, but with a personal twist. We're not just painting generic landscapes anymore. Thanks to technology, we can turn any digital photo into a custom kit.
This opens up all kinds of possibilities:
- Immortalize Family Moments: Think about that perfect wedding photo, your kid's first steps, or a candid shot from a family reunion.
- Create Unique Gifts: Imagine the look on someone's face when they receive a hand-painted portrait for a birthday or anniversary.
- Celebrate Beloved Pets: You can even capture your furry friend's personality on canvas, creating something just as special as these personalised pet portrait prints.
Key Takeaway: The process is a rewarding blend of mindfulness and creativity. It's a chance to slow down, focus on the details, and watch a special memory come to life one brushstroke at a time.
This guide will cover it all, from choosing the perfect photo to applying the final finishing touches. By the time we're done, you'll have everything you need to create a paint by number portrait you can proudly display or give as an unforgettable gift.
How to Choose the Perfect Photo for Your Portrait
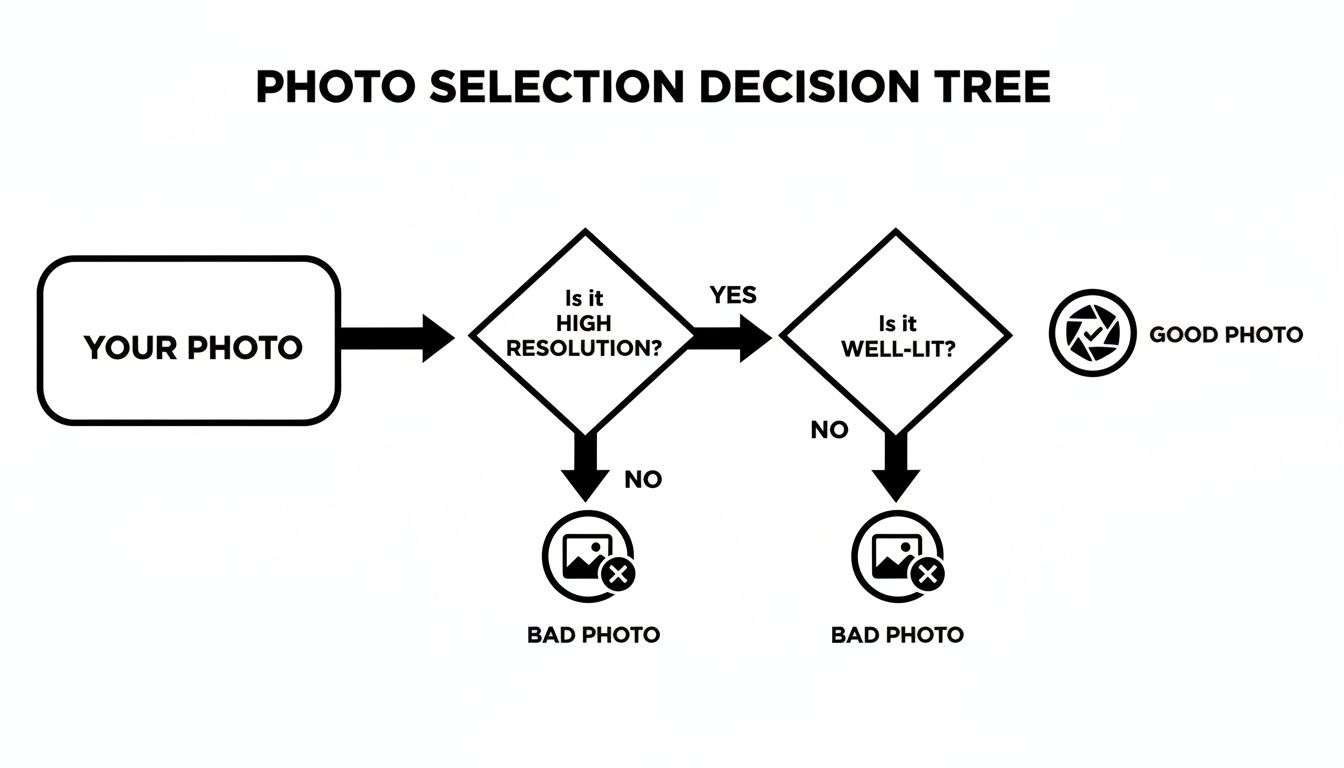
Let's be honest, the most important decision you'll make for your paint by number portrait happens long before you dip a brush in paint. The success of your entire project really hinges on the quality of the photo you start with. A fantastic photo gives you a brilliant blueprint for a stunning painting, but a weak one can set you up for frustration.
Think of it like this: the software that designs your custom kit is essentially translating digital pixels into paint colors. The more information it has to work with—that is, the more pixels and clearer details—the more nuanced and accurate your canvas layout will be. This is why picking a high-quality image isn't just a suggestion; it’s the secret to getting a final piece you'll be proud to display.
Good Light and Sharp Details are Everything
When it comes to a great portrait photo, your two best friends are good lighting and high resolution. Natural, even light is what you're after. It beautifully illuminates your subject’s features without casting harsh, distracting shadows or blowing out the highlights. The best photos are often taken outdoors on a slightly overcast day or indoors near a big, bright window.
Resolution is all about detail. A blurry, low-res photo snapped in a dim room just won't cut it. The software has to guess where the details are, which leads to a muddy, indistinct painting. On the other hand, a crisp, close-up shot of your dog in the backyard sun provides a perfect, clear roadmap for a lifelike and beautiful portrait.
Always think about the best photo resolution for printing, not just how it looks on your phone screen. A photo can look great on a small device but lack the data needed to stay sharp when blown up on a canvas.
Your Photo Selection Checklist for the Best Portrait
Use this quick guide to see if your photo is a great candidate for a custom paint by number kit.
| Key Element | What You Want | What You Should Avoid |
|---|---|---|
| Focus | The subject's face and eyes are crystal clear. | Any blurriness, especially on the main features. |
| Lighting | Even, natural light without harsh shadows. | Overexposure, dark shadows, or flash glare. |
| Composition | Subject is up close and fills most of the frame. | Subject is too far away or just a small part of a group photo. |
| Background | Simple, uncluttered, and non-distracting. | Busy patterns, other people, or messy environments. |
| Overall Quality | High-resolution image (sharp when zoomed in). | Pixelated, grainy, or low-resolution files. |
By keeping these points in mind, you'll be able to spot the photos in your camera roll that have the most potential.
Quick Edits That Can Make a World of Difference
You don't need to be a photo editing wizard to give your image a boost. Most phones have simple, built-in tools that can make a massive impact. For example, a quick crop is one of the easiest ways to improve a photo. It lets you remove distracting background clutter and puts the focus right where it belongs: on your subject.
Another handy trick is to bump up the contrast just a little. This helps sharpen the edges and makes the details pop, which in turn gives the software a clearer guide for creating your paint-by-number pattern. These tiny tweaks can seriously elevate the final result. If you want to dive deeper, you can learn more about how to turn photos into art in our comprehensive guide.
Ultimately, choosing the right photo is what sets the stage for a masterpiece. When you start with a high-resolution image with great lighting and a clear subject, you're not just making the painting process more enjoyable—you're ensuring your final paint by number portrait truly captures the spirit of a memory you love.
Nailing the Details: How to Choose the Right Kit Options
You’ve got the perfect photo picked out—awesome! Now comes the fun part: customizing your paint by number portrait kit. This is where you get to make a few key decisions that will shape your entire painting experience and the final look of your artwork.
The two most important choices you'll make are the canvas size and the number of paint colors. Getting these right is what turns a good photo into a great painting.
Does Size Matter? Choosing Your Canvas
The size of your canvas isn't just about how much wall space it'll take up; it totally changes the feel of the finished piece.
A smaller canvas, something like a 12x16 inch (30x40 cm), is great for creating a more intimate portrait. It’s perfect for a desk or a little reading nook. I often recommend this size for first-timers because it’s less intimidating and you get that satisfying feeling of finishing it sooner.
On the other hand, if you want to make a real statement, go bigger. A 20x24 inch (50x60 cm) canvas or larger gives you the space for incredible detail. Think about it: facial features become sharper, you can see the texture in hair, and the whole portrait just has a more commanding presence. For a detailed family photo or a majestic pet portrait, a larger canvas really does the memory justice.
Before you lock in that size, just double-check that your photo is up to the task.
This just confirms what we already know: a great painting starts with a great photo.
Let’s Talk Paint: Decoding the Color Count
This might be the most critical choice you’ll make. The number of paint colors in your kit directly controls how subtle and realistic your portrait will be. It’s the difference between a simple sketch and a deeply shaded, photorealistic drawing.
Here’s a quick rundown to help you decide:
- 24 Colors: This is your go-to for simple, high-contrast photos. It works well for minimalist portraits with a plain background or a subject with bold, clear features without a lot of subtle shading.
- 36 Colors: This is the sweet spot and by far the most popular option. It gives you enough shades to capture nuanced skin tones, the little highlights in hair, and soft background gradients. It delivers a beautifully balanced and realistic portrait.
- 48 Colors: If your photo is rich in detail—think dappled lighting, intricate patterns on clothing, or very subtle shifts in skin tone—this is what you want. The 48-color palette will render every tiny detail with stunning accuracy, giving you a truly photorealistic result.
My two cents: For a portrait of a person or a pet, always lean toward a higher color count if you're on the fence. More colors mean smoother transitions between shades, and that’s the secret to a lifelike painting.
This demand for personalized, high-quality art kits is part of a huge trend. The global art paint market was valued at $3.09 billion back in 2026 and is expected to hit $5.31 billion by 2035. A big part of that growth comes from DIY hobbyists like us who want to create amazing recreations of our favorite photos. If you're curious, you can discover additional insights into the craft industry's growth on coherentmarketinsights.com.
The Best Add-On You Didn't Know You Needed
Finally, let's talk add-ons. Most companies offer a few extras, but the one I always recommend is the DIY stretcher frame.
Sure, you can frame your painting later, but getting the frame with your kit is a game-changer. First, painting on a stretched, tight canvas is way easier and more satisfying than working on a rolled-up one. No curling edges!
Second, it makes finishing a breeze. The moment you paint that last number, your art is already on a frame and ready to hang. You get that instant gratification of seeing your masterpiece on the wall. It’s a small investment that makes a huge difference in the whole experience.
Your First Brushstrokes and Essential Painting Tips
Alright, you’ve got your custom kit, and this is where the magic really starts. That blank, numbered canvas is about to become a work of art that's uniquely yours. Before you dive in, let’s walk through a few simple setup steps to make your painting experience as smooth and fun as possible.
First, find a clean, flat spot to work and carefully unroll your canvas. Don't stress if you see a few creases from shipping; they'll vanish as the paint is applied and the canvas tightens up. Arrange your little paint pots, your brushes, and a small cup of water for rinsing. A paper towel for dabbing excess water off your brushes is also a lifesaver.
What you're doing is pretty cool—it’s a blend of old-school art and modern tech. While the global digital art market is expected to hit a staggering $13.17 billion by 2031, there's something irreplaceable about a hands-on project like a paint by number portrait. It’s this desire for a real, physical connection to creativity that makes these kits so popular. Plus, studies have shown that activities like this can reduce anxiety by up to 25% per session. You can see more on how digital trends influence art in this in-depth analysis on MordorIntelligence.com.
Mastering the Basics of Brushwork
Your kit probably came with a few different brushes. Each one has a job. The bigger, flat-headed brush is your go-to for covering those large background areas quickly. Your medium brush is the all-around player, perfect for most of the numbered sections.
But that tiny, fine-tipped brush? That's your hero for detail work. It’s what you’ll use to capture the glint in an eye, the texture of hair, or the subtle curve of a lip. Using the right brush for the right spot makes all the difference in keeping your lines clean and your details sharp.
So, where do you begin? Most painters I know swear by one of two strategies:
- Darkest to Lightest: Start with your darkest colors first. This approach immediately carves out the shadows and gives your portrait a sense of depth and structure right from the get-go.
- One Color at a Time: Pick a color, any color, and paint every single section with that number. It's a very methodical way to work and can be incredibly relaxing. It’s also a great way to get a feel for the paint consistency before tackling more detailed areas.
Achieving Smooth and Realistic Textures
The secret to a stunning paint by number portrait lies in a few simple techniques, especially when it comes to the "living" parts of the painting: the skin, hair, and eyes.
For skin tones, you want a soft, blended effect, not harsh lines. As you paint one section, use a light touch to feather the wet paint just a little into the neighboring numbered area. This simple move creates a much more natural-looking transition between shades.
Pro Tip: Don't glob the paint on your brush. A small amount on the very tip gives you far more control. Too much paint can easily cover up the numbers and lines, leading to a lumpy finish.
When you get to the hair, think like a hairstylist. Follow the natural flow and direction of the hair with your brushstrokes. Long, straight strokes for straight hair; shorter, curved strokes for curls. It's a small detail that adds an incredible amount of life and movement.
Special Focus on Eyes: The Window to the Soul
The eyes are almost always the focal point of a portrait, so they deserve a little extra care. Grab your smallest brush for this! The goal is to carefully fill in the distinct colors of the iris, pupil, and the whites of the eye.
The most critical detail is the catchlight—that tiny spec of white that makes the eye look wet and alive. Be patient and precise here. It might seem insignificant, but this single dot is what transforms a flat image into a portrait bursting with personality.
Occasionally, you might feel a transition between two colors could be a little smoother. Our kits are designed to make blending unnecessary, but if you're curious about taking your skills further, you might want to check out our guide on mixing colors with paint. It's a great skill to have if you ever want to add your own personal touches. Now, just relax, trust the numbers, and enjoy watching your photo come to life.
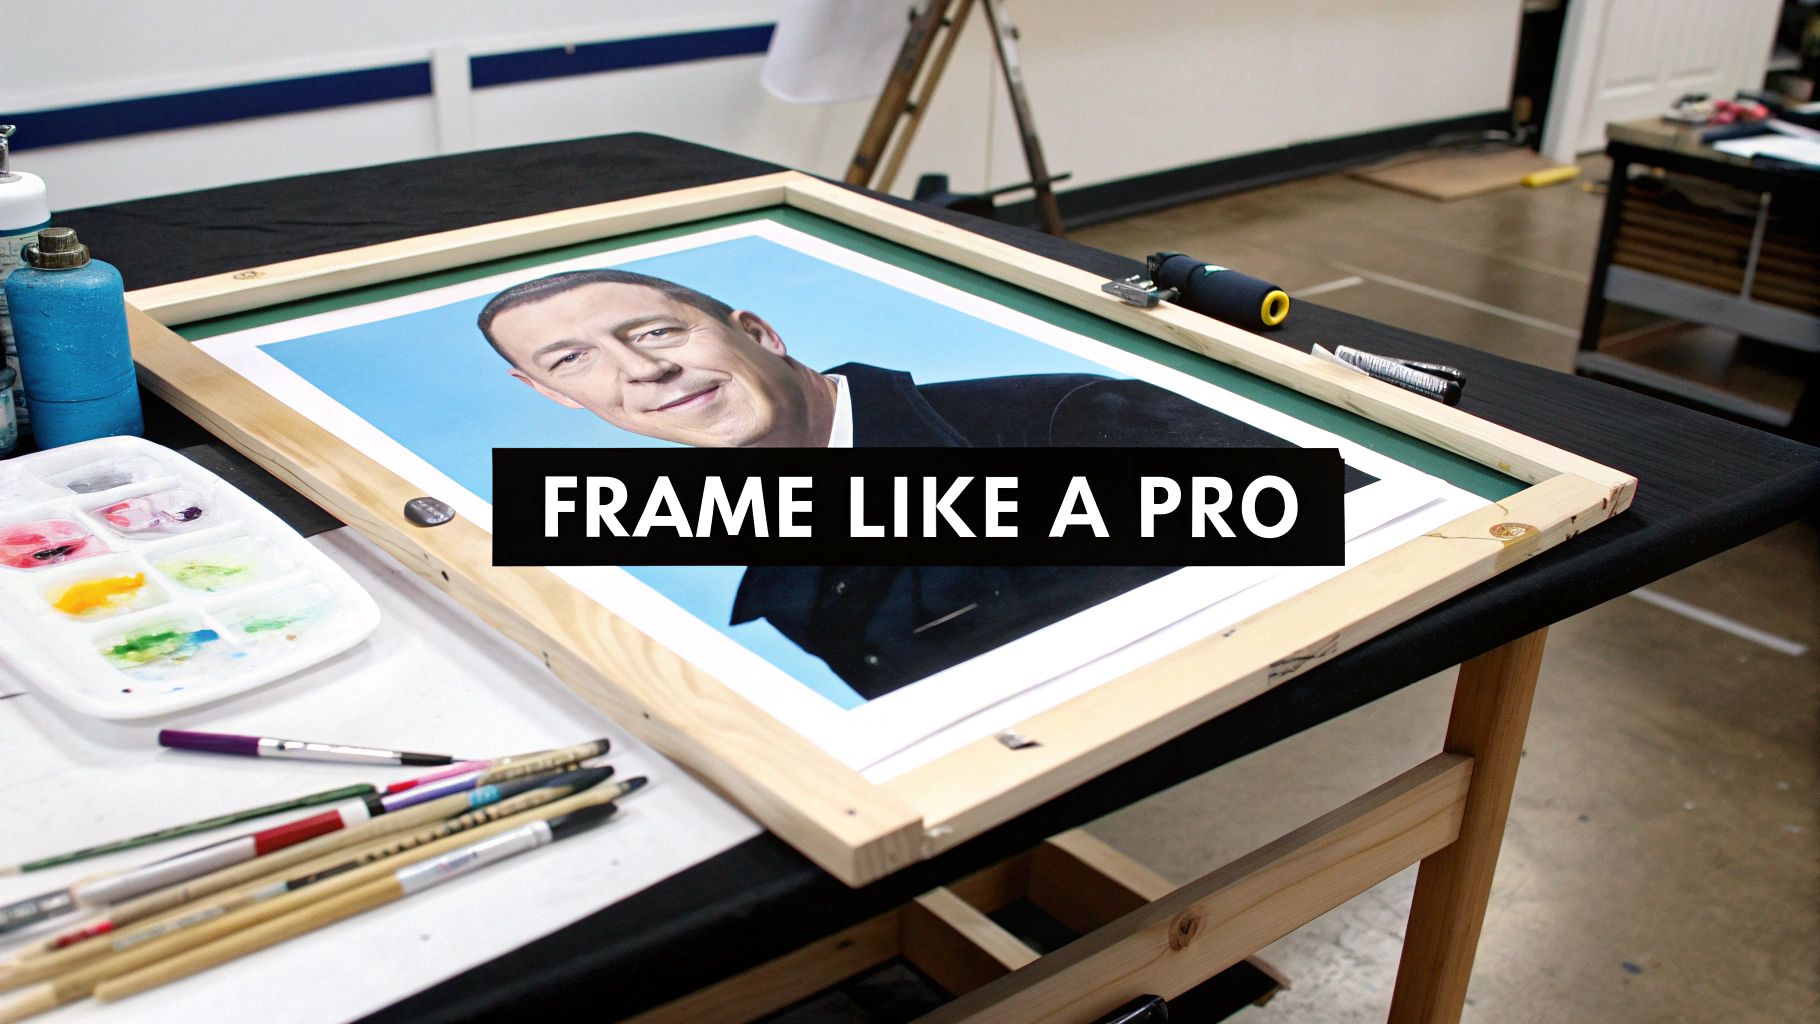
Finishing and Framing Your Portrait Like a Pro
You’ve laid down the last brushstroke and filled in the final numbered section. Your incredible portrait is complete! It’s a huge accomplishment, but don't stop just yet. A few final steps will protect your hard work and transform it from a finished project into a stunning piece of art ready for the wall.
The first thing I always recommend is applying a varnish. Honestly, this simple step is a total game-changer for any paint by number portrait. A clear sealant acts as a protective shield, guarding the canvas against dust, dirt, and the subtle damage that UV light can cause over time.
Beyond just protection, a good varnish makes the colors in your painting truly sing. It deepens the darks, brightens the highlights, and gives the entire piece a cohesive, professional sheen. Whether you go for a matte, satin, or gloss finish, this final layer elevates your artwork in an instant.
Applying a Protective Varnish
Don't be intimidated by varnish; applying it is easier than you might think. Just make sure your painting is 100% dry before you start. I usually give it at least 24-48 hours after my final painting session, just to be safe. Find a well-ventilated, dust-free spot to work so no pesky particles get trapped in the sealant.
Using a wide, soft-bristled brush, apply a thin, even coat of acrylic varnish across the canvas. I like to work in smooth, parallel strokes—first going horizontally, then vertically—to make sure I haven't missed a spot. Let it dry completely according to the product's instructions, which can take several hours.
A single thin coat is often all you need. Applying too much varnish at once can leave a cloudy or uneven finish. It’s always better to apply a second thin coat later if needed, rather than one thick, heavy layer.
This small bit of effort makes a massive difference in how long your creation will last and how vibrant it will look. It's the best way to ensure that personal connection you've built with the piece is preserved for years.
Framing Your Masterpiece
Now that your painting is protected, it's time to give it a proper home. Framing is what gives your portrait that polished, intentional look, making it ready to hang proudly on your wall or give as a heartfelt gift. You've got a few great options here.
- DIY Stretcher Frame: If you ordered the DIY frame with your kit, this is your simplest route. Just assemble the wooden bars and carefully stretch your canvas over them, using the tacks to secure it. It's an easy and budget-friendly way to get your art ready for display.
- Ready-Made Frames: Pop into a local craft store or browse online, and you'll find a huge variety of standard-sized frames. Take your canvas measurements with you and find one that fits your portrait's style, whether that’s a clean, modern black frame or something more classic and ornate.
- Custom Framing: For a truly gallery-worthy finish, consider taking your portrait to a local framer. They’re experts at choosing the perfect frame and matting to enhance your artwork. It’s the most expensive option, but the results can be spectacular.
For those who chose a canvas panel, the framing process is just as straightforward. If you're looking for more detailed guidance, our article on how to frame a canvas panel has some great, specific tips.
Long-Term Care and Display
Your beautifully finished and framed paint by number portrait is a treasure that will last. To keep it looking its best, just be mindful of where you hang it. Try to avoid spots with direct sunlight; even with a UV-protective varnish, prolonged exposure can eventually cause colors to fade.
It's also a good idea to keep it away from areas with high humidity, like a bathroom, which can damage the canvas and frame over time. A light dusting with a soft, dry cloth every now and then is all the maintenance it will need. With these simple care tips, your personalized work of art will remain a vibrant reminder of a cherished memory.
Got Questions? Let's Talk Through Common Painting Hiccups
As you get into the groove of painting your custom portrait, you're bound to run into a few little quirks. Don't worry, it's all part of the process! Think of this as your personal troubleshooting cheat sheet. We've tackled the most common questions that pop up, so you can solve any issue quickly and get back to the fun part.
Trust me, nearly every little bump in the road has a simple fix. Let’s get you painting with total confidence.
"Oops, I Painted in the Wrong Spot!"
It happens to the best of us, so the first rule is: don't panic. Accidentally dabbing your number 20 paint into a tiny number 12 section is a classic, and thankfully, it's an easy mistake to correct.
The trick is to let the wrong paint dry completely. Seriously, just walk away for a bit. If you try to wipe it off while it's still wet, you'll end up with a frustrating smear that's much harder to fix. Once it’s dry to the touch, you can simply paint right over the mistake with the correct color. The acrylics in your kit are designed to be opaque, so they cover beautifully.
For most slip-ups, one solid coat of the right color will make the error vanish. If you happened to put a dark color in a very light area, you might need a second thin coat of the correct color after the first one dries, but that’s it!
"My Paint Seems a Little Thick..."
Sometimes, especially if a paint pot has been open for a while, the paint can start to get a bit thick or pasty. If you open a color and it doesn’t feel smooth and creamy, there’s no need to force it. We can fix that in seconds.
All you need is a tiny bit of water.
- Start by adding just one single drop of water into the paint pot. A little goes a long way here.
- Grab a toothpick or the handle of a small brush and stir it in really well.
- Keep mixing until the paint feels smooth and flows easily from your brush.
The biggest mistake you can make is adding too much water at once. If the paint becomes watery, it won't cover the numbers and lines on the canvas properly. It's always better to start with one drop and only add a second if you feel it's truly needed.
My Pro Tip: The perfect paint consistency is like melted ice cream. It should be fluid enough to spread easily, but still thick enough to provide rich, solid color in a single go.
"How Long Is This Actually Going to Take?"
Ah, the million-dollar question! And the honest-to-goodness answer is: it really depends. The journey to a finished portrait is unique for everyone, but a few things will influence your timeline.
- Canvas Size: A cozy 12x16 inch canvas is a quicker project than a show-stopping 20x24 inch piece.
- Photo Complexity: A portrait with lots of tiny, detailed sections (like intricate hair or patterned clothing) will naturally take more time than a simpler photo with large blocks of color.
- Number of Colors: A 48-color kit means more time spent switching between colors and cleaning your brushes compared to a 24-color kit.
For a rough idea, a smaller, less detailed portrait might take you around 10-15 hours. A larger, more complex piece could easily stretch to 25 hours or more. But remember, this isn't a race! The real joy comes from the relaxing process. Many people love chipping away at it for an hour or so each evening, watching their creation slowly come to life.
"Do I Really Need to Clean My Brushes Every Time?"
Yes, absolutely! I can't stress this one enough. Skipping this step is the fastest way to get muddy, undefined colors, which is the last thing you want in a portrait.
When you're done with a color, give your brush a thorough rinse in a cup of water. Swirl it around gently at the bottom to work all the pigment out. Then—and this part is key—blot it dry on a paper towel or an old rag before you dip it into the next color. This simple habit keeps every color pure and vibrant, which is crucial for getting those clean lines that define the eyes, nose, and mouth.
Ready to see your own photo transformed into a work of art? We make it incredibly simple to create a personalized masterpiece you'll treasure forever.


