

Framing a canvas painting is one of the most satisfying finishing touches you can give your artwork. It's the step that transforms a piece from a simple canvas into a stunning, gallery-ready centerpiece. The whole process really boils down to a few key decisions: picking between a standard or floater frame, getting your hands on some basic mounting hardware, and then carefully securing the canvas for that clean, professional look. Once you get the hang of it, you’ll be giving every painting a polished feel.
Giving Your Art a Polished, Professional Look
Learning how to frame your own canvas paintings is a game-changer for any artist or collector. It's about so much more than just protecting the art; it’s about presentation. Think of the frame as the final brushstroke—it has the power to enhance the colors, complement the style, and amplify the overall impact of the piece. A great frame can honestly make a thrift store find look like it belongs in a high-end gallery.
This isn't just a niche hobby, either. The appreciation for well-presented art is a global trend. The wall art market, which includes both canvases and frames, was valued at a massive USD 63.61 billion in 2024 and is expected to nearly double by 2032. This just goes to show how much people value art as a core part of their decor and even as an investment. If you're curious, you can discover more insights on the poster and frame market to see the full scope.
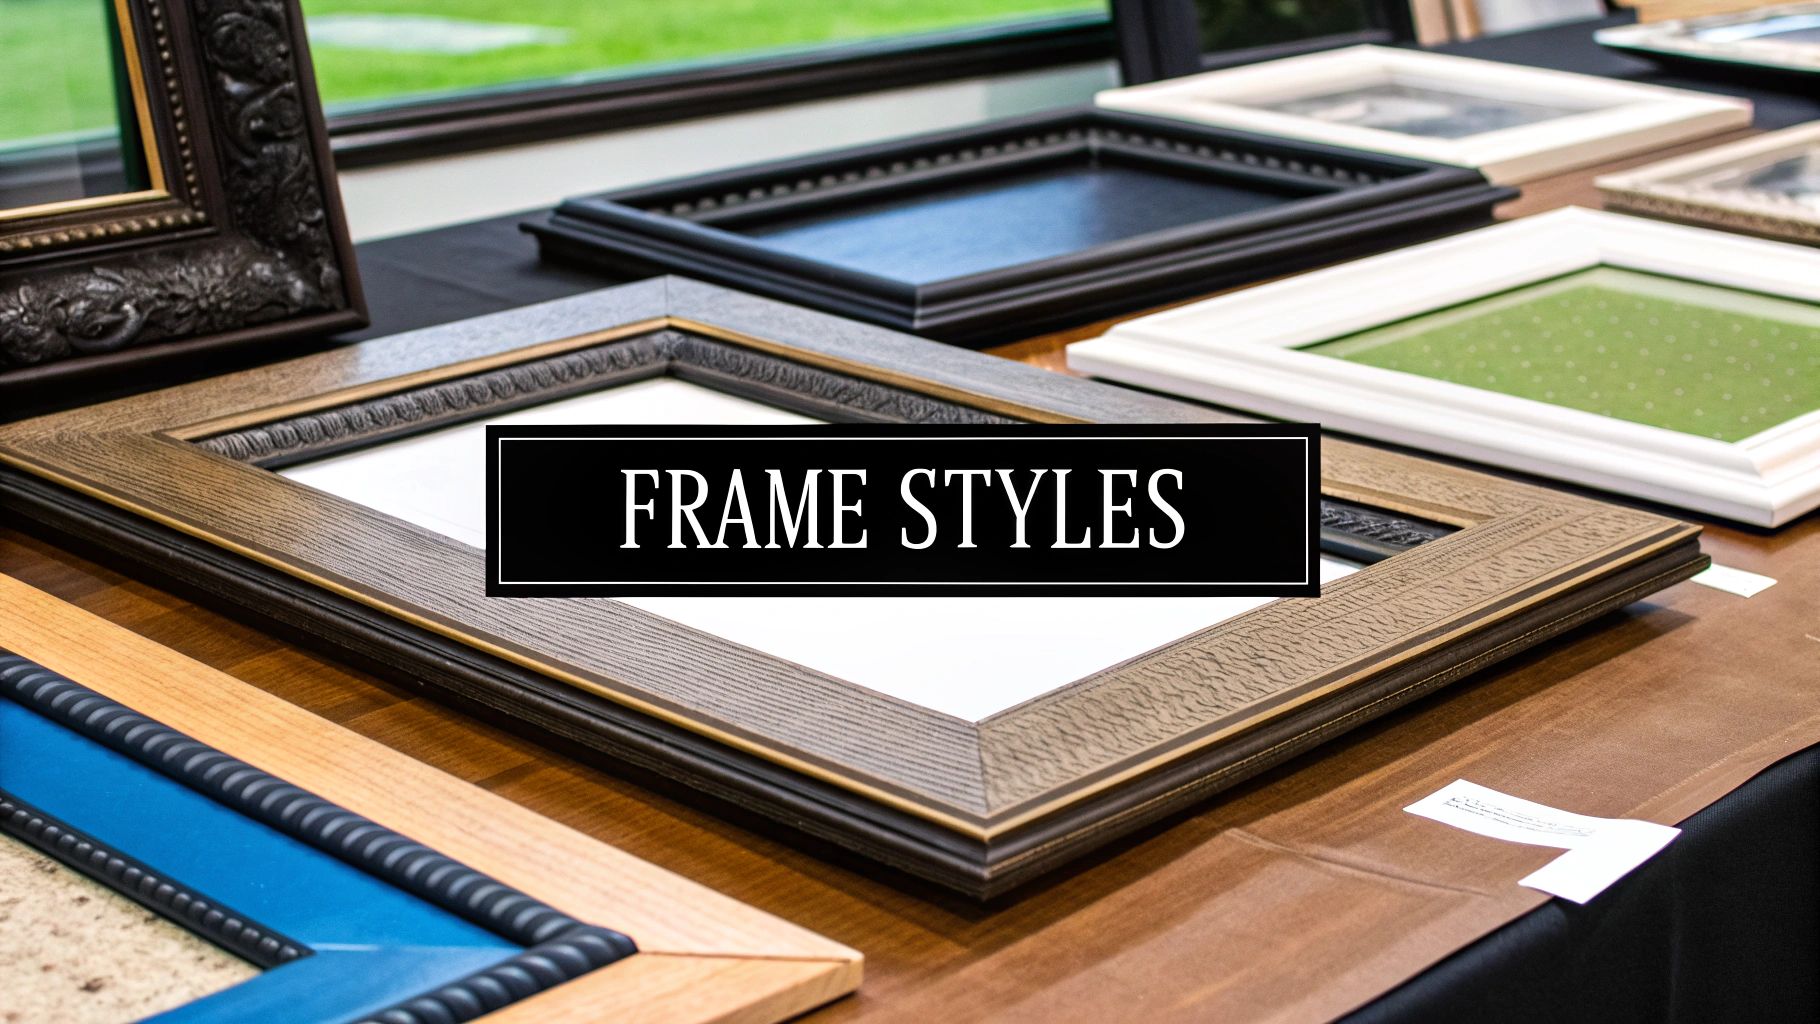
The Two Main Frame Styles
When it comes to framing a canvas, you’ll generally be choosing between two distinct styles. Each one creates a completely different vibe, so knowing the difference is your first real step.
-
Traditional Frame: This is the classic style you probably picture first. It has a lip, known as a "rabbet," that overlaps the front edge of the canvas. It's perfect for traditional oil paintings or any piece where you want a more formal, contained presentation.
-
Floater Frame: This is a much more modern option. It’s designed to create the illusion that the canvas is "floating" inside the frame, leaving a small, even gap all the way around. This style is fantastic for contemporary art and especially for gallery-wrapped canvases where you want to show off the painted edges.
To make the choice a bit easier, here’s a quick comparison to help you decide which is right for your painting.
Frame Type At a Glance
| Frame Type | Best For | Aesthetic | Mounting |
|---|---|---|---|
| Traditional Frame | Classic paintings, formal pieces | Timeless, elegant, defined border | Canvas is secured from the back, under the frame's lip. |
| Floater Frame | Modern art, gallery-wrapped canvases | Contemporary, minimalist, gallery look | Canvas is attached from the back, creating a "floating" gap. |
Ultimately, your choice here sets the entire tone for the finished piece.
Key Takeaway: Before you buy anything, really look at your painting. Is it classic or contemporary? Formal or abstract? Answering that one question will point you toward the right frame and guide the rest of your project.
In this guide, I'll walk you through the entire process, sharing practical tips I've picked up over the years. We'll cover everything you need for a successful DIY framing project, no guesswork involved.
Choosing the Right Frame and Supplies
With your canvas prepped and ready to go, you’ve reached the fun part: picking a frame. There are no hard-and-fast rules here; it’s mostly about what feels right to you. A good way to start is by matching the frame's style to the artwork's vibe. That classic oil landscape? It would probably look stunning in an ornate, traditional wood frame. But a bold, modern abstract piece often looks best in a simple, sleek floater frame.
Think of the frame as the final touch that completes the artwork. It’s no surprise that the global market for canvas frames was valued at around USD 2.1 billion in 2023, and it’s only expected to grow. You can read the full research about the growth of the frame market if you're curious about the trends. This really shows how much people value that final presentation.
Matching Frame Material to Your Needs
The material you choose for your frame will influence its appearance, how long it lasts, and what it costs. There isn't a single "best" choice—it all comes down to your painting and your wallet.
- Wood Frames: This is the timeless, go-to option. Wood brings a certain warmth and classic feel, with choices ranging from simple pine to rich walnut. It’s incredibly versatile but can be a bit heavy and might react to humidity over time.
- Metal Frames: Usually made from aluminum, these frames are sleek, modern, and light. Their thin profiles and durability make them a fantastic match for contemporary art or photos printed on canvas.
- Composite Frames: Built from synthetic materials, these are often your most affordable bet. They're lightweight and won't be bothered by moisture, which is practical, even if they don't quite have the high-end feel of real wood.
Here's a tip from my own experience: if you're framing a particularly large or heavy canvas, don't skimp. A sturdy wood or metal frame is a wise investment. It offers the structural support needed to prevent any warping down the road.
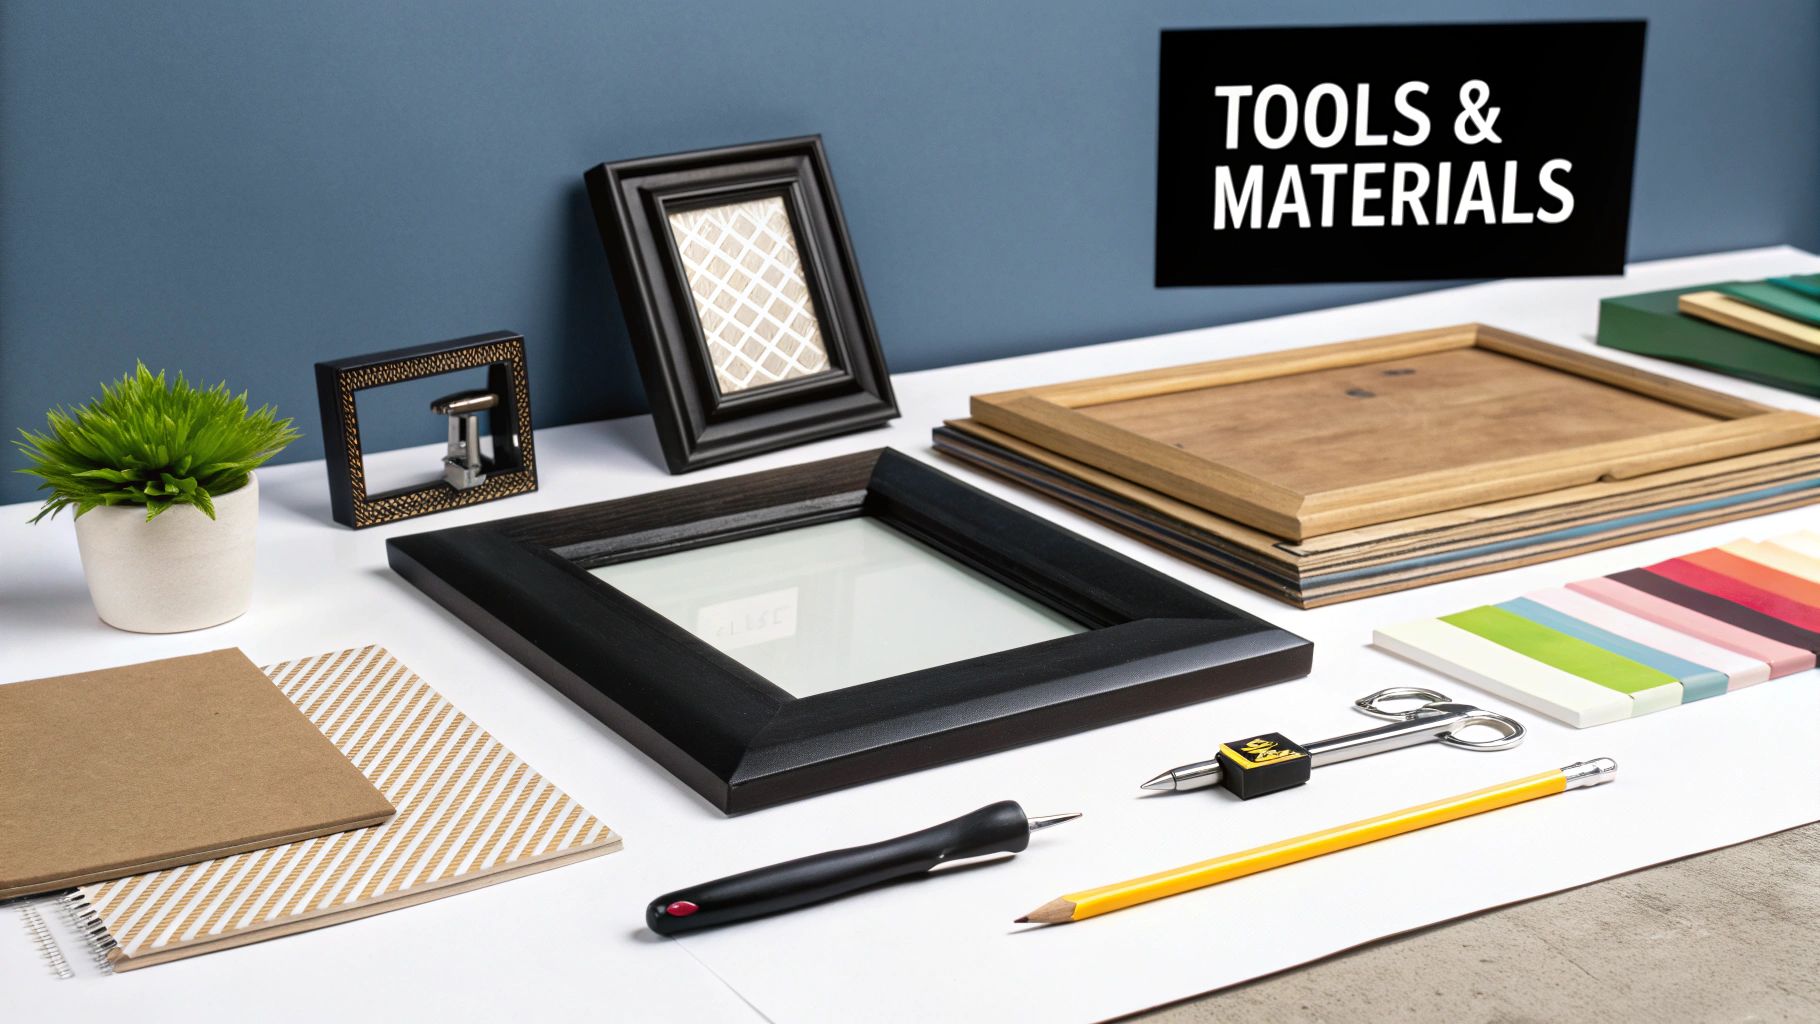
Your Essential Supply Checklist
Getting all your supplies together before you start will make the whole framing process so much easier. You don't need a full-blown workshop, just a handful of essential tools. If you're new to the art world, you might also find this list of essential art supplies for beginners helpful.
Here’s a quick checklist of what you'll probably need to have on hand:
- A tape measure for getting those dimensions just right.
- A screwdriver (a Phillips head will do the trick for most hardware).
- Mounting hardware, like offset clips, which are common for standard frames.
- Hanging hardware, such as D-rings and picture-hanging wire.
- A pencil for marking where everything goes.
Mounting Your Canvas for a Secure Fit
Alright, you've got your frame and your tools. Now for the fun part: mounting the canvas. This is where a little bit of patience goes a long way. Getting it right means your art will hang straight and secure, without any annoying wobbles.
Whether you've chosen a classic frame or a sleek floater frame, the basic idea is the same—a snug, stable fit.
For Traditional Frames
With a standard frame, your canvas should nestle right into the recessed lip on the inside, which is technically called the rabbet. Once it's sitting flush, you'll secure it from the back.
The go-to hardware for this job is usually offset clips. These are small, Z-shaped metal brackets. You screw one end into the frame and the other end presses down on the back of the canvas stretcher bar, holding it firmly in place. Just be careful not to crank the screws down too hard; you don't want to risk splitting the frame's wood.
Getting the Perfect Floater Frame Gap
Floater frames are a different beast and require a bit more precision. That beautiful "floating" illusion all comes down to maintaining a perfectly even gap between the canvas edge and the frame. I find that a 1/4 inch gap usually looks best, but feel free to play with that distance to see what you like.
Here’s a trick I use:
- Place the canvas face-up inside the frame.
- Use spacers to get that gap just right. You don't need anything fancy; small scraps of foam board or even some folded cardboard work perfectly. Wedge them between the canvas and the frame on all four sides.
- Once you're happy with the alignment, carefully flip the whole thing over.
- Now, you'll drive screws from the back, through the frame, and directly into the canvas's stretcher bars.
This visual guide is a great reference for getting those initial measurements spot on, which is absolutely critical for a clean result.
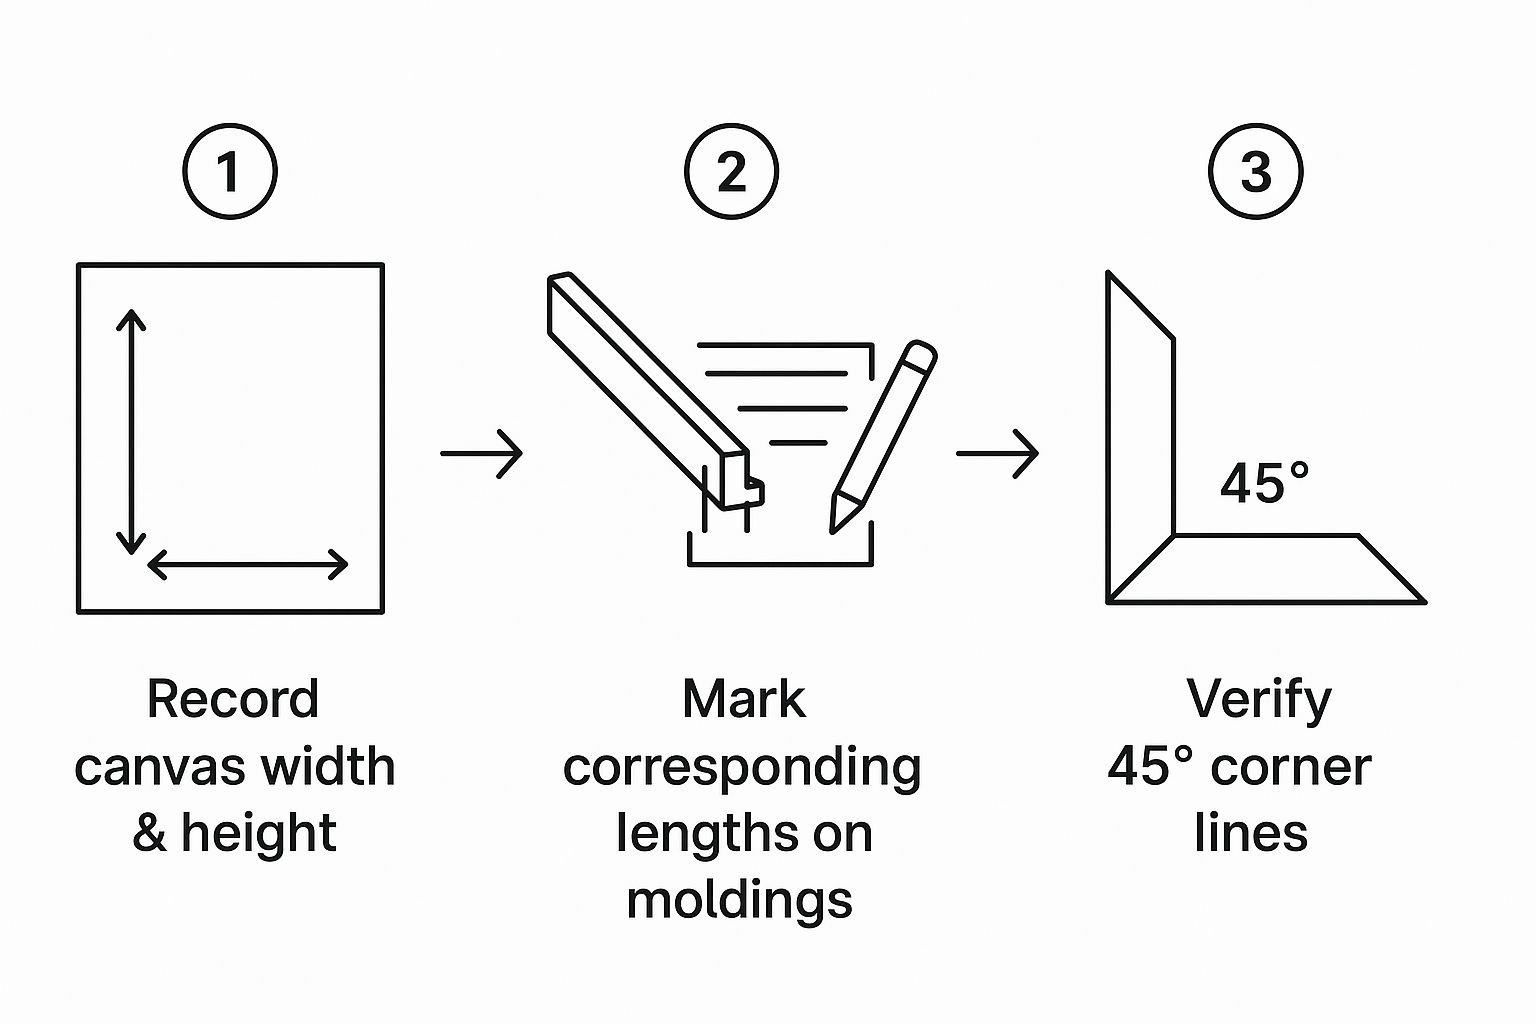
The main thing is to measure twice and drill once. Trust me, it saves a lot of headaches and ensures your corners line up perfectly.
Pro Tip: Before you drive any screws into the stretcher bars, drill small pilot holes first. This simple step prevents the wood from splitting and helps the screws go in straight, giving you a much stronger and more professional-looking finish.
Believe it or not, the way you paint can also affect how the canvas fits. Things like heavy texture can add just enough bulk to throw off a snug fit. If you want to learn more, our article on canvas painting techniques dives into how different applications can play a role. Taking your time here really is the secret to making a DIY framing job look like it was done by a pro.
Stretching Rolled Canvas Art Yourself
If you've ever bought art online or brought a beautiful canvas back from your travels, chances are you have a rolled-up masterpiece just waiting to be displayed. Stretching it yourself with a DIY stretcher bar kit is a surprisingly rewarding project. Not only does it save you a good bit of money, but it also gives you complete control over the final look.
First things first: assemble the wooden bars. Most kits have interlocking corners that slide together easily, forming a perfect square or rectangle. I like to give them a gentle tap with a rubber mallet just to make sure the fit is perfectly snug.
Once the frame is built, lay your canvas face down on a clean, flat surface. Then, place the frame on top and get it centered just right. This is where your technique really starts to matter.
The Stretching Technique
The secret to a professional-looking stretch is getting the tension just right. You're aiming for a canvas that's as tight as a drum, with absolutely no sagging or ripples in sight.
The trick is to always work from the middle of each side and then move outward toward the corners.
- Start by grabbing the edge of the canvas on one side with a pair of canvas pliers.
- Give it a firm but gentle pull over the frame and pop a staple right in the center of that wooden bar.
- Now, move directly to the opposite side and do the exact same thing, trying to match the tension.
- Repeat this process for the remaining two sides, always starting in the middle.
This "star pattern" approach is key because it distributes the tension evenly across the entire canvas. Keep adding staples, working from the center out on each side until you’re about two inches from the corners. Trust me, this method is the best way to prevent puckering and get that flawless, gallery-quality finish.
Folding the Corners
Neatly folded corners are one of those little details that make a massive difference. For a really clean look—especially if you're thinking about using a floater frame later on—a "gallery wrap" fold is the way to go. It’s a bit like wrapping a gift, where you tuck the fabric into a crisp, 45-degree angle.
It's interesting to see how the market for framing supplies has evolved. Big brands are using lighter woods and more sustainable materials, while customizable kits are booming thanks to artists and hobbyists wanting more personalized options. You can actually explore the market analysis of canvas frames to see how these trends are shaping the industry.
Taking your time with the stretching process is what will turn that rolled-up canvas into a polished piece of art that’s ready for the wall.
Adding the Final Professional Touches
You're in the home stretch! Your canvas is mounted and looking great. Now it's time for those finishing touches—the small details that really make a piece look professionally framed and help protect it for years to come.
Installing the Hanging Hardware
First up, let's get the hanging hardware right. For a clean, flush-to-the-wall look, my go-to is always D-rings and picture wire. The real trick here is placement.
You'll want to measure about one-third of the way down from the top edge of the frame on both the left and right sides. Screw a D-ring in at each of those marks. This positioning is key; it keeps the artwork from tilting forward off the wall once it's hung.
Attaching the Wire and a Dust Cover
With your D-rings in place, grab your picture wire. Cut a piece that’s a few inches longer than the frame is wide—you'll need the extra length for twisting. Thread the wire through both D-rings and wrap it back on itself tightly.
Don't pull it completely taut, though. You want a little bit of slack. When you pull the center of the wire up, the peak should sit roughly two inches below the top of the frame. That’s the sweet spot for a secure hang.
Now for a step that many people skip but is a true pro move: adding a dust cover. This is just a piece of kraft paper cut to fit the back of the frame. You can glue or tape it down to seal everything up. It’s a simple barrier that works wonders against dust, pests, and even shifts in humidity.
This protective step is a crucial part of art preservation. To ensure your masterpiece lasts, you can explore more techniques in our guide on how to preserve acrylic paintings.
One last thing. Stick small felt or rubber bumpers on the two bottom corners of the frame's back. This tiny addition is fantastic—it prevents scuffs on your wall and helps the art hang perfectly straight by allowing a bit of air to circulate behind it. It's these little details that really bring it all together.
Answering Your Top Questions About Framing Canvas Art
As you get into the world of framing, a few questions are bound to come up. It happens to everyone! Let’s walk through some of the most common ones I get asked, so you can tackle your project with confidence.
Do I Really Have to Frame Every Canvas Painting?
Honestly? Nope, not at all. A gallery-wrapped canvas, the kind where the artwork continues around the sides and the staples are neatly hidden on the back, often looks fantastic all on its own. It's a clean, modern look that really lets the artwork be the star.
That said, a frame does offer some serious benefits. It acts like a bodyguard for your art, shielding the vulnerable edges from dings and scrapes. It also helps prevent the canvas from warping over time, which can happen with changes in humidity. In the end, it’s a judgment call based on the style of your painting and where it will hang.
What Exactly Is a Floater Frame?
A floater frame is a pretty cool, contemporary option. It’s designed so your canvas sits inside the frame with a small, even gap all the way around, creating the illusion that it's "floating" in space. This little trick adds a wonderful sense of depth and a professional, gallery-like finish.
A floater frame is the perfect choice when you have a gallery-wrapped canvas and want to display the painted edges. A traditional frame has a lip that covers the front edge of the art, but a floater frame leaves the entire piece visible.
The typical gap is around 1/4 inch, but you can play with that measurement depending on how big the painting is. The key is to keep the gap consistent on all four sides for that sharp, balanced look.
Can I Frame a Canvas That Isn't Stretched?
You absolutely can, it just requires a different approach. A rolled, unstretched canvas is essentially just a piece of fabric, so it needs some kind of rigid support before it can live in a frame. The most straightforward way is to mount it onto a firm backing like foam board or archival mat board.
Once it's mounted, you can treat it just like you would a paper print and pop it into a standard picture frame. If you go this route, you'll definitely want to use glass or acrylic to protect the surface. The alternative is to have the canvas stretched onto stretcher bars first, which turns it into a standard, taut canvas ready for any frame you like.
Ready to turn your favorite photos into a work of art? At Custom Paint By Numbers, you can create a personalized paint-by-number kit from any picture, complete with everything you need to get started. Create your custom kit today.


