

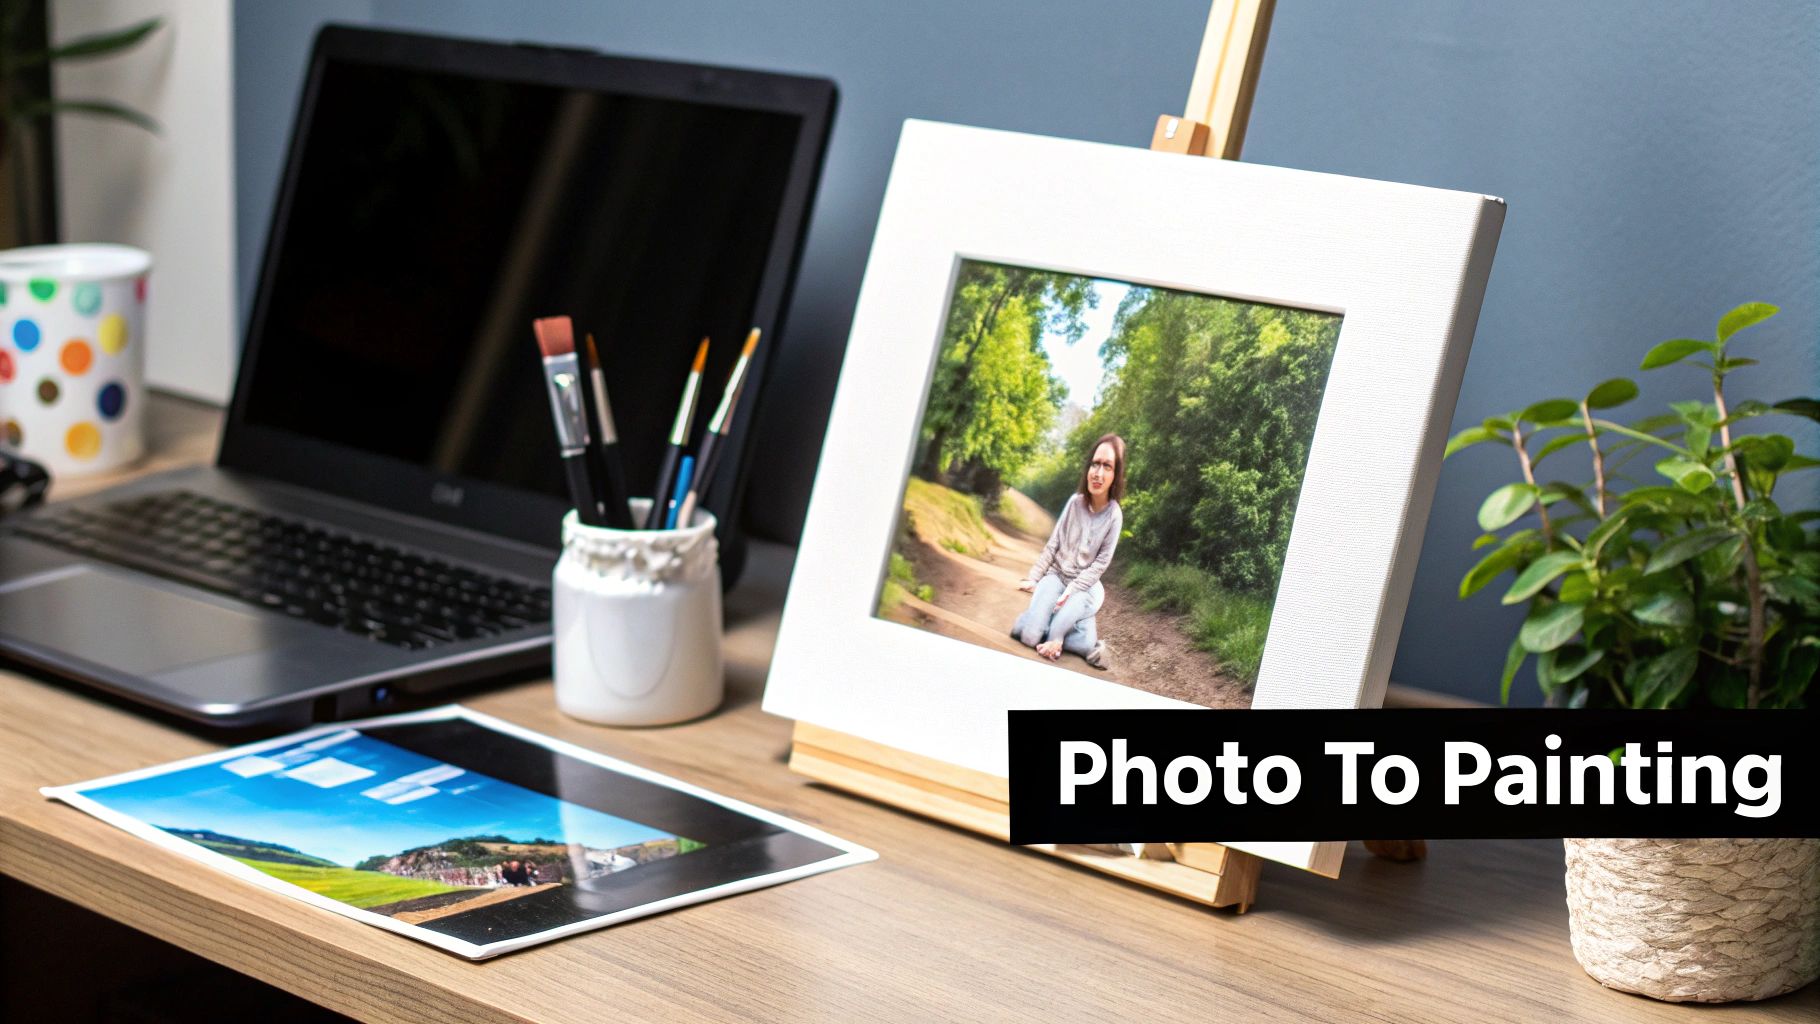
Turning one of your favorite photos into a real painting is a lot easier than you might imagine. You can actually transform any digital memory into a numbered canvas that you get to bring to life, one brushstroke at a time. It's a fantastic way to create a deeply personal piece of art, and I'll walk you through everything you need to know.
Unlock Your Inner Artist With Custom Paint by Numbers
Have you ever looked at a photo and thought, "I wish I could paint that"? The idea of creating your own paint-by-numbers kit from a personal picture is a game-changer. It’s a way to connect with your memories on a totally different level, turning them into something tangible and artistic that you made yourself.
This is more than just a craft project; it's about making art that is 100% yours. It could be a portrait of your dog, a gorgeous sunset from that one vacation, or a goofy, candid shot of your family. The process itself is both a relaxing hobby and a way to produce a genuinely meaningful keepsake.
A Modern Take on a Classic Hobby
Paint by numbers isn't a new idea—it has a surprisingly rich history. The first commercial kits hit the scene back in 1951 from the Palmer Paint Company. By 1955, they had sold a mind-boggling 20 million kits in the U.S. alone. It was clear from the start that people loved the idea of creating their own art with a little guidance.
Today’s technology lets us take that classic concept a step further. Instead of being limited to pre-made designs, we can upload our own images to generate a custom kit. For a unique artistic twist, you could even learn how to turn your photos into an oil painting style before converting them into a numbered canvas.
The real magic of a custom kit is how it blends nostalgia with creativity. You’re not just painting a generic scene; you're recreating a moment that belongs to you, brushstroke by brushstroke.
The perks go far beyond just having a cool painting at the end:
- Stress Relief: The focus required for painting can be incredibly meditative and calming.
- Personalized Gifts: Imagine giving a hand-painted portrait for a wedding, anniversary, or birthday. It's a truly one-of-a-kind present.
- Unique Home Decor: You get to display art that tells your personal story and fits your space perfectly.
Our guide on how to turn photos into art has even more great tips to get you started on this incredibly rewarding journey.
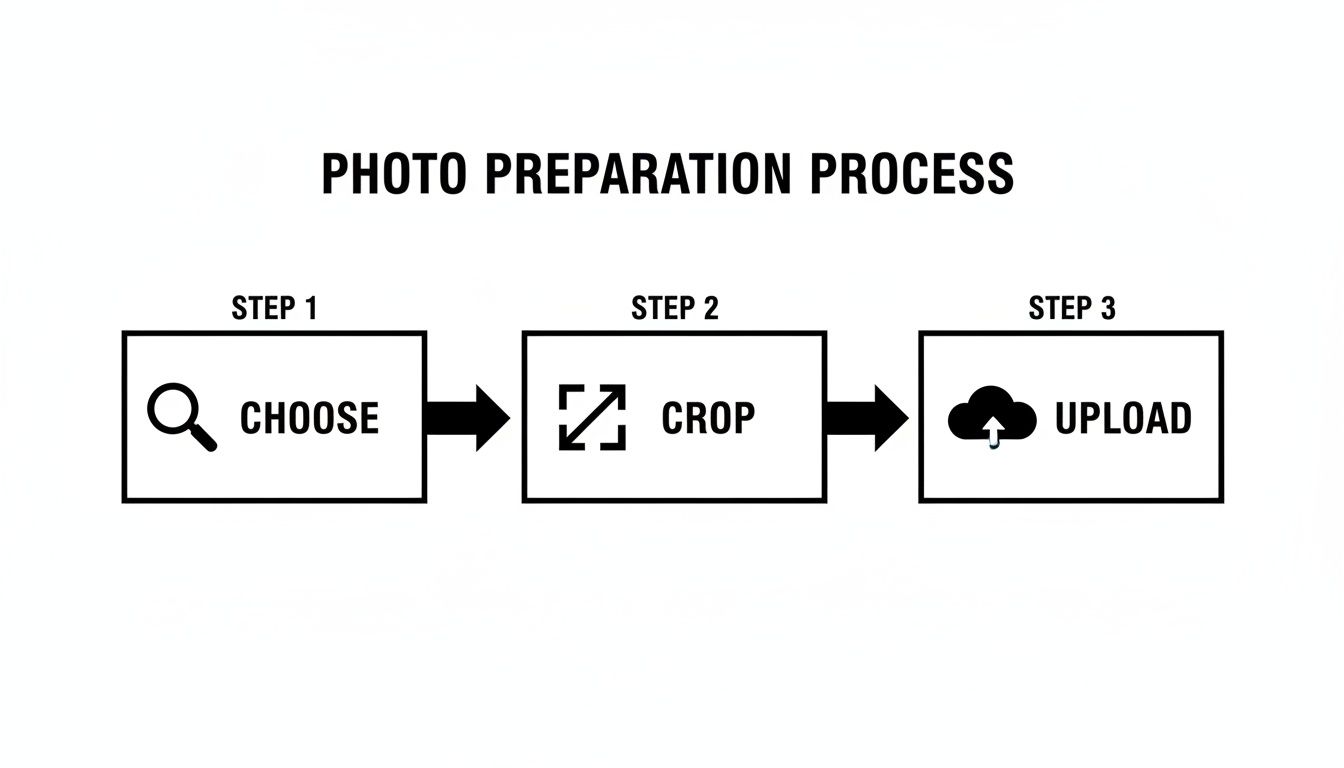
Choosing and Prepping the Perfect Photo
The secret to a stunning custom paint by numbers isn’t your painting skill—it’s the photo you start with. A truly great result begins with a solid foundation, and your choice of image is hands-down the most important factor for success. Not every picture translates well into a numbered canvas, so let's break down what actually works.
Think of it this way: the software that maps out your painting needs clear information to do its job well. A photo with sharp focus, good lighting, and strong contrast provides the best possible instructions. On the other hand, a blurry, dark, or overly busy picture can confuse the process, leaving you with muddy colors and muddled details. It’s why a high-resolution portrait will almost always turn out better than a distant, crowded landscape shot taken at dusk.
What Makes a Photo Ideal?
Certain qualities make a photo a perfect candidate for this art form. You're looking for an image where the main subject is the undeniable hero of the shot.
- Clear Lighting: Steer clear of photos with heavy shadows or blown-out highlights. Good, even lighting helps define all the shapes and colors cleanly.
- Simple Backgrounds: A cluttered background creates a ton of tiny, unnecessary segments that distract from what you actually want to paint. A simple or blurred background keeps the focus right where it should be.
- High Resolution: A crisp, clear photo provides more data to create accurate lines and color fields. Low-resolution images just end up looking blocky and pixelated.
A well-lit photo of your dog sitting in the grass is a fantastic starting point. In contrast, a low-light group photo taken from across the room will be a real challenge, as the faces and details will be too small and poorly defined to paint effectively.
Before you jump into selecting a photo, here’s a quick checklist to help you decide if it's a good fit.
Quick Photo Selection Checklist
| Characteristic | Why It Matters | What to Look For |
|---|---|---|
| High Resolution | Prevents a blocky, pixelated final painting. More detail means cleaner lines. | A clear, sharp image. Zoom in—if it looks fuzzy, find another photo. |
| Good Lighting | Defines shapes and creates a good range of colors without harsh shadows or bright spots. | Natural, even light is best. Avoid photos taken with a direct flash or in dark rooms. |
| Strong Focal Point | The subject should be obvious and take up most of the frame. | A portrait of a person or pet, a close-up of a flower, or a single building. |
| Simple Background | Keeps the focus on the main subject and reduces unnecessary, complex sections. | Blurred backgrounds, solid colors, or open sky work perfectly. |
| Good Contrast | Helps the software separate different elements and assign distinct colors. | Clear differences between light and dark areas. |
Running your photo through this mental checklist first will save you a lot of guesswork and lead to a much better painting experience.
Quick Edits for a Better Result
Before you even think about converting your photo, a few simple tweaks can make a world of difference. You don't need to be a Photoshop pro; basic adjustments are often all it takes. To effectively refine colors, crop for composition, or simplify details, you can utilize various photo editing software options to ensure your chosen image is perfectly prepped.
Start by cropping the image to put the spotlight squarely on your main subject. Got a great shot of your kids playing? Crop out the distracting picnic table and other people in the background.
Next, try boosting the brightness or contrast just a little. This simple step can make the colors pop and become more distinct, which helps the software assign different paint numbers much more accurately. You can learn more about how the technology works by reading our guide on how to convert photos to paint by numbers. Getting these small prep steps right will save you a ton of frustration and lead to a much more beautiful finished piece.
Creating Your Custom Canvas and Palette
Alright, your photo is prepped and ready to go. Now for the fun part: turning that digital image into an actual paint-by-numbers canvas. This is where the magic happens, transforming your picture into a numbered guide with a matching set of paints.
You basically have two ways to go about this. You can roll up your sleeves and use a DIY tool to convert the image yourself, or you can hand it off to a custom kit service and let them handle everything. There's no right or wrong answer here; it really just depends on how hands-on you want to be.
The prep work you've already done—choosing, cropping, and uploading—sets the stage for a great result, no matter which path you take.
The Do-It-Yourself Software Route
If you love tinkering and want full control over the final look, generating your own pattern is the way to go. There are plenty of apps and online tools that will analyze your photo and break it down into a paintable, numbered canvas.
When you go this route, you'll need to make two big decisions that will shape your entire project:
- Number of Colors: This is the most critical choice. A smaller palette of around 24 colors will give your painting a bolder, more graphic feel, almost like a pop-art poster. Bump it up to 42 colors or more, and you'll start capturing those subtle details and smooth gradients for a much more realistic finish.
- Level of Detail: This setting controls the size of the numbered sections. More detail means smaller, more intricate areas to paint, which is perfect for complex textures like animal fur or leaves on a tree. Less detail creates larger, simpler shapes, making it a great starting point for beginners.
Think about your photo. For a clean portrait against a simple background, 24 colors might be all you need. But for a sprawling landscape with a fiery sunset, you'll probably want at least 36 colors to do it justice.
Ordering a Custom Kit Online
Don't want to mess with software settings? The easiest path to a professional-looking result is to order a custom kit online. It's a remarkably simple process: you upload your photo, pick a canvas size, and choose how many colors you want from the service's options.
From there, they take care of everything. Their specialized software—often tweaked by actual designers—optimizes the image, creates a balanced color palette, and prints your custom design onto a quality canvas. Before you know it, a complete kit arrives on your doorstep with the canvas, numbered paints, and brushes.
This stress-free approach is a huge reason why the paint-by-numbers market has swelled to USD 1.56 billion in 2024. People are looking for mindful hobbies, and with surveys showing 70% of users feeling less stressed after a painting session, it’s easy to see why. You can discover more insights about this growing market and how it fits into the larger world of art supplies.
Key Takeaway: Choosing between DIY and an online service comes down to control versus convenience. The DIY route puts you in the driver's seat, while a custom kit service guarantees a polished, ready-to-paint experience with zero guesswork.
Assembling Your Toolkit and Workspace
While you're waiting for your custom canvas to arrive, this is the perfect time to get your painting station ready. I've found that how much you enjoy a paint by numbers project really comes down to having a comfortable and organized space. When everything is set up just right, you can really lose yourself in the process without hunting for things or worrying about spills.
Most custom kits you order online come with the essentials. You'll get your pre-numbered linen canvas, a full set of those little numbered acrylic paint pots, and usually three different brushes. There's typically a wider one for big sections, a medium one for general use, and a super-fine one for all those tiny, detailed spots.
Upgrading Your Setup for Comfort and Precision
The basic kit will get the job done, but a few extra items can make a huge difference in your painting experience. They aren't required by any means, but they definitely make the whole process feel smoother and more professional.
- A Small Easel: Trust me, hunching over a flat table for hours is a fast track to a sore back and neck. An easel props your canvas up at a much better angle, which is not only better for your posture but also gives you a clearer view of your work.
- Good Lighting: This is a big one. A bright, direct light source, like a flexible desk lamp, is a game-changer. It lets you shine a light right where you're working, making it so much easier to read the tiny numbers and see the lines.
- A Magnifying Glass: For those incredibly detailed areas with numbers you can barely see, a simple magnifying glass is a lifesaver. It seriously cuts down on eye strain and helps you paint those tiny shapes with confidence.
Your painting environment has a real impact on your final result. A dedicated, well-lit corner with your tools within reach transforms a simple craft into a relaxing, mindful escape.
If you're getting serious about this and want to build out your art supplies, check out our guide on beginner acrylic painting supplies. It's got a great rundown of other tools you might want to have around.
Organizing Your Workspace for a Smooth Flow
Okay, last step before you dive in. Take a few minutes to organize your station.
Grab a cup of water for rinsing brushes between colors and keep a few paper towels nearby to blot them dry. I also like to lay out the numbered paint pots in order. It's a simple trick, but it saves you from constantly searching for the right color.
And don't forget to protect your table! A bit of old newspaper or a plastic cloth is all you need. A little prep work now means you’ll be ready to start painting the second you feel inspired.
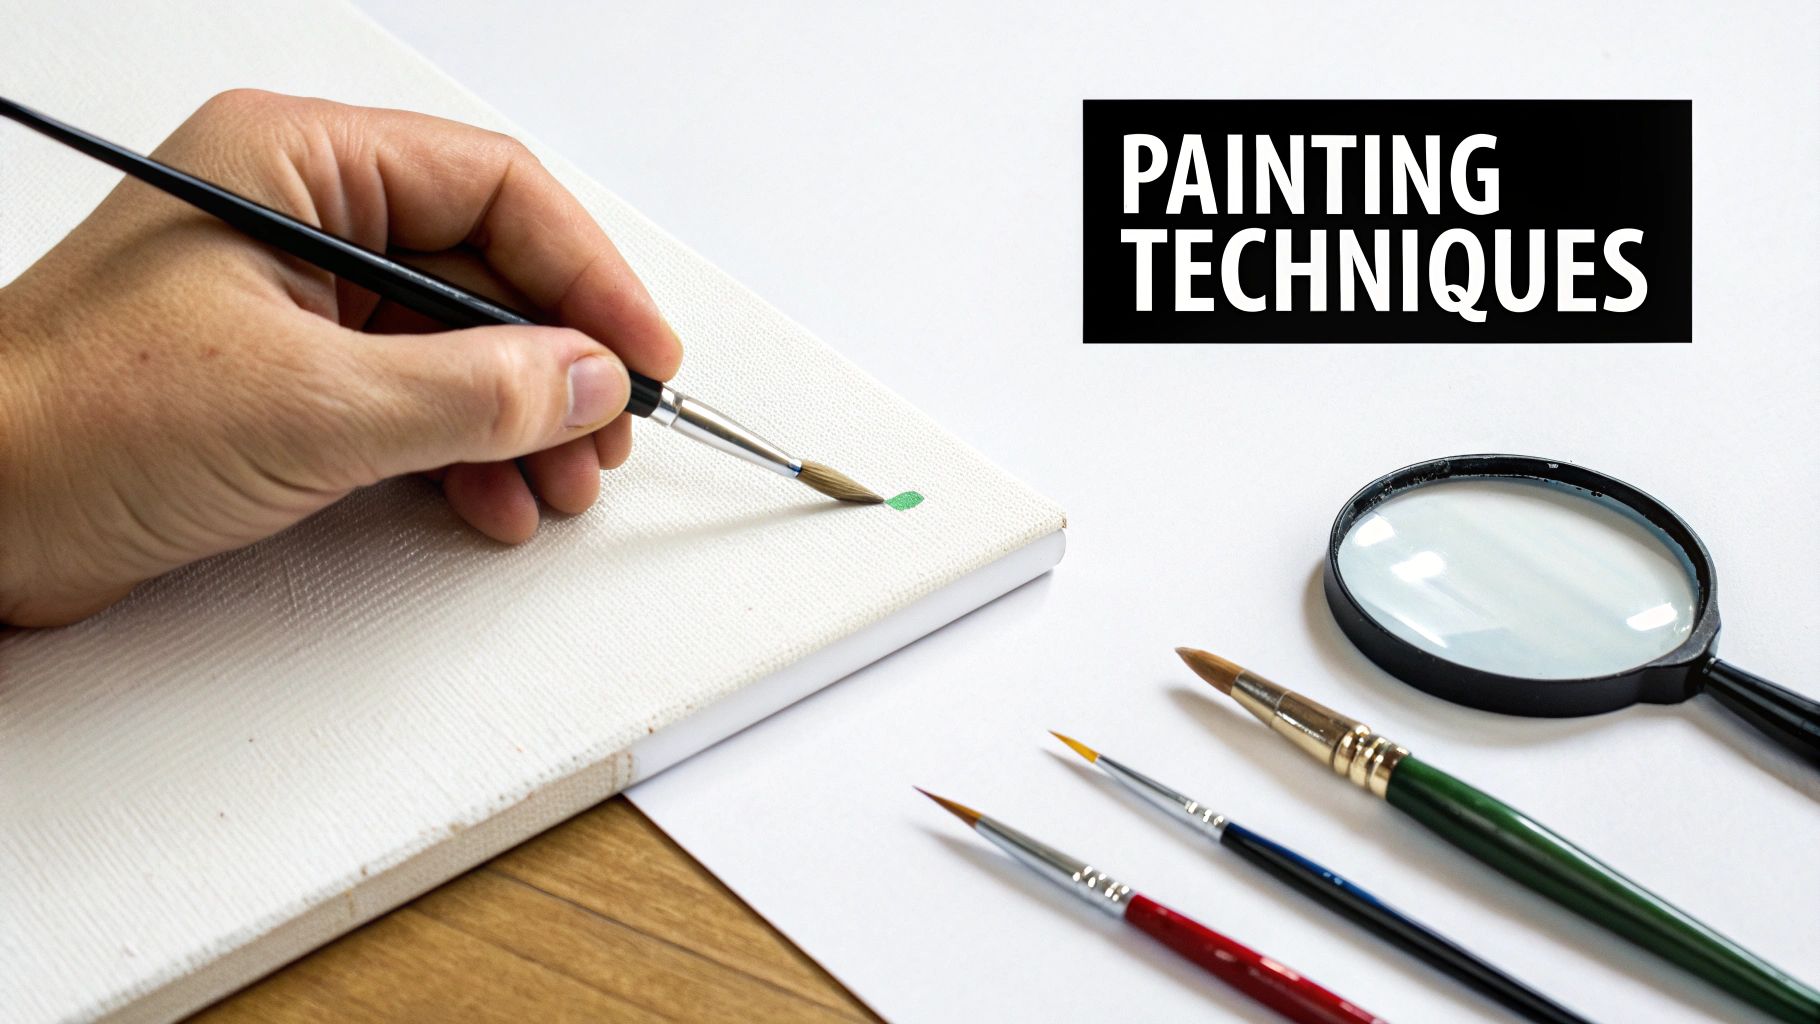
Essential Painting Techniques for a Flawless Finish
Alright, your workspace is ready, and your custom canvas is staring back at you. This is the moment—where your photo officially begins its journey into a real piece of art. Don't worry, you don't need to be a seasoned artist. In fact, some of the simplest techniques are the ones that deliver the most professional-looking results.
A lot of beginners like to work through the canvas one color at a time. It's a great way to get into a rhythm, and it keeps your brushes and water from getting muddled. You just focus on one number, fill in all its spots, and then move on to the next.
Strategic Painting for Clean Results
Another fantastic strategy is the top-down method. If you're right-handed, start painting in the top-left corner and work your way down and across the canvas. Left-handed? Just reverse it: start at the top-right and move toward the bottom-left.
This simple directional trick is an absolute lifesaver. It stops your hand and arm from smearing wet paint you just carefully applied. There’s nothing worse than dragging your sleeve through a section and ruining all that meticulous work.
I also recommend painting your darkest colors first and saving the lightest ones for last. Dark paints are much more forgiving and can easily cover up a stray brushstroke that wanders into a lighter area. Trying to get a light yellow to hide a speck of black paint is way harder than the other way around. A little planning here saves a lot of headaches later.
Mastering Details and Crisp Lines
Those sharp, clean lines are what will make your painting pop. When you get to the tiny, intricate sections, that smallest brush in your kit is about to become your best friend. Take your time with these spots. A great tip is to brace your painting hand with your other hand to keep it extra steady.
Here are a few more tricks I've picked up for precision work:
- Don't Overload Your Brush: Only dip the very tip into the paint. Loading it up too much creates blobby, thick lines and makes staying inside the boundaries a real challenge.
- Keep Your Paint Flowing: If an acrylic paint pot seems a bit thick or starts to get tacky, just add a single drop of water and give it a good mix. This thins it out just enough to help it glide on smoothly.
- Cover the Lines: To get that seamless, "I painted this from scratch" look, aim to paint right up to and just a tiny bit over the gray lines. This makes sure no little white gaps are showing when you're all done.
The concept behind paint-by-numbers isn't new—it actually has roots in a 1923 patent that grew into a worldwide hobby. It now fuels a massive USD 1.56 billion market, letting millions of people create art, just like Dan Robbins imagined with his original Craft Master kits back in 1951. You can learn more about the fascinating history of this art form on Wikipedia.
How to Fix Common Mistakes
Look, mistakes are going to happen. It's just a normal part of the creative process, so don't sweat it. The beauty of acrylic paint is that it’s incredibly forgiving.
If you paint outside the lines, just take a breath. The easiest fix is to let the wrong color dry completely. Once it’s totally dry, you can simply paint over it with the correct color. Since acrylics are opaque, one or two coats will usually hide the mistake perfectly. This is another reason painting dark-to-light is so helpful—a light color might need that second coat to fully cover a darker error underneath.
Finishing and Displaying Your Masterpiece
Once you’ve filled in that very last numbered section, step back and give yourself a pat on the back. You did it! You took a personal photo and transformed it into a genuine work of art. But before you find the perfect spot on the wall, a couple of final touches can really protect your hard work and give it that professional, gallery-ready feel.
To Seal or Not to Seal?
First up is sealing your painting. For acrylics, applying a clear varnish is a total game-changer, and something I always recommend. It does more than just protect the surface from dust and UV light; it also evens out the finish, so some colors don't look shiny while others look flat.
You’ve got two main choices here, and it really comes down to personal preference:
- Gloss Varnish: This finish will make your colors look deeper, richer, and more saturated. It gives the whole piece that vibrant, almost-wet look that can really make the details pop.
- Matte Varnish: If you want a more modern, subtle look, matte is the way to go. It gives a flat, non-reflective finish, which means no annoying glare, no matter where you hang it.
Finding the Perfect Frame
With your painting sealed and protected, it’s time for the final step that elevates it from a fun project to a piece of home decor: the frame. The right frame pulls everything together and helps your artwork feel at home in your space.
You can't go wrong with a simple black or white frame. They let the colors in your painting do all the talking without creating any distraction. If you’re going for a more traditional or rustic vibe, a natural wood-toned frame can add a wonderful warmth.
A Quick Tip from Experience: Make absolutely certain your canvas is bone-dry before you put it behind glass. I mean, completely dry. Even a little bit of moisture can cause the paint to stick to the glass over time, which can ruin your hard work. I always give it at least 24 hours after varnishing just to be safe.
Now, the best part. Find a place to hang your finished piece where it’ll make you smile every day. It’s more than just a painting; it’s a memory you brought to life, and that’s something to be proud of.
A Few Final Questions You Might Have
Even after mapping everything out, it’s natural to have a few lingering questions before you dive into your first custom paint by numbers project. Let's walk through some of the things people ask me all the time.
Is My Photo Good Enough?
This is probably the biggest hurdle for newcomers. You absolutely don't need a professional photo, but for the best results, your picture should be clear, well-lit, and high-resolution.
Steer clear of photos that are blurry, too dark, or have a really busy background. From my experience, a simple portrait or a close-up shot against a clean backdrop almost always turns into a fantastic painting.
How Long Is This Going to Take?
Honestly, it depends! The two biggest factors are the size of your canvas and how complex the image is. A small, simple design might only take you 6-8 hours to knock out over a weekend. On the other hand, a large, intricate piece could easily take 20 hours or more. Remember, it’s a marathon, not a sprint.
The real joy of paint by numbers is that you get to set the pace. Whether you finish it in a few days or enjoy the process over several months, the relaxing, creative journey is just as rewarding as the final piece of art.
What if I Run Out of a Color?
Don't panic! This is a common fear, but it rarely happens. Most kits are designed with a buffer, usually including about 30% more paint than you'll likely need for any given color.
If you do find yourself running low, you have a couple of easy options. You can try mixing similar shades to get a close match, or just pop down to a local craft store to pick up a similar acrylic paint. It’s a simple fix that will get you back to painting in no time.
Ready to turn that favorite photo into a piece of art you can hang on your wall? The best way to start is with a quality kit from Custom Paint By Numbers. Go create your masterpiece! https://paint-by-number.com


