

Welcome to the ultimate resource for sparking creativity and fun right in your own home! Finding engaging, educational, and genuinely enjoyable activities for children can feel like a constant challenge. That's where the magic of art comes in. This guide is designed to provide you with a comprehensive list of art projects for kids at home, carefully curated to suit different age groups, from toddlers to teens.
We move beyond simple suggestions by offering everything you need to get started immediately. Inside, you'll find:
- Detailed, step-by-step instructions for each project.
- Clear lists of required materials, most of which you may already have.
- The key learning benefits associated with each activity.
- Important safety tips to ensure a fun and secure creative session.
- Exciting variations, including structured paint-by-numbers options, to keep things fresh.
Forget the endless searching and complicated prep work; everything you need to transform your kitchen table into a vibrant art studio is right here. Art is a powerful tool for self-expression, problem-solving, and developing fine motor skills. For an even wider array of specific project ideas to spark creativity, consider exploring resources like these 10 creative art projects for preschoolers, which offer fantastic inspiration. Whether you have a young child exploring textures for the first time or an older one ready to tackle more complex creations, these projects are designed to inspire, educate, and create lasting memories. Let's get started on this colorful journey
1. Painting and Watercolor Art
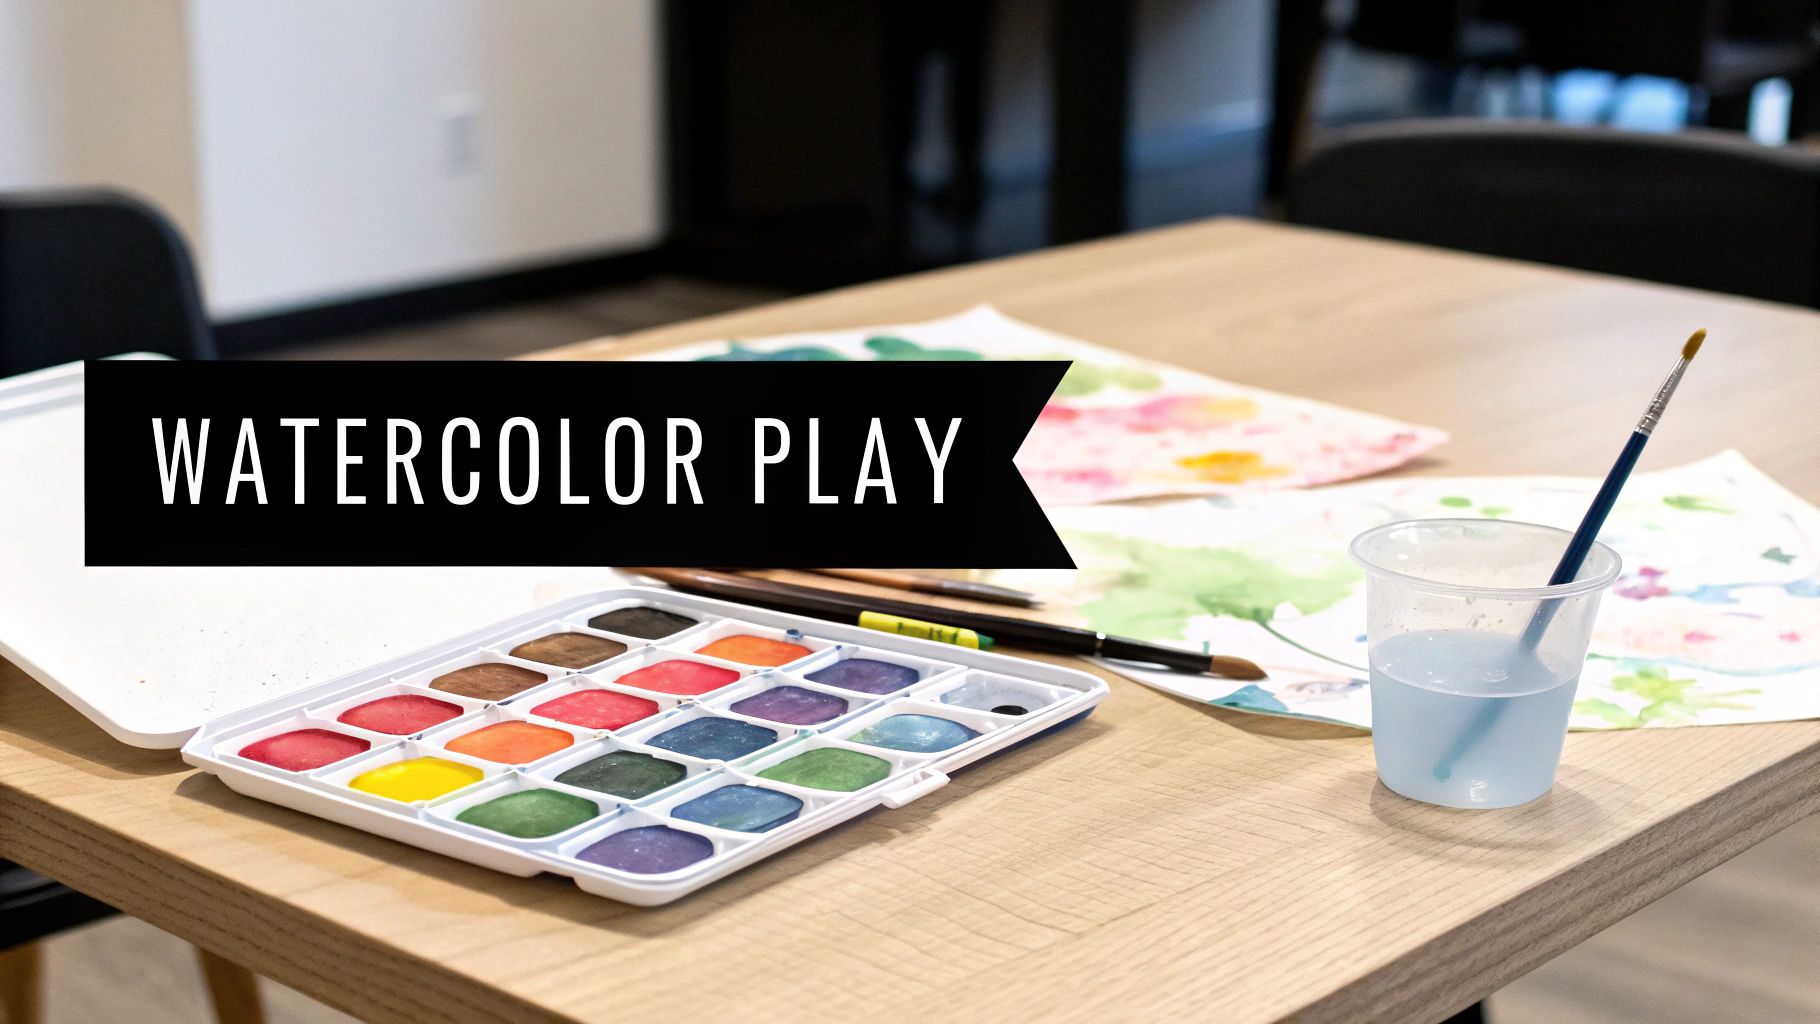
Painting is a classic and foundational art activity that allows children to express their creativity through color and form. It involves using brushes to apply paint to surfaces like paper, canvas, or even cardboard. Watercolor painting is an especially fantastic starting point for younger children because the paints are water-based, making cleanup easier and allowing for beautiful, transparent blending effects. These types of art projects for kids at home are perfect for exploring color theory and developing fine motor skills.
This activity is ideal for a quiet afternoon and can be adapted for any age, from toddlers exploring finger painting to older kids learning techniques from icons like Bob Ross. Brands like Melissa & Doug offer mess-free "Water Wow" books, while Cra-Z-Art kits provide all-in-one project solutions.
Getting Started
- Materials Needed: Washable, non-toxic paints (tempera or watercolor), assorted paintbrushes, thick paper or watercolor paper, a cup for water, and a palette or paper plate for mixing colors.
- Time Estimate: 30-60 minutes.
- Age Group: Ages 2 and up.
Simple Steps for Success
- Protect Your Space: Lay down newspaper or a plastic tablecloth to cover your work surface. An old t-shirt or smock will protect clothing.
- Set Up the Station: Arrange the paper, paints, water cup, and brushes so they are easily accessible for your child.
- Demonstrate Basics: Show your child how to dip the brush in water, then into the paint, and how to rinse the brush between colors to keep them from getting muddy.
- Encourage Exploration: Let them experiment with mixing primary colors (red, yellow, blue) to discover new shades. There are no mistakes, only creative discoveries.
Pro Tip: For a more structured experience that builds confidence, try a simple paint-by-numbers kit designed for children. These kits guide color placement while still allowing for creative expression, making them an excellent bridge to more complex projects. Discover more great painting activities for preschoolers on paint-by-number.com.
2. Collage and Paper Crafting
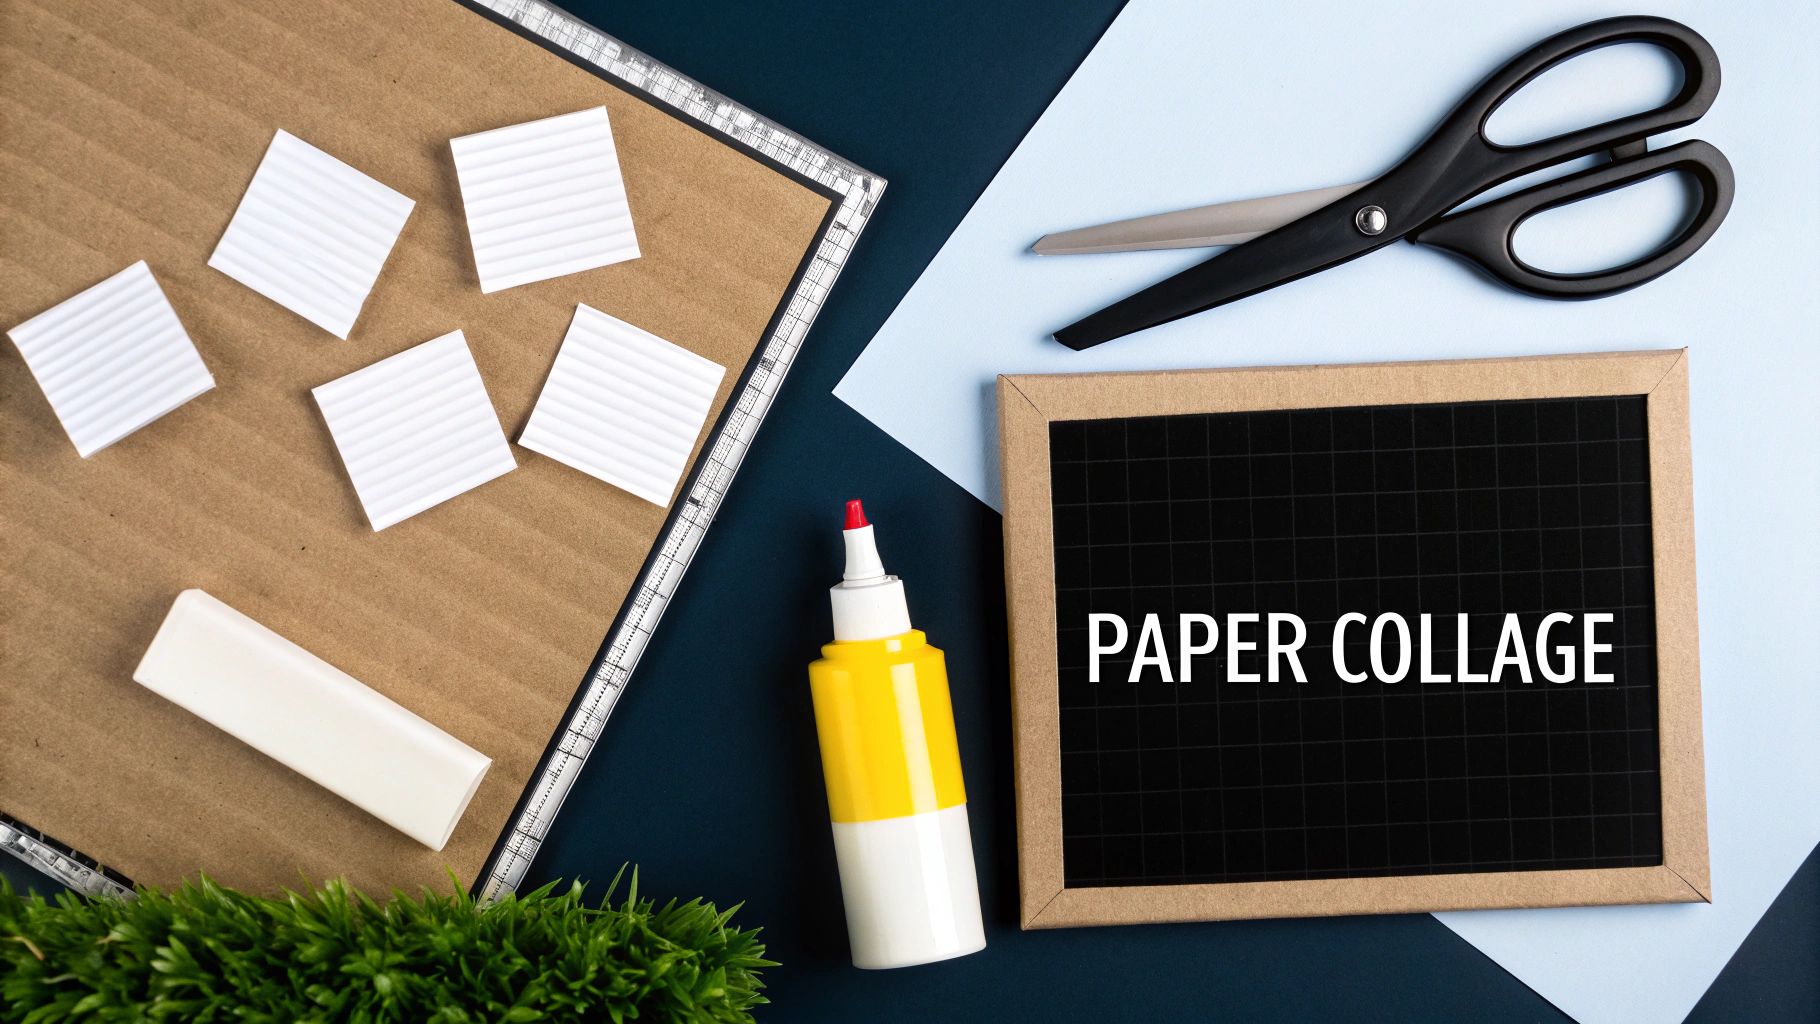
Collage is an imaginative art form where children cut, tear, and arrange different materials like colored paper, magazine clippings, fabric, and other found objects to create a new picture. This mixed-media approach allows for endless creativity, as it encourages kids to combine textures and images into unique compositions. These kinds of art projects for kids at home are exceptional for developing decision-making skills, practicing scissor safety, and understanding composition.
This hands-on activity is inspired by the vibrant paper-cut techniques of artist Henri Matisse and the beloved children's book illustrations of Eric Carle. It can be as simple as gluing shapes onto paper or as complex as creating a themed mood board from magazine cut-outs. Brands like Roylco offer specialty collage paper packs that add extra texture and fun to any project.
Getting Started
- Materials Needed: Construction paper, old magazines or newspapers, child-safe scissors, glue sticks, and a sturdy base like cardstock or a piece of cardboard.
- Time Estimate: 30-45 minutes.
- Age Group: Ages 3 and up.
Simple Steps for Success
- Prepare the Materials: Pre-cut shapes for younger children or provide a variety of materials for older kids to explore. Organize items in small trays by color or type.
- Choose a Theme: Encourage your child to think of a theme, like an animal, a landscape, or a self-portrait. This helps guide their creative choices.
- Arrange and Plan: Before gluing, have your child arrange their chosen pieces on the base paper. This step teaches planning and composition without the pressure of permanent placement.
- Glue Everything Down: Once they are happy with the layout, use a glue stick for a less-messy application to secure all the pieces in place.
Pro Tip: For a structured yet creative experience, challenge your child to create a specific scene or object, like an underwater world or a favorite food. This provides a clear goal while still allowing total freedom in how they use the materials. Find more inspiration for your next creation with these rainy day crafts for kids on paint-by-number.com.
3. Drawing and Sketching
Drawing is the fundamental building block of visual art, allowing children to translate their thoughts and observations into images. Using simple tools like pencils, crayons, or markers on paper, this activity develops crucial observational skills, hand-eye coordination, and an understanding of form and space. These types of art projects for kids at home are incredibly accessible and serve as the perfect low-mess, high-impact creative outlet.
This timeless activity can be as simple as scribbling with crayons or as structured as following a guided lesson. Brands like Strathmore offer high-quality Kids Paper sketch pads, while subscription services like Drawingbox provide curated lessons and supplies. For a meditative twist, older kids can explore Zentangle patterns, a method of creating beautiful images from repetitive strokes.
Getting Started
- Materials Needed: Paper or a sketchbook, drawing tools (pencils, colored pencils, crayons, markers), and an eraser.
- Time Estimate: 20-45 minutes.
- Age Group: Ages 2 and up.
Simple Steps for Success
- Gather Your Tools: Set out a clean sheet of paper and a selection of drawing instruments. A comfortable, well-lit space is key.
- Start with Shapes: Encourage younger children to draw basic shapes like circles, squares, and triangles. Show them how these simple forms can be combined to create more complex objects like a house or a person.
- Use a Reference: For older kids, provide a reference image like a family pet, a favorite toy, or a picture from a book. This helps them practice observation and improve accuracy.
- Practice and Track Progress: Encourage keeping a sketchbook to see how their skills develop over time. Celebrate every creation, focusing on effort rather than perfection.
Pro Tip: Providing your child with quality materials can significantly boost their confidence and enjoyment. A good set of colored pencils or markers that blend well will make their artistic vision come to life more vividly. Discover a guide to the best art supplies for beginners on paint-by-number.com to get started on the right foot.
4. Clay Modeling and Sculpting
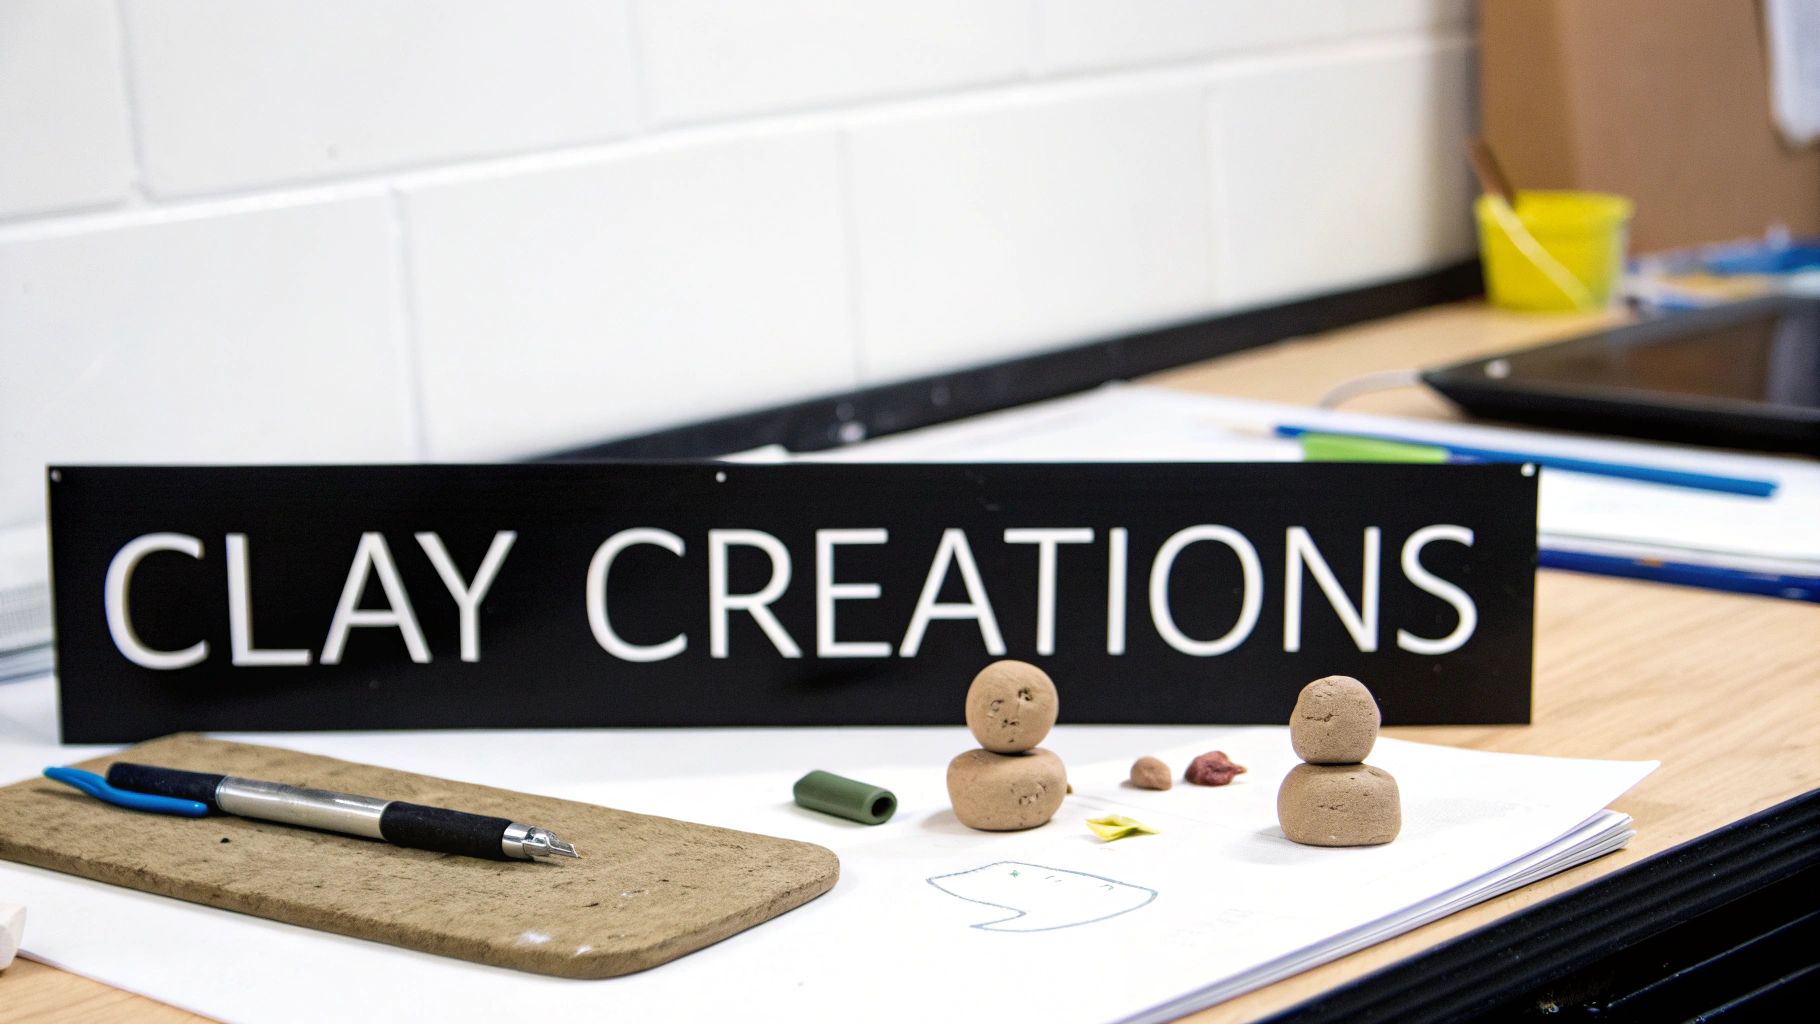
Clay modeling and sculpting introduce children to the world of three-dimensional art, allowing them to transform a simple lump of material into a tangible creation. This tactile activity involves molding, pinching, rolling, and shaping clay by hand. Air-dry and polymer clays are excellent for home use because they don't require a professional kiln, making these types of art projects for kids at home incredibly accessible for developing spatial awareness and strengthening hand muscles.
This hands-on project is perfect for kids who love sensory play and building things. Brands like Sculpey and Fimo offer a rainbow of polymer clay colors, while Das Air-Dry Clay is a classic for creating sturdy, paintable sculptures. Children can start with traditional techniques like making pinch pots and graduate to crafting detailed figures or beads.
Getting Started
- Materials Needed: Air-dry clay or polymer clay (non-toxic), a smooth work surface (like a silicone mat or wax paper), simple sculpting tools (plastic knives, toothpicks), a small cup of water for smoothing, and optional acrylic paint and varnish for finishing.
- Time Estimate: 45-90 minutes (plus drying or baking time).
- Age Group: Ages 4 and up.
Simple Steps for Success
- Prepare Your Workspace: Cover your table to protect it. Clay can be messy, so having a dedicated, easy-to-clean area is key.
- Knead the Clay: Have your child work the clay with their hands to soften it and make it more pliable. This is a great sensory warm-up.
- Start with Simple Shapes: Encourage them to roll spheres, flatten pancakes, and create coil "snakes." These basic forms are the building blocks for more complex sculptures.
- Create and Refine: Let them build their creation, whether it's a small animal, a bowl, or an abstract shape. Use a little water on a fingertip to smooth out cracks in air-dry clay.
- Dry or Bake: Follow the package instructions carefully. Air-dry clay may take 24-48 hours to harden completely, while polymer clay needs to be baked in a home oven by an adult.
Pro Tip: Keep unused clay fresh by storing it in an airtight container or a sealed plastic bag. For air-dry clay, wrap it in a damp paper towel before sealing it to prevent it from drying out prematurely. This small step ensures your materials are ready for the next burst of creativity.
5. Printmaking and Stamping
Printmaking is a versatile art form that allows children to create multiple images from a single design by pressing an inked surface onto paper or fabric. At-home methods like potato printing, sponge stamping, and using foam blocks are incredibly accessible and fun. These types of art projects for kids at home introduce concepts of repetition, pattern, and positive/negative space in a hands-on, engaging way. It's a fantastic method for making greeting cards, wrapping paper, or even custom t-shirts.
This activity is perfect for all ages, from toddlers enjoying the sensory feel of sponge stamping to older kids carving intricate designs into potatoes or foam blocks. Brands like Stampin' Up! offer curated stamp collections, while DIY options using household items like bottle caps or leaves make it a spontaneous and low-cost project.
Getting Started
- Materials Needed: Washable ink pads or tempera paint, paper or fabric, and stamping tools (potatoes, sponges, foam sheets, leaves, or pre-made stamps). A paper plate for paint.
- Time Estimate: 30-45 minutes.
- Age Group: Ages 2 and up.
Simple Steps for Success
- Prepare Your Stamp: If using a potato, an adult should carefully cut it in half and carve a simple shape (star, heart, etc.). Sponges can be cut into various shapes.
- Set Up the Ink/Paint: Squeeze a small amount of paint onto a paper plate or open your ink pad. Keep it easily accessible.
- Demonstrate the Technique: Show your child how to gently press the stamp into the paint or ink, ensuring even coverage, and then press it firmly and vertically onto the paper.
- Encourage Pattern Play: Let them experiment with creating patterns by repeating, rotating, and overlapping their stamped designs. Encourage them to try different colors and see what happens.
Pro Tip: For a mess-free and highly detailed stamping experience, try a beginner's paint-by-numbers kit. These kits often involve numbered sections that correspond to specific colors, teaching precision and color association in a structured way that feels like a sophisticated art project. Explore options for young artists at paint-by-number.com.
6. Nature Art and Outdoor Crafting
Nature art invites children to step outside and use the natural world as their art supply store. This hands-on activity involves collecting materials like leaves, twigs, stones, and flowers to create unique pieces of art. From creating temporary land art inspired by artists like Andy Goldsworthy to making lasting collages, these art projects for kids at home connect children with their environment, teaching them to appreciate the beauty in natural textures, shapes, and colors.

This type of crafting is perfect for a sunny day and encourages exploration and observation. It’s an incredibly versatile activity, suitable for toddlers arranging pebbles on the grass to older kids creating intricate pressed flower bookmarks or detailed leaf rubbings. The Forest School education movement has popularized this approach, emphasizing its benefits for sensory development and environmental awareness.
Getting Started
- Materials Needed: A collection bag or box, glue suitable for organic materials, thick paper or cardboard, and any natural items you can find (leaves, twigs, flowers, pebbles, seeds). Optional: crayons or charcoal for rubbings.
- Time Estimate: 45-75 minutes (including collection time).
- Age Group: Ages 3 and up.
Simple Steps for Success
- Go on a Nature Walk: Head to your backyard, a local park, or a trail to collect interesting natural treasures. Encourage your child to look for different shapes, colors, and textures.
- Sort Your Finds: Once back home, lay out all the collected items. Sort them by type, size, or color to see what you have to work with.
- Create Your Masterpiece: Arrange the items on a piece of cardboard or heavy paper to create a picture, pattern, or abstract design. This could be a nature collage, a leaf animal, or a rock family.
- Secure and Preserve: Once your child is happy with the design, use glue to stick the items down. For temporary art, like land art in the yard, be sure to take a photo to document the creation.
Pro Tip: To preserve the vibrant colors of leaves and flowers, press them between the pages of a heavy book (with newspaper to absorb moisture) for a week or two before using them in a craft. This makes them flat and easy to glue for projects like bookmarks or suncatchers. For more ideas, check out the Woodland Trust's guide to nature art.
7. Mixed Media and Assemblage Art
Mixed media art is a boundary-breaking activity that combines multiple materials and techniques, like paint, collage, found objects, and textiles, into a single cohesive piece. It encourages children to think outside the box, viewing everyday items as potential art supplies. These types of art projects for kids at home are fantastic for developing creative problem-solving skills and tactile awareness.
This art form is perfect for using up leftover craft supplies and turning "junk" into treasure. It can be as simple as an assemblage box of collected trinkets or a complex vision board made with magazine clippings. Artists like Robert Rauschenberg pioneered this style, showing that art can be made from anything.
Getting Started
- Materials Needed: A base (cardboard, canvas, wood box), a collection of "found objects" (buttons, fabric scraps, yarn, old toy parts, beads, nature items), strong glue (like PVA or a glue gun for older kids), scissors, and optional additions like paint or markers.
- Time Estimate: 45-75 minutes.
- Age Group: Ages 4 and up.
Simple Steps for Success
- Gather Your Treasures: Create a "maker tray" or "junk drawer" filled with interesting materials. Let your child sort through and pick their favorites.
- Choose a Base: Select a sturdy foundation like a piece of cardboard, the inside of a shoebox lid, or a small canvas.
- Arrange First, Glue Later: Encourage your child to plan their composition by arranging the objects on the base before gluing anything down. This teaches them about balance and layout.
- Layer and Build: Show them how to layer materials for depth. They can paint a background first, then glue down larger items, and finish with smaller details like beads or yarn.
Pro Tip: For festive crafting that encourages creativity and family involvement, consider exploring guides on creating your own unique DIY advent calendar ornaments. Each ornament can be a mini mixed media project, combining different materials to represent each day leading up to the holiday, making it a memorable family tradition.
8. String Art and Thread Painting
String art is a captivating project that blends geometry with creativity, allowing children to create striking images by wrapping colorful thread or yarn around a grid of nails or pins. This technique produces beautiful, textured artwork through the tension and layering of fibers, transforming a simple board into a dynamic piece. These types of art projects for kids at home are excellent for older children and teens, helping to develop patience, planning, and fine motor precision.
This activity is a fantastic way to introduce concepts like geometry and spatial reasoning in a hands-on, artistic format. Kids can create anything from simple geometric shapes to personalized name plaques or even intricate constellation maps. The process is both meditative and rewarding, resulting in a unique piece of decor they can proudly display.
Getting Started
- Materials Needed: A wooden board or corkboard, small nails with heads (or pins for corkboard), a small hammer, embroidery floss or colorful yarn, and a printed template or pencil for sketching a design.
- Time Estimate: 60-90 minutes, depending on design complexity.
- Age Group: Ages 8 and up (with adult supervision for hammering).
Simple Steps for Success
- Prepare the Board: If using a wooden board, you can paint or stain it first and let it dry completely. This adds a finished look to the project.
- Position Your Design: Place your printed template on the board or sketch your design directly onto the surface with a pencil.
- Set the Nails: Carefully hammer the nails along the outline of your design, keeping them evenly spaced. An adult should handle or closely supervise this step.
- Start Wrapping: Tie the end of your string securely to one of the nails. Begin wrapping the string from one nail to another, creating lines and filling in the shape. Encourage experimenting with different wrapping patterns to create unique textures.
Pro Tip: For younger children or a hammer-free alternative, use a thick piece of styrofoam or corkboard and sturdy push pins instead of nails. This makes the project safer and more accessible, allowing them to focus entirely on the creative threading process. You can find more kid-friendly craft ideas at The Spruce Crafts.
9. Decoupage and Paper Decoration
Decoupage is the art of decorating an object by gluing colored paper cutouts onto it and finishing with several coats of varnish. This technique transforms everyday items like boxes, jars, or picture frames into personalized works of art. It’s a wonderful way to teach children about upcycling and patience, as they carefully arrange and layer paper to create a durable, glossy finish. These types of art projects for kids at home are excellent for developing fine motor skills, planning, and concentration.
This activity is perfect for a focused crafting session and can be tailored to any theme or interest. Children can decorate a memory box with family photos, a pencil holder with comic book clippings, or a simple picture frame with colorful tissue paper. Popular brands like Mod Podge offer all-in-one glue, sealer, and finish products that are non-toxic and perfect for kids' crafts.
Getting Started
- Materials Needed: An object to decorate (wooden box, glass jar, cardboard frame), assorted paper (magazines, scrapbook paper, tissue paper, printed images), child-safe scissors, Mod Podge or a non-toxic decoupage medium, and a paintbrush or foam brush.
- Time Estimate: 45-75 minutes (plus drying time).
- Age Group: Ages 5 and up.
Simple Steps for Success
- Prepare Your Materials: Cut or tear your chosen papers into small, manageable shapes and sizes. Ensure the surface of your object is clean and dry.
- Apply the Glue: Using a foam brush, apply a thin, even layer of Mod Podge to a small section of your object.
- Place the Paper: Carefully place a piece of paper onto the glued area. Use your finger or the brush to gently smooth out any air bubbles or wrinkles.
- Seal the Deal: Once the entire surface is covered with paper, apply a thin top coat of Mod Podge over everything to seal it. Let it dry completely and add a second or third coat for extra durability.
Pro Tip: For younger kids who might struggle with precise cutting, tearing paper creates a beautiful, soft-edged mosaic effect. Encourage them to overlap the pieces to ensure the entire surface is covered, resulting in a vibrant and textured final product that they can be proud of.
10. Mandala and Pattern Drawing
Mandala and pattern drawing are meditative art forms that involve creating intricate, symmetrical designs. A mandala, which means "circle" in Sanskrit, is a geometric design that holds symbolic meaning, while pattern drawing, like the popular Zentangle method, focuses on creating beautiful images by drawing structured patterns. These types of art projects for kids at home are exceptional for promoting mindfulness, focus, and patience.
This activity offers a peaceful and structured way to be creative, making it ideal for children who enjoy detailed work or need a calming outlet. The repetitive nature of creating patterns can be incredibly soothing and satisfying. From simple printed templates for young kids to complex compass-drawn designs for teens, this art form scales beautifully with age and skill level.
Getting Started
- Materials Needed: Paper (grid or plain), fine-tip markers or pens, colored pencils, a pencil and eraser, a ruler, and a compass or protractor (optional).
- Time Estimate: 30-90 minutes.
- Age Group: Ages 6 and up.
Simple Steps for Success
- Start with a Framework: For a classic mandala, use a pencil to lightly draw a central point and a series of concentric circles around it using a compass or by tracing circular objects.
- Work from the Center Out: Begin drawing simple shapes like petals, triangles, or dots in the innermost circle. Repeat the same shape all the way around to maintain symmetry.
- Build Your Layers: Move to the next circle and add a new, repeating pattern. Encourage kids to experiment with different lines, dots, and curves.
- Add Color and Detail: Once the pencil design is complete, trace over it with a fine-tip marker. Erase any leftover pencil lines and fill the sections with vibrant colors.
Pro Tip: If freehand drawing feels daunting, start with a guided experience. Using a paint-by-numbers kit that features a mandala design can help children understand pattern, symmetry, and color balance in a structured, fail-proof format. This builds confidence and provides a beautiful piece of art to display.
10-Item Comparison: Kids Home Art Projects
| Activity | 🔄 Complexity | ⚡ Resources & setup | 📊 Expected outcomes | 💡 Ideal use cases | ⭐ Key advantages |
|---|---|---|---|---|---|
| Painting and Watercolor Art | Low–Moderate — basic brush control | Low: paints, brushes, paper; washable options | Colorful 2D pieces; immediate visible results | Beginner lessons, expressive play, short sessions | Affordable, teaches color mixing & fine motor skills |
| Collage and Paper Crafting | Low — cutting & arranging skills | Low: scissors, glue, recycled paper/fabrics | Mixed 2D/3D compositions; often fragile | Recycling projects, composition practice, group crafts | Encourages composition, recycling, no drawing skill needed |
| Drawing and Sketching | Low — foundational techniques | Minimal: pencils, erasers, sketchbook | Sketches and studies; improves observation | Portable practice, fundamentals, warm-ups | Builds observation, low-cost, highly portable |
| Clay Modeling and Sculpting | Moderate — hand-building techniques | Moderate: clay, tools, storage; oven for polymer | Tactile 3D objects; displayable after drying/baking | Sensory activities, gifts, 3D thinking exercises | Develops fine motor strength, tactile learning, lasting pieces |
| Printmaking and Stamping | Low–Moderate — repeatable process | Low: stamps/blocks, ink pads, paper/fabric | Repeatable prints and patterns; variable consistency | Pattern exploration, card-making, small batch crafts | Produces multiples, teaches pattern recognition affordably |
| Nature Art and Outdoor Crafting | Low — collection & simple assembly | Very low: found materials, glue/adhesive optional | Ephemeral or preserved natural artworks | Outdoor education, nature walks, seasonal projects | Free materials, builds environmental awareness and observation |
| Mixed Media and Assemblage Art | Moderate–High — multi‑technique planning | High: varied materials, adhesives, storage space | Unique hybrid 2D/3D pieces; often textural | Experimental projects, memory/mood boards, advanced class | Fosters creativity, material problem-solving, one‑of‑a‑kind results |
| String Art and Thread Painting | Moderate — planning & precision | Low–Moderate: board, nails/pins, thread; adult tools | Durable dimensional designs with geometric impact | Geometry-themed projects, gifts, focused craft sessions | Visually striking, teaches planning and patience |
| Decoupage and Paper Decoration | Moderate — surface prep & sealing | Low–Moderate: paper, adhesive (Mod Podge), varnish | Decorated functional objects with protected finish | Upcycling, personalized gifts, home decor projects | Upcycles items, teaches finishing techniques for durability |
| Mandala and Pattern Drawing | Low–Moderate — steady hand & repetition | Minimal: paper, pens, compass/rulers optional | Intricate, symmetrical designs; meditative results | Mindfulness activities, focus exercises, art therapy | Calming practice, builds precision and concentration |
Your Next Masterpiece Awaits: Keeping the Creative Momentum Going
We’ve journeyed through a vibrant world of creativity, exploring ten distinct categories of art projects for kids at home. From the simple joy of finger painting and the tactile satisfaction of clay sculpting to the mindful focus required for mandala drawing, you now have a comprehensive toolkit to banish boredom and spark imagination. This collection of activities is more than just a list; it’s a launchpad for discovery, designed to meet your child wherever they are on their creative journey.
The true magic of these projects lies not in a perfect, gallery-worthy outcome, but in the process itself. It's in the happy mess, the surprising color choices, and the proud smile that comes with a finished piece. By engaging in these hands-on activities, children aren't just making art; they are building a foundation of critical life skills.
Recapping the Creative Journey
Let's briefly revisit the core benefits we've uncovered across these varied artistic endeavors:
- Motor Skills Development: Activities like string art, clay modeling, and detailed sketching refine fine motor control and hand-eye coordination.
- Problem-Solving: Collage and mixed media projects challenge kids to think critically about how different materials and shapes fit together to create a cohesive whole.
- Sensory Exploration: Nature art and printmaking provide rich sensory experiences, connecting children to different textures, scents, and the physical world around them.
- Emotional Expression: Art offers a vital, non-verbal outlet for children to process feelings, tell stories, and express their unique personalities in a safe and constructive way.
Remember, the goal is to foster a love for creation, not to enforce rigid rules. The variations and tips provided for each project are merely starting points. Encourage your child to experiment, to combine techniques, and to see where their imagination takes them. What happens when you use natural dyes in your watercolor painting? Or add bits of clay to a collage? This is where true innovation begins.
Making Art a Lasting Habit
Integrating art into your family’s routine is the key to keeping this creative momentum alive. It doesn’t need to be a large, complicated affair every time. Dedicating a small, accessible space for art supplies, or scheduling a simple 20-minute drawing session after school, can make creativity a natural and anticipated part of the day.
Key Takeaway: The most important step is to celebrate the effort, not just the result. Display your child's artwork proudly on the refrigerator, a dedicated bulletin board, or in framed arrangements. This simple act communicates that their creative work is valued, which builds the confidence they need to continue exploring and taking artistic risks.
As your child's skills and interests grow, you can introduce more structured challenges. For a truly special and memorable project that bridges the gap between playful creation and a polished final product, consider transforming a favorite family photo or a beloved pet's picture into a guided painting experience. This approach provides the perfect scaffold for young artists who are ready for a more detailed project but still benefit from clear direction. It turns a simple craft session into an opportunity to create a lasting keepsake, making the experience both educational and deeply personal.
The world of art projects for kids at home is vast and endlessly rewarding. Use this guide as your trusted companion. Keep it handy for rainy days, quiet weekends, or any moment that calls for a splash of color and a dash of ingenuity. You are not just filling time; you are nurturing a young artist, building a creative thinker, and making memories that will last a lifetime.
Ready to turn a cherished memory into a stunning work of art? Create a unique and engaging painting experience with a Custom Paint By Numbers kit, the perfect next step for any budding artist in your family. Visit us at Custom Paint By Numbers to upload your photo and start your next masterpiece today.


