

Ready to elevate your paint-by-number creations from pretty good to absolutely stunning? The secret lies in one simple technique: blending. I'm going to show you how to blend painting by softening those hard lines between colors. It’s the trick to adding incredible depth and realism, turning that numbered canvas into a true piece of art.
Transform Your Art with Simple Blending Techniques
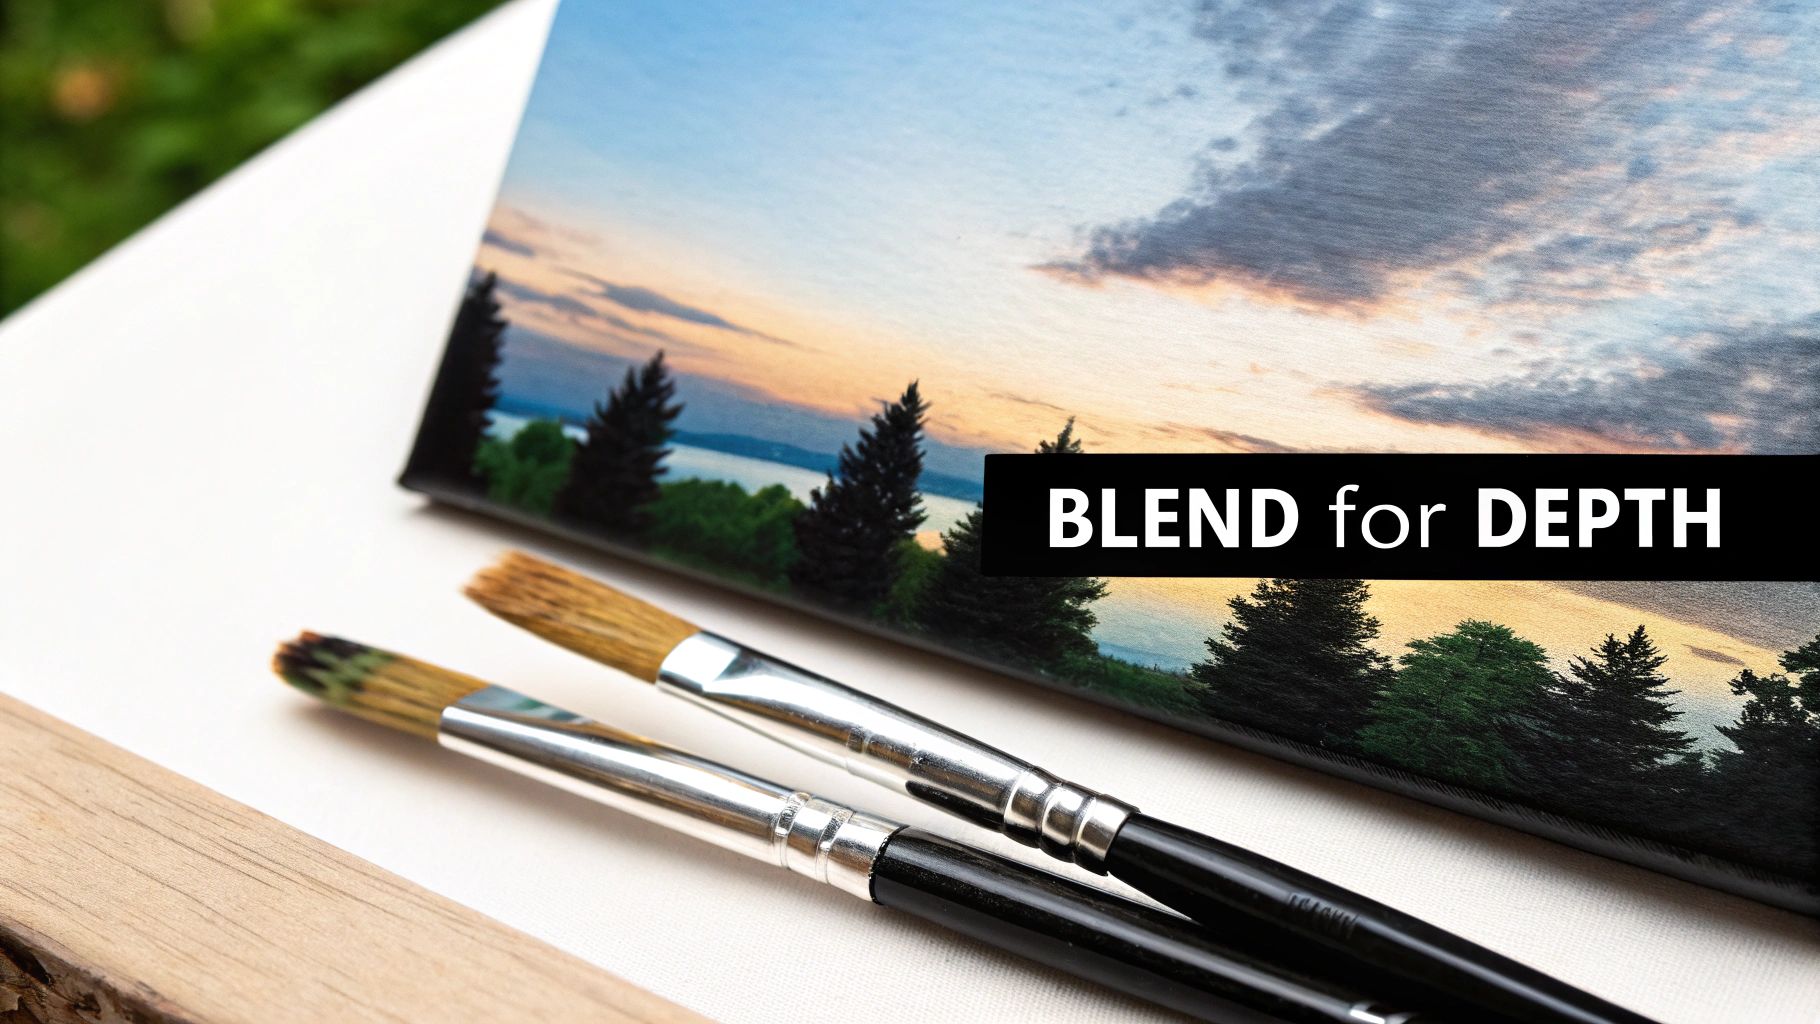
Forget those rigid, choppy sections that scream "paint-by-number." Instead, picture a smooth, gorgeous sunset sky or the soft, natural curve of a cheek on a custom portrait. Blending is what makes your art feel alive.
This guide breaks it all down into easy, doable steps. You really don't need years of art school to get that professional, polished look. In fact, learning this one skill will completely change the game for your hobby. It's how you make a painting look less like a kit and more like your art.
Why Blending Matters
Honestly, if there's one skill that will have the biggest impact on your work, this is it. It’s what separates a nice-looking project from a jaw-dropping one.
- It Looks More Realistic: Think about it—nature rarely has sharp, defined edges. Blending helps you recreate the soft color shifts you see in a real sunset or a flower petal.
- It Creates Depth: By softening the transition between light and dark areas, you create an illusion of three dimensions. Suddenly, your painting doesn't look so flat anymore.
- It’s a Great Fix-It Tool: Did you paint outside the lines? Is a number peeking through? A quick, gentle blend can often cover up those little mistakes seamlessly.
The difference is truly amazing. Hobbyist surveys show that blending not only mimics the beautiful effects of oil painting but can also boost project completion rates by up to 30%. It’s that satisfying. Discover more insights from this paint-by-number kit market report.
The techniques here are designed specifically for the acrylic paints that come in your kit. Once you've got this down and are hungry for more, you can always explore other creative arts courses to keep growing. With just a few small tweaks to how you paint, you'll see a huge improvement in your finished pieces.
Setting Up Your Blending Workspace
A great painting session starts before the brush even hits the canvas. Taking a few moments to set up a dedicated, organized space is the first real step toward learning how to blend your paints smoothly. Think of it as mise en place for painting—a little prep work now saves you from frustrating interruptions later.
The good news? You don’t need a fancy studio. A clean spot on your kitchen table with some newspaper thrown down is all it takes. The real secret is having your tools right where you can grab them, so you can work quickly while that acrylic paint is still workable.
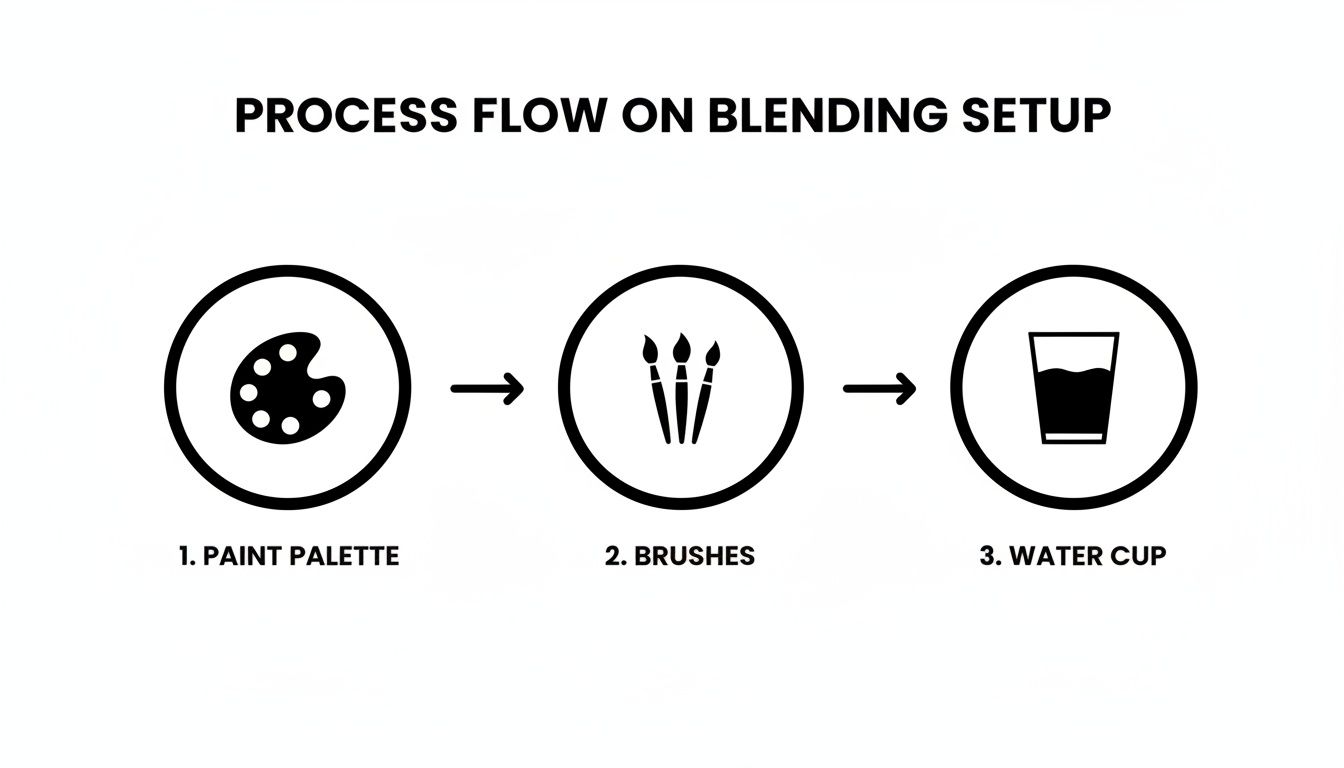
Gather Your Essential Blending Tools
Your paint-by-number kit gives you a fantastic starting point. The trick is simply knowing how to use those tools specifically for blending. You’ll just need to grab a couple of common household items to make the whole process a lot easier.
To get started, let’s pull together a quick reference guide for your blending toolkit.
Your Blending Toolkit Breakdown
This table breaks down the simple tools you'll need and what they're used for. It’s all about having the right tool for the job at the right moment.
| Tool | Primary Use in Blending | Pro Tip |
|---|---|---|
| Your Brushes | The flat brush is for large areas; the round brush is for more controlled blending. | Keep them clean! A dirty brush will muddy your colors in an instant. |
| A Palette | Holding and mixing your paints before applying them to the canvas. | A simple paper plate or a small ceramic dish works perfectly. No need to get fancy. |
| Two Water Cups | One for rinsing brushes and one for clean water to thin paints. | This is non-negotiable. Using dirty rinse water to thin paint is the fastest way to get muddy, dull colors. |
| Paper Towels | Dabbing excess water or paint from your brush. | Essential for controlling how much paint you apply and for techniques like dry brushing. |
Having these items ready to go means you can lose yourself in the process instead of scrambling for supplies. The global art and craft tools market is projected to hit $6.39 billion by 2032, but your success doesn’t hinge on expensive gear. In fact, for paint-by-number artists, simply having the right three precision brushes can lead to a 90% success rate in blending. You can dive deeper into how to choose and use the different types of brushes in your paint-by-number kit in our detailed guide.
Understanding Your Brush's Role
Each brush in your kit is designed for a specific job, especially when it comes to creating those seamless gradients. Knowing which one to grab and when will make your blending efforts so much more effective.
An artist's workspace is a reflection of their process. Keeping it simple and organized allows you to maintain a creative flow without getting bogged down by searching for supplies.
Here's a practical way to think about it: Grab the broad, flat brush for big areas like skies or fields where you need to merge two colors over a large space. The round brush gives you way more control for blending in medium-sized sections, like the petals on a flower. And that tiny liner brush? While it’s not your main blending tool, it’s a secret weapon for softening the hard edges where two small, detailed color areas meet. Approaching your canvas with this strategy will level up your results almost immediately.
Creating Soft Transitions with Wet-On-Wet Blending
This is where the real magic happens. If you've ever admired a painting with a soft, seamless gradient—think of a hazy morning sky or the gentle fade of color on a flower petal—you were likely looking at a wet-on-wet technique. It’s my go-to method for tackling large areas in a paint-by-number, like skies, water, or open fields.
The idea is straightforward: you lay down a second color right next to your first one while both are still wet. This lets them mingle and mix directly on the canvas, creating a beautiful, natural transition. The only catch? Acrylics dry fast, sometimes in less than 10 minutes. So, the secret is to work with a bit of speed and have everything ready to go beforehand.
A little prep makes a world of difference. This simple setup is all you need to get in the zone and work without a hitch.
Keeping your palette, brushes, and water close means you can focus entirely on the blend before that paint starts to set.
The Core Technique Explained
Let’s walk through a classic example: a simple sunset. You’ve got a patch of light blue sky that needs to fade into a warm yellow at the horizon.
First, load up a flat brush with your blue paint and lay down a solid, even coat on the top half of the area. Don't stop to rinse your brush! Just give it a quick wipe on a paper towel, pick up your yellow paint, and fill in the bottom half. Bring the yellow right up until it just kisses the wet edge of the blue.
Now for the fun part. Using light, feathery strokes—either back-and-forth or in a criss-cross pattern—gently dance your brush along the line where the two colors meet. You'll see them start to blur together, creating a new orange hue in the middle. The key is a light touch; you want to coax the colors to mix, not scrub them into a muddy mess.
I see it all the time with beginners: the biggest mistake is overworking the blend. A few gentle passes are usually enough. If it starts to look muddy, just stop. Let it dry completely. You can always come back and fix it with a thin layer of paint later on.
Mastering Your Paint Consistency
The thickness of your paint will make or break your blend. If it’s too thick, it will clump and refuse to merge smoothly. Too thin, and you'll have a watery, transparent mess. The sweet spot is something like the consistency of melted ice cream—creamy and flowing, but not runny.
- Paint too thick? Dip your brush in a tiny bit of clean water and mix it into the paint on your palette. Seriously, just a drop is often enough.
- Paint too thin? You've probably been a little too enthusiastic with the water. No worries, just add a bit more fresh paint from the pot to thicken it back up.
- Drying too fast? Break it down. Instead of trying to blend the entire sky in one go, work in smaller, more manageable patches. Blend one section, then move to the area next to it while the edge is still wet.
Getting a feel for this comes with practice. For a deeper dive into getting your colors just right, our guide on mixing acrylic paint for your projects is a great next step. When you combine good mixing with good blending, you gain complete creative control.
It’s interesting how this principle pops up elsewhere. Photographers, for instance, often learn how to blur backgrounds in photos to achieve a similar sense of depth and guide the viewer’s eye. Mastering wet-on-wet blending is your first step to creating that same professional, polished look in your own artwork.
Creating Subtle Gradients with The Glazing Method
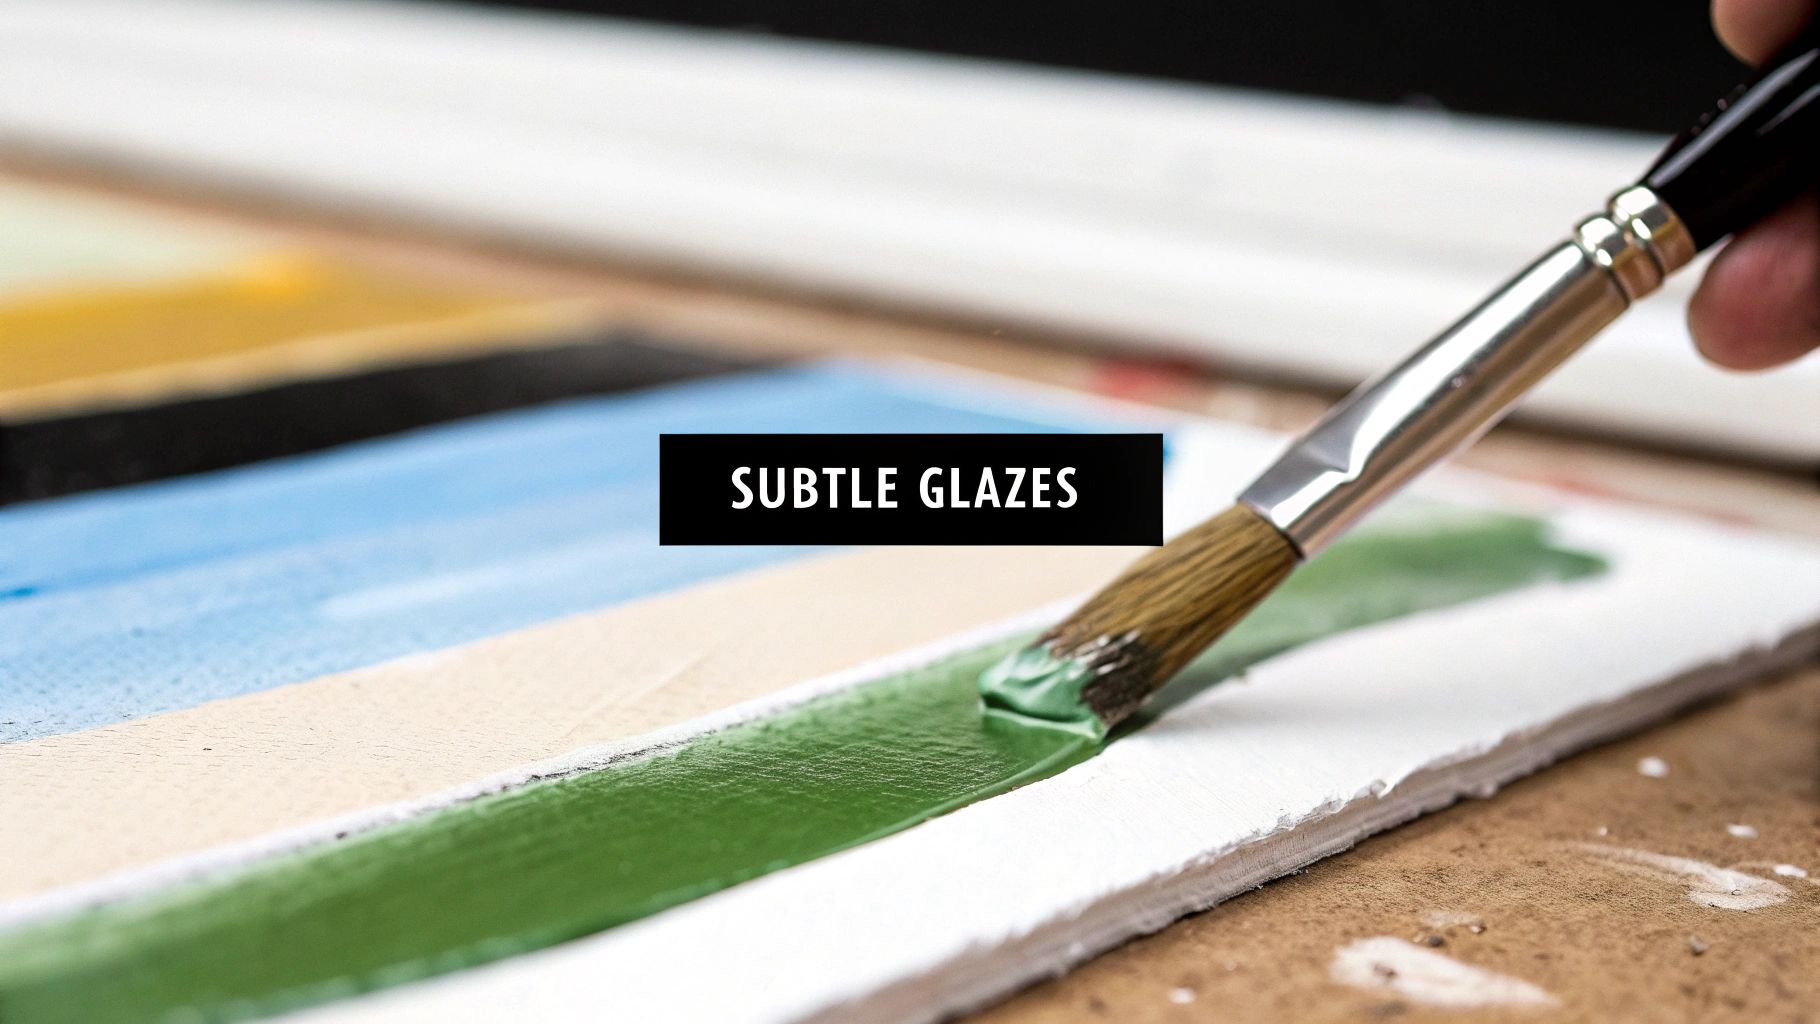
While wet-on-wet blending is fantastic for big, bold transitions, some parts of your painting call for a much lighter, more controlled touch. That’s where glazing comes in.
Think of glazing as the polar opposite of wet blending. Instead of rushing to mix colors while they’re wet, glazing is a slow, methodical process. You apply super-thin, transparent layers of color over a completely dry base.
This is your secret weapon for creating delicate shadows, realistic skin tones, or the soft shimmer of light hitting a piece of fabric. Glazing gives you a level of precision that’s hard to get any other way, letting you build up color depth one whisper-thin layer at a time.
What Exactly Is a Glaze?
Simply put, a glaze is just acrylic paint that's been thinned with water until it’s translucent. The amount of water you add is everything. The idea isn't to make watery paint, but to create a transparent film of color that tints what’s underneath without hiding it.
Let's say you're trying to add a soft, rosy glow to a cheek in a portrait. If you just slap on a thick layer of pink, it's going to look clownish. But a thin glaze of that same pink over the base skin tone will add just the right amount of color, creating a believable blush that seems to glow from within.
The real magic of glazing is in the layering. Each new coat you add subtly deepens the color and smooths out the gradient. It’s an incredibly forgiving technique that gives you total control over the finished look.
This method works so well because of the high-quality acrylics in modern paint-by-number kits. In fact, data shows that 85% of painters who blend the edges of their color sections get professional-looking gradients. This attention to detail can even boost the perceived value of gift sales by as much as 28%. For a deeper dive, you can check out the 2023-2025 report on the U.S. paint market and its qualities.
Your Step-By-Step Guide to Glazing
Ready to give it a shot? Let’s imagine we’re adding a soft shadow to a piece of clothing, like a fold in a blue curtain.
-
Start with a Dry Foundation: First thing's first: the blue area of the curtain must be completely dry. This is non-negotiable. Trying to glaze over wet paint will only give you a muddy mess.
-
Mix Your Glaze: On your palette, take a tiny bit of a darker blue (or even a touch of black) and mix it with a few drops of water. You're aiming for the consistency of skim milk—very thin and almost watery.
-
Apply the First Layer: Dip your brush into the glaze, then blot most of it off on a paper towel. You want a damp brush, not a dripping one. Now, gently sweep this sheer layer over the area where you want the shadow to appear.
Don't worry if it looks way too light. That's exactly what you want! Let this first layer dry completely. Since it's so thin, this should only take a minute or two.
Building Your Gradient, Layer by Layer
Once that first glaze is dry, you just repeat the process. Apply another thin layer, maybe focusing it a bit more on the deepest part of the shadow. With each new coat, you'll watch the shadow gradually darken, creating a perfectly smooth and realistic transition from light to dark.
This is a fantastic skill to have in your artist's toolkit. You can discover even more ways to level up your work by exploring other canvas painting techniques that elevate your art. When it comes to learning how to blend painting with glazes, patience really is your best friend.
Simple Exercises to Build Blending Confidence
Reading about blending is great, but getting a real feel for it? That only happens when you pick up the brush. The best way to get comfortable is to practice without the pressure of messing up your main project. These quick exercises, done on a spare canvas or even some thick paper, are perfect for building your confidence and understanding how the paint actually behaves.
Think of these as your painter's warm-up. Each drill hones a specific skill, so you can focus on one goal at a time. It’s a hands-on way to take the fear out of blending and really internalize the techniques we've talked about.
The Gradient Swatch Drill
Your first mission is to create a simple value scale. This is all about learning how much paint to load on your brush and how to manage your pressure.
- Start by painting a small patch of a darker color, like a deep blue.
- Right next to it, paint a patch of pure white.
- Now, in the space where they meet, use the wet-on-wet technique. Gently work your brush back and forth, coaxing the two colors to mix until you get a smooth transition from dark to light.
Don't worry about making it perfect. The whole point is just to see how the two values interact and to practice creating that soft, even gradient.
A quick pro tip: The secret to a great blend is moving quickly while both paints are still wet. If you feel the paint getting sticky or starting to lift off the canvas, stop! Let it dry. Trying to force a blend with tacky paint is the surest way to get a muddy mess.
The Two-Color Transition Drill
Okay, let's switch from light and dark to different colors. This exercise is fantastic for seeing how two hues mix together right there on the canvas.
- Pick two colors that work well together. Think about a bright yellow blending into a vibrant red to make a fiery orange, or a cool blue meeting a yellow to create a fresh green.
- Paint them side-by-side. Just like before, lay down your two colors so their wet edges are touching.
- Blend where they meet. Use light, feathery strokes along the seam. You'll see a brand new, intermediate color pop up right in the middle, creating a beautiful, seamless flow.
This is the exact skill you’ll need for painting things like sunsets, ocean waves, or rolling hills where colors need to merge naturally.
The Soft-Edged Shape Drill
Finally, let's practice softening the edges of a shape. This is a game-changer for painting anything that shouldn’t have a hard outline, like clouds, faraway trees, or the soft shadow on a piece of fruit.
Paint a simple shape—a circle or a square works great—in a solid color. Before it has a chance to dry, grab a clean, slightly damp brush. Gently run it along one of the edges using a soft, circular scrubbing motion. You're just trying to blur the line, pulling a tiny bit of the wet paint outward. You’ll watch that hard edge just dissolve into a hazy, soft border, a crucial technique for adding depth and realism to your work.
Got Blending Questions? We've Got Answers
As you start blending, you're bound to run into a few head-scratchers. Don't sweat it—that's totally normal. Every artist has been there, trying to figure out why their paint is misbehaving.
Think of this as your personal troubleshooting guide. I'll walk you through the most common blending hiccups with practical advice that actually works, so you can get back to your canvas with confidence.
My Paint Is Drying Way Too Fast! What Can I Do?
This is, without a doubt, the number one frustration with acrylics. You put your colors down, reach for your blending brush, and... boom. The paint is already tacky and refuses to budge. It feels like a race against time you can never win.
The secret isn't to paint faster, but to work smarter. Instead of tackling a huge area all at once, break it down into smaller, more manageable patches. For example, rather than trying to blend an entire sky, focus on a two-inch strip at a time. Blend it, then move to the next section while the edge is still wet. This simple shift keeps you in control.
Another great trick is to keep a small spray bottle filled with water nearby. A quick, light mist over your work area can give you just enough extra "open time" to get a smooth blend without turning your paint into a runny mess.
Why Do My Blends Look So Muddy?
Ah, the dreaded "mud." This usually happens when you overmix colors on the canvas, especially when they're opposites on the color wheel (like red and green or blue and orange). Instead of a clean gradient, you end up with a dull, brownish blob.
The key here is to use a light touch. Your goal is to gently coax the colors to meet, not to scrub them together. Use soft, feathery strokes right on the seam where the two colors touch. Using a separate, clean, and slightly damp brush just for this blending step works wonders.
A good rule to live by: Less is more. A few delicate passes are almost always better than aggressive, back-and-forth mixing. If you see it starting to look muddy, stop. Seriously, just stop. It's far easier to let that spot dry and fix it with a thin glaze later than it is to rescue an overworked, muddy patch.
Should I Even Bother Blending in Tiny, Detailed Areas?
That's a great question, and the answer really depends on the look you're going for. In a paint-by-number, blending every single tiny edge can sometimes make your details lose their pop and look a bit fuzzy.
Here's how I decide what to do:
- For soft things: If you're painting something without sharp edges—like a fluffy cloud, a distant hill, or a gentle fold in a blanket—a soft blend looks fantastic and adds realism.
- For sharp things: If you're painting something with defined lines—like a building, a piece of jewelry, or the detail in an eye—keeping the edges crisp is usually the better choice to maintain clarity.
Sometimes, all you need is a single, gentle stroke with a tiny, damp liner brush to soften a line just enough without losing the detail. Play around with it and see what feels right for the specific piece you're working on.
Ready to turn your favorite memories into art? At Custom Paint By Numbers, we make it simple to create a personalized canvas from your own photos. Start your custom painting journey today and bring your pictures to life!


