

Ready to dive into mixing your own acrylic colors? It’s simpler than you think. All you really need to get started are five basic tubes of paint: red, yellow, blue, black, and white. With just these, you can create virtually any color imaginable.
Think of these five paints as your foundational toolkit. The primaries give you vibrant new colors, while black and white let you control the value and mood of every hue you mix.
Your First Steps in Mixing Acrylic Paint Colors
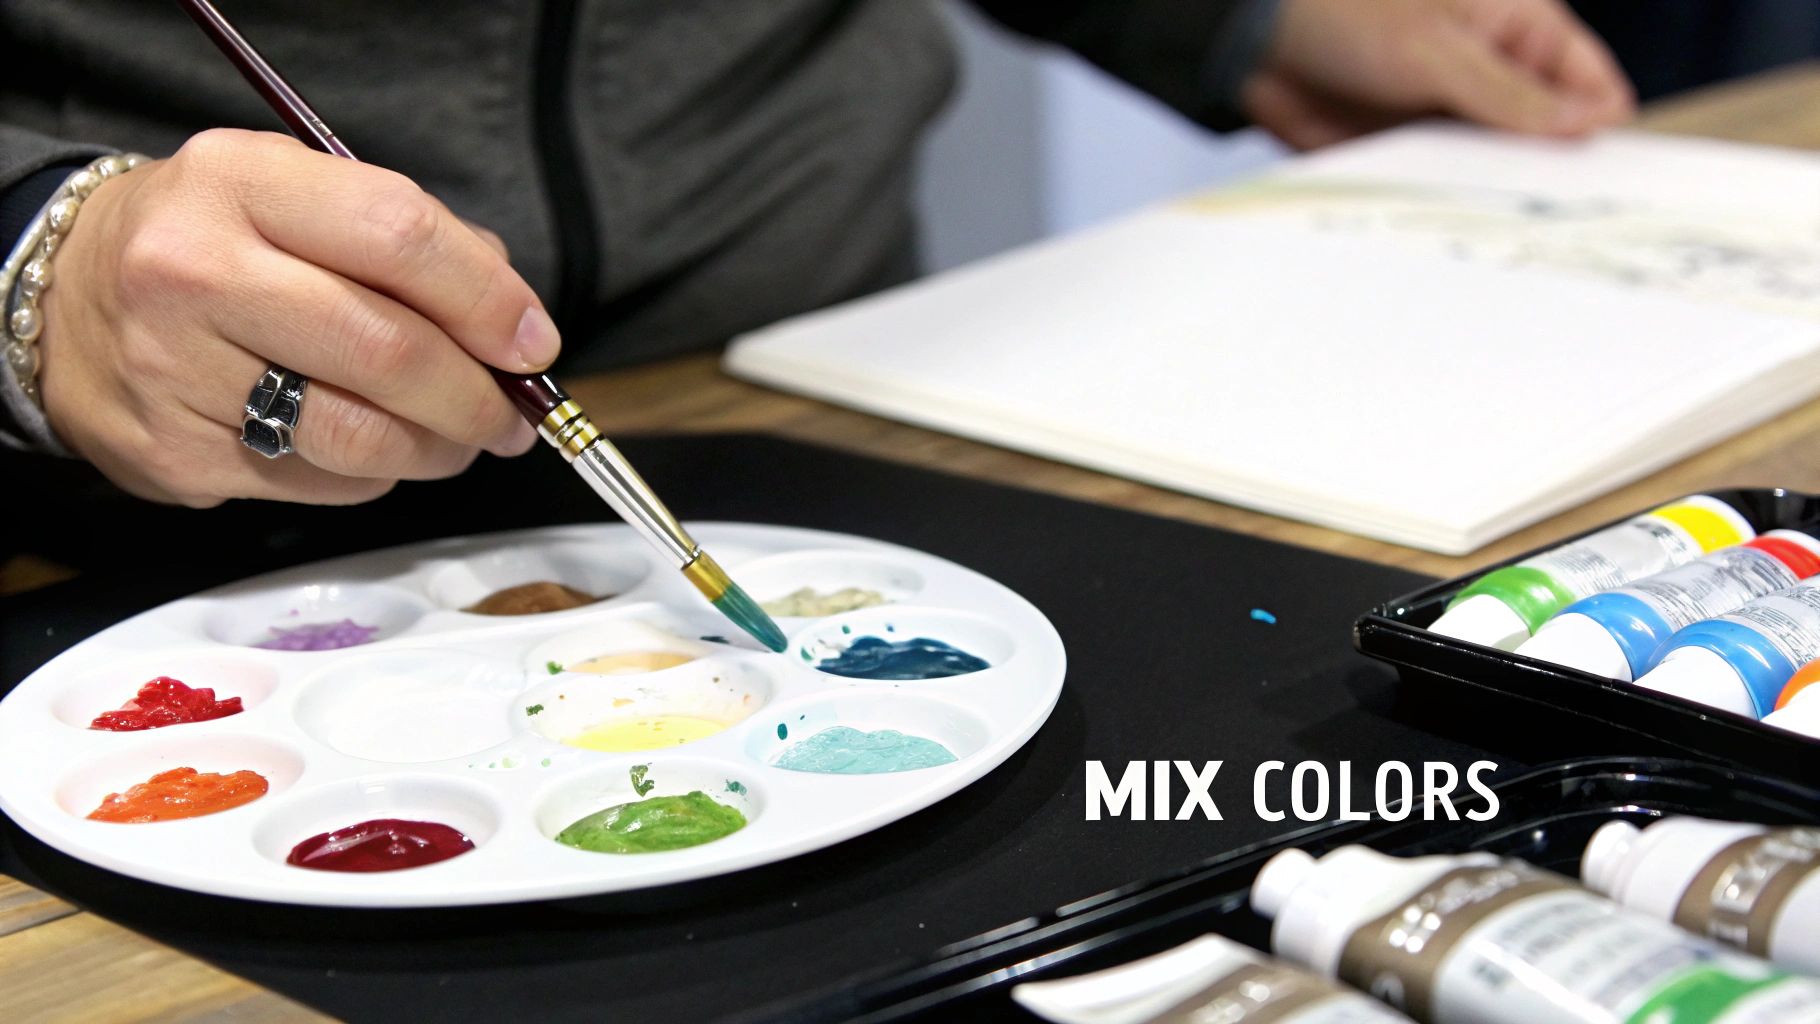
Starting out is all about experimentation. Grab a palette knife—it’s much better for blending pigments smoothly than a brush, which can get damaged—and let’s make some magic.
Here are the classic combinations to try first:
- Mix red and yellow to get a whole range of fiery oranges.
- Combine blue and yellow to unlock all sorts of natural-looking greens.
- Blend red and blue to discover deep, rich purples.
From Primary to Secondary Colors
The core of color mixing comes from understanding how primary colors interact. Red, yellow, and blue are the building blocks. When you mix them, you get secondary colors. When you add white, black, or gray, you start creating tints, shades, and tones.
This quick reference chart gives you a great starting point for those initial mixes.
Basic Acrylic Color Mixing Chart
| Resulting Color | Mixing Recipe (Starting Point) |
|---|---|
| Orange | 1 part red + 1 part yellow |
| Green | 1 part blue + 1 part yellow |
| Purple | 1 part red + 1 part blue |
| Tint | Base color + white |
| Tone | Base color + gray |
| Shade | Base color + black |
These ratios are just the beginning. The real fun starts when you adjust them to create your own unique colors. For a deeper dive into the color wheel and how it all works, the team at Southern Adoornments Decor has a great guide on color theory.
"Once you see how three primaries create everything else, mixing becomes your secret weapon."
Example Mix: Soft Sunset Orange
Let’s try a real-world example. To get that soft, glowing orange you see at sunset, start with two parts yellow and one part red. Want to make it brighter, like the sun is hitting it directly? Add a tiny bit of white. If you want a more muted, dusty coral, add the smallest possible speck of blue to tone it down.
Practical Tips for Accurate Mixing
- Always test your mixes on a scrap piece of paper before you commit them to your canvas.
- Keep things clean. Wipe your palette knife between colors to prevent your beautiful hues from turning into mud.
- Keep a small notebook handy. Jot down your "recipes" and ratios so you can recreate that perfect color later.
Essential Tools for the Job
- Palette knife: This is your best friend for blending pigments thoroughly without fraying your brush bristles. It also makes cleanup a breeze.
- Stay-wet palette: Acrylics dry fast! A stay-wet palette can be a game-changer, giving you more time to blend and mix.
- Mixing medium or retarder: These additives can be stirred into your paint to improve flow and extend the drying time even further.
Creating Tints, Tones, and Shades
This is where you bring depth and realism to your painting.
Adding a bit of white to any color creates a lighter tint, which is perfect for highlights. Mixing in a touch of gray (black + white) creates a tone, softening the intensity for more atmospheric or subtle effects. A dash of black will deepen your color into a shade, which is exactly what you need for creating shadows and rich, dramatic details.
With these core concepts, you're ready to start mixing with confidence. Keep a color journal to track your experiments—both the successes and the happy accidents. It's the fastest way to build your intuitive sense for color.
Next Steps for Practice
A great habit to get into is starting each painting session by creating a quick swatch chart. Mix your basic secondary colors, then try adding varying amounts of white or black to each one. Look at your swatches under natural light and make a few notes. This simple exercise will solidify your understanding of how ratios work and train your eye to see even the most subtle color shifts.
Now you’re all set to explore more complex recipes and truly master your palette. Good lighting and clean brushes will make a world of difference. And remember, always mix on your palette, not directly on the canvas!
Happy mixing
Getting Your Mixing Station Ready
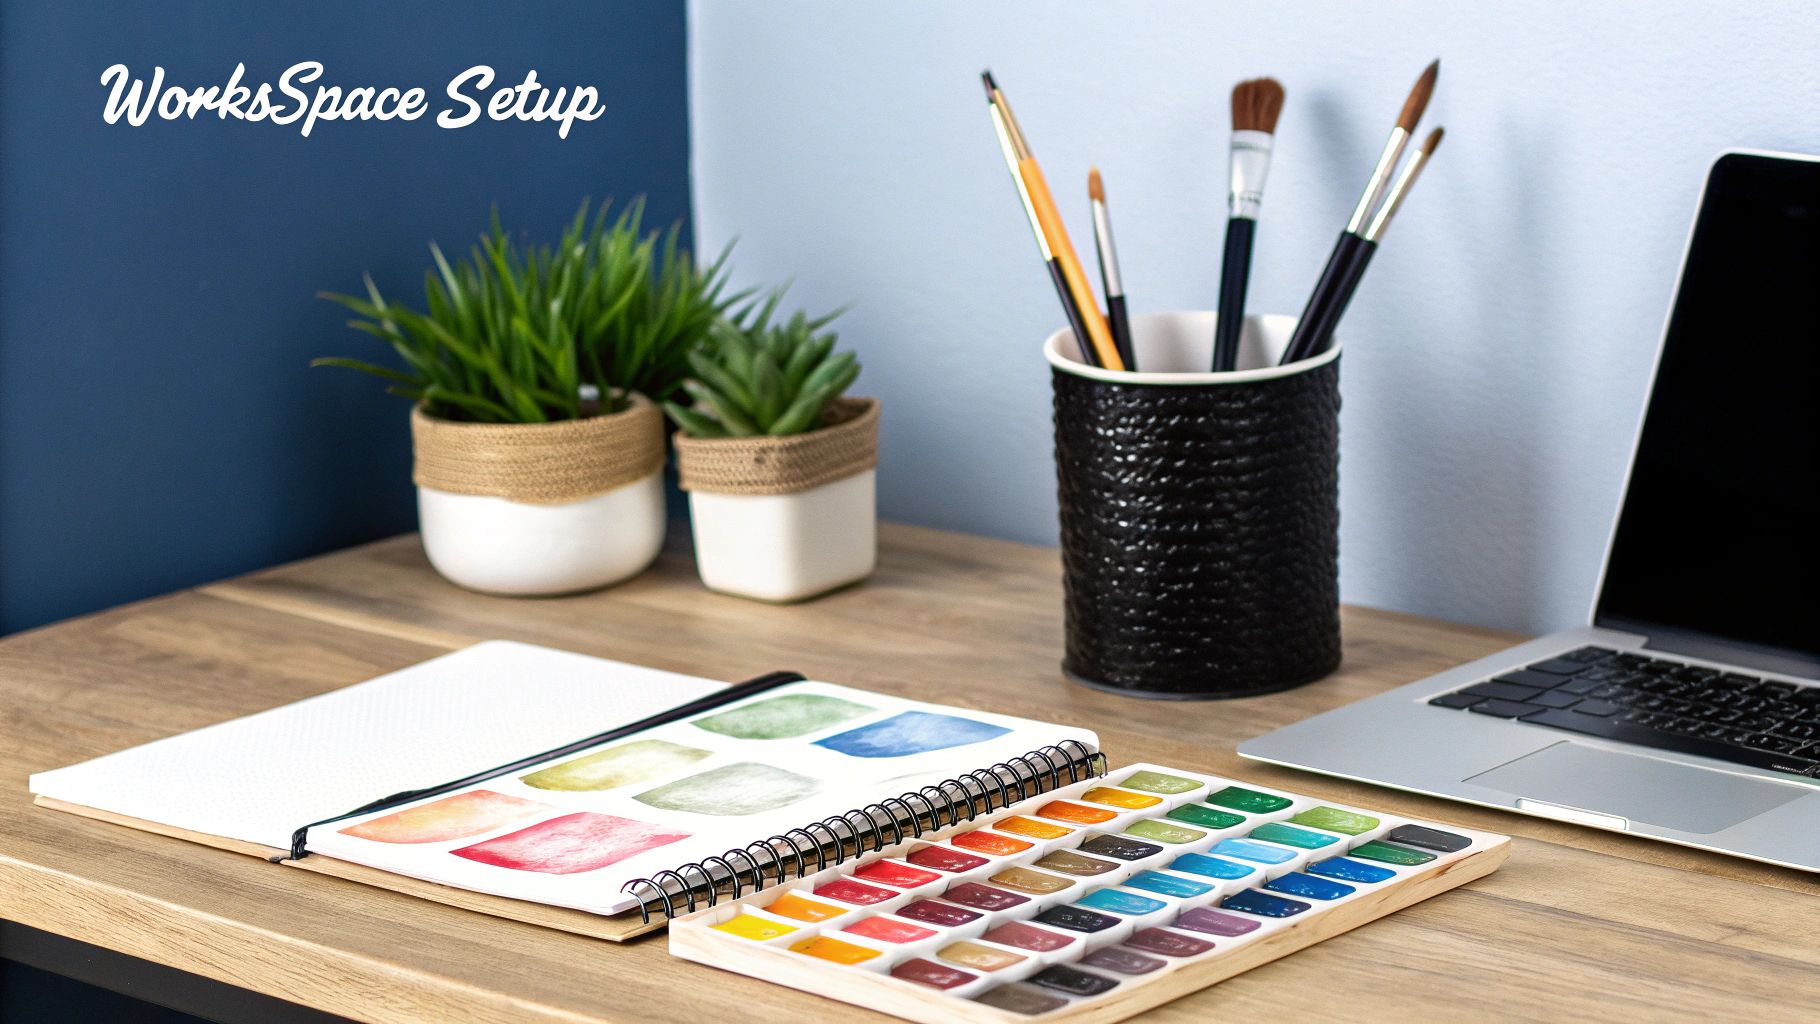
Before a single drop of paint hits the palette, setting up your space properly can be the difference between a frustrating mess and a smooth, creative flow. A little bit of organization goes a long way, helping you avoid muddy colors and letting you focus on the fun part: mixing beautiful, custom shades.
Your palette is the heart of your mixing station. Sure, a simple ceramic plate or a sheet of glass will do the job in a pinch. Disposable paper palettes are also fantastic for quick painting sessions and even quicker cleanups. But if you get serious about mixing acrylics, a stay-wet palette is an absolute game-changer.
Acrylics are notorious for drying out fast, but this type of palette keeps them workable for hours—sometimes even days. It uses a damp sponge under a special paper to maintain moisture, which is a lifesaver when you're tweaking a tricky skin tone or want to step away and come back to your project later.
Picking the Right Tools for the Job
It's tempting to just mix with your paintbrush, but I'd strongly advise against it. Using your brush for heavy-duty mixing can shove pigment deep into the bristles, which not only damages the brush over time but also contaminates your next color.
A palette knife is your best friend here. It lets you blend colors together thoroughly without any waste or accidental muddying. Once your custom colors are mixed, you'll need the right tools to apply them. Having a versatile paint brush set on hand is essential. If you’re just starting to build your toolkit, our guide on https://paint-by-number.com/blogs/learn-about-paint-by-numbers/beginner-acrylic-painting-supplies is a great place to find all the essentials.
How to Lay Out Your Palette
The way you arrange your paints on the palette matters more than you might think. A classic pro tip is to squeeze your paints out around the edge, following the order of the color wheel. It's simple and incredibly effective.
- Start with yellow at the "12 o'clock" position.
- Work your way down one side with oranges, reds, and purples.
- Go up the other side with blues and greens.
- Keep your white, black, and any earth tones (like Burnt Umber) in their own corner.
This setup becomes second nature pretty quickly. It makes it easier to find what you need and dramatically cuts down on accidentally dragging your brush through the wrong color and making a muddy mess.
A clean, organized palette isn't just about being tidy—it's a strategy for cleaner, more vibrant mixes. How you set up your space directly impacts your results.
Start a Color Mixing Journal
Here's one of the best habits any painter can develop: keep a color mixing journal. It's as simple as it sounds—a sketchbook where you document all your color experiments.
When you mix a color you really love, paint a little swatch in your journal. Right next to it, write down the "recipe"—which colors you used and a rough estimate of the ratios. For example, "2 parts Ultramarine Blue + 1 part Cadmium Yellow + tiny touch of white."
Doing this doesn't just save your favorite formulas for later. It actively trains your eye to see how colors work together, building a powerful intuition. Before you know it, you'll be able to look at a color and know exactly how to mix it. It’s a huge confidence booster that turns guesswork into skill.
Mastering Color with a Limited Palette
It’s a common misconception among beginners that having more paint tubes will somehow lead to better results. In reality, the opposite is often true. If you really want to understand how to mix acrylic paint colors, start by limiting yourself to just the three primaries plus white.
Why? Because it forces you to truly see the relationships between colors. You start noticing the subtle shifts and biases in each pigment that you’d otherwise completely miss. Suddenly, you’re creating dozens of unique hues from just a few tubes of paint instead of staring at a wall of pre-mixed colors.
Choosing Your Primaries: Warm vs. Cool
The specific red and yellow you choose will set the entire mood of your painting. A palette with Cadmium Red Medium and Cadmium Yellow Medium will give you bright, punchy, warm mixtures perfect for a glowing sunset or vibrant autumn scene.
If you want something softer, try switching to Alizarin Crimson and Yellow Ochre. You'll find these are better suited for creating the cooler, more subdued tones of a misty morning landscape.
- Warm primaries are brilliant for scenes full of light and energy.
- Cool primaries excel at creating atmosphere and depth.
- White is your tool for adjusting the value and creating softer tints.
Every primary color leans a little bit warm or cool, and understanding that bias is the key to predicting how your mixes will turn out. Getting a feel for this will save you a ton of paint and frustration down the line.
Keep a Color Mixing Journal
This is a game-changer. Recording your experiments turns frustrating guesswork into a reliable, repeatable process. Just sketch a small swatch of your mixed color next to your notes to create a visual reference you can always come back to.
It’s simple to get started:
- Put a small dot of Ultramarine Blue, Cadmium Yellow, Cadmium Red, and Titanium White on your palette.
- Start mixing different ratios on a piece of scrap canvas or paper.
- Jot down the approximate "recipe" and what the resulting color looks like.
This little habit builds your color intuition faster than anything else. In fact, a recent survey showed that 85% of artists felt their color accuracy improved within weeks of starting a mixing journal.
If you want to dive deeper into the fundamentals, check out our guide on color theory for beginners.
Mixing a World of Greens
Green is the perfect color to test out your limited palette skills. With just Ultramarine Blue and Cadmium Yellow, you can mix everything from a deep forest green to a zesty chartreuse just by tweaking the ratios.
Here’s a quick cheat sheet to get you started:
| Mix Ratio | Resulting Hue |
|---|---|
| 3 parts Yellow + 1 part Blue | Bright Chartreuse |
| 2 parts Yellow + 2 parts Blue | Classic Green |
| 1 part Yellow + 3 parts Blue | Deep Teal |
| 1 part Yellow + 1 part Blue + White | Soft Mint |
Playing around with these recipes really shows you how tiny adjustments can completely change the final color. A small touch of white can lighten a mix, while a speck of red can mute its intensity.
“Using just three primaries plus white changed how I see every color,” says acrylic painter Jane Smith. “It trained me to mix intentionally.”
This isn't just about saving money on paint; it's about becoming a more confident and knowledgeable artist.
Creating Mid-Tones and Neutrals
Rich, believable paintings rely on more than just bright colors. You need subtle grays, browns, and other neutrals to make your highlights and shadows pop without looking out of place. Luckily, you can mix all of these from your three primaries.
- For a Basic Gray: Mix equal parts Cadmium Red, Ultramarine Blue, and Cadmium Yellow. Then, add white until you get the value you're looking for.
- For a Warm Brown: Start with two parts yellow to one part red. Add a tiny dot of blue to deepen it, and then use white to adjust the warmth.
- For a Muted Green: Mix your green as usual, then add a small amount of its complement, red, to knock back the intensity.
Get these experiments down in your journal. Testing them under natural light will give you the most accurate idea of what they’ll look like on your final canvas.
Troubleshooting Muddy Colors
We’ve all been there—you mix and mix, and suddenly you’re left with a dull, lifeless "mud." This usually happens from overmixing or accidentally blending too many complementary colors. When it happens, don't try to fix it. Just stop.
Scrape the muddy mess off your palette and start fresh with clean primaries.
- Work in small, slow additions. Test the color after each little bit you add.
- If a color starts looking dull, try adding a touch of white to lift the value and restore some vibrancy.
- Always, always wipe your palette knife or brush clean between colors. This is the number one cause of contamination.
This clean approach prevents waste and, more importantly, keeps your colors looking crisp and intentional.
Practical Recipes for Mixing Essential Colors
Knowing a few go-to recipes can be a real game-changer when you're learning how to mix acrylic paints. It gives you a solid starting point and builds confidence, so you're not just guessing every time.
These are some of my favorite, time-tested recipes for common colors like skin tones, greens, browns, and grays. We'll use clear, simple ratios, so grab your palette knife and your primary colors, and let's get mixing.
Mixing Believable Skin Tones
The secret to realistic skin tones is starting with a simple base: red, yellow, and white. From there, you can add tiny amounts of blue or brown to shift the temperature and depth.
For a warm, light complexion, try starting with a pea-sized amount of white and a bit of yellow ochre. Then, mix in the smallest touch of cadmium red—a little goes a long way.
- Light Skin (Warm Tone): Try 3 parts white + 1 part yellow ochre + a tiny pinch of red.
- Medium Skin (Neutral Tone): Mix 2 parts white + 1 part cadmium red + 1 part yellow ochre + a minuscule drop of blue.
- Deep Skin (Cool Tone): Blend 1 part burnt sienna + 1 part ultramarine blue + a dash of white to lift the value.
Quick tip: Always check your skin tone mixes in natural daylight if you can. The color can look completely different under the warm glow of studio lights.
Creating Natural Greens
Are you tired of your greens looking like they came straight out of a toy box? Mixing your own is the key to creating foliage that feels alive. I almost always start with Ultramarine Blue and Cadmium Yellow.
Even a slight change in the ratio can take you from a bright, zesty chartreuse to a deep, mossy green. To soften a green, add a drop of white. To make it feel more earthy and muted, add a speck of its complement, red.
- Bright Chartreuse: 3 parts yellow + 1 part blue
- Olive Green: 2 parts yellow + 1 part blue + a tiny touch of red
- Forest Green: 1 part yellow + 2 parts blue + a smidge of brown
Here's a little hack I use: take a quick photo of your green swatches on a white piece of paper. It helps you see the undertones more clearly than you might in a dimly lit room.
The infographic below shows just how powerful a limited palette can be. With just three primary colors and white, you can save money and unlock a whole world of color.

This image really drives home how using just three primaries opens up endless possibilities, boosts your creative freedom, and is much easier on your wallet.
In fact, many artists find that 63% of their palette sessions become more efficient when they stick to a limited set of base colors. It’s a smarter way to work.
Starting Ratios for Common Color Mixes
Think of the following table as a cheat sheet. These are reliable starting points, not rigid rules. The real magic happens when you start tweaking them to fit your painting.
| Target Color | Base Colors | Approximate Starting Ratio | Pro Tip for Adjustment |
|---|---|---|---|
| Light Skin | White, Yellow Ochre, Red | 3:1 with a tiny touch of Red | Add a whisper of blue for cooler undertones. |
| Medium Skin | White, Cadmium Red, Yellow Ochre, Blue | 2:1:1 with a drop of Blue | Play with the amount of red to dial up the warmth. |
| Deep Skin | Burnt Sienna, Ultramarine Blue, White | 1:1 with a bit of White | More blue will add cool depth. |
| Lush Green | Cadmium Yellow, Ultramarine Blue | 2:1 | A tiny bit of red will instantly mute the vibrancy. |
| Olive Brown | Yellow Ochre, Alizarin Crimson, Ultramarine | 2:1:1 | Use white to soften the color and lighten the value. |
| Neutral Gray | Red, Blue, Yellow, White | 1:1:1 with 3 parts White | For a darker gray, simply use less white. |
Use these ratios to get in the ballpark, then trust your eyes to make the final adjustments. Every painter develops their own signature shades over time.
Creating Rich Browns and Neutrals
You can get much more interesting browns and neutrals by mixing them yourself instead of relying on a flat, pre-mixed tube of brown paint. The key is to mix complementary colors. Start with a base of yellow ochre and red, then slowly introduce blue drop by drop until you hit that perfect, rich hue.
For a warm chocolate brown, I like to combine 2 parts burnt umber with 1 part alizarin crimson. I'll use white to adjust the lightness and save pure black for only the absolute darkest shadows.
Mixing browns from your primary colors gives you a natural warmth that you just can't get from a tube of brown or by adding black.
If you want to practice using these earthy tones in a dramatic sky, you might find our guide on how to paint a sunset helpful.
Mixing Deep, Dynamic Grays
The most interesting grays are never just black and white. They’re full of subtle color. You can create these dynamic, rich grays by mixing complementary hues.
A simple, beautiful gray can be made with 1 part ultramarine blue, 1 part burnt umber, and 3 parts white. From there, you can adjust the pigment ratios to push the gray towards a cooler or warmer feel.
Remember to:
- Always use a palette knife to ensure your colors are blended evenly.
- Test your gray mixes on a scrap piece of paper and check them in natural light.
- Keep small swatches of your favorite gray recipes in a color journal.
Pro painters often mix a small test batch and let it dry completely before painting with it. This is a great habit because it shows you exactly how much the color will darken as it dries.
Tips for Adjusting Your Ratios
You'll quickly notice how even tiny adjustments can completely change a color. These recipes are just your launching pad—don't be afraid to experiment.
Get into the habit of jotting down your experiments in a notebook. Write down the ratios you used and what the final color looked like. This simple practice is what turns trial and error into a reliable skill.
Here's a quick routine to follow:
- Mix a small test dot of your color.
- Take note of how it looks while wet.
- Let it dry completely.
- Compare the wet and dry colors, then adjust your mix as needed.
Visualizing Your Progress
It might sound a bit nerdy, but creating charts of your color mixes helps you see patterns and improve faster. Keeping a visual timeline of your swatches is a fantastic way to reflect on your progress.
- Try sketching a daily color wheel using only your custom-mixed colors.
- Scan your physical swatches to create a digital backup.
- Always label each swatch with the date and the ratio you used.
Making this a consistent habit can boost your mixing accuracy by as much as 40%.
Dealing with Common Acrylic Mixing Problems
Sooner or later, every painter runs into a frustrating mixing session. Your colors just won't cooperate. The most common offender? Muddy colors. One minute you have vibrant hues, the next, everything looks like a dull, brownish mess.
This usually happens when you overmix or accidentally let complementary colors (like red and green) mingle too much. They cancel each other out, leaving you with a neutral gray or brown. Another thing to remember is that acrylic pigments aren't like digital colors; you can't just add them up neatly to get a perfect result. Real-world mixing is a bit of an art in itself. You can learn more about why CMYK-style mixing isn't so straightforward with acrylics.
And then there's the drying time. Acrylics are notorious for drying in minutes, which can create harsh, unwanted edges when you’re trying to blend colors smoothly. Getting a handle on these quirks early will save you a ton of paint and frustration.
A few common hiccups you might run into:
- The Muddy Mix: Your colors look grayish or brown. This is a classic case of complementary colors clashing. The fix is all about clean tools and mixing in careful stages.
- Hard Edges: Your blends aren't smooth because the paint is drying too fast. A stay-wet palette or a retarder medium is your best friend here.
- The Color Shift: The color you mixed looks perfect wet, but dries much darker. You'll need to learn to mix a shade lighter to compensate.
How to Avoid Muddy Colors
The absolute simplest habit to adopt is starting with a squeaky-clean palette every single time. Even a tiny speck of a leftover color can contaminate your new mix and throw everything off. It’s a small step that makes a huge difference.
Before you commit a color to your canvas, paint a little test swatch. Try mixing two versions side-by-side—maybe one with a touch more blue, the other with a little less. These quick experiments are the fastest way to build an intuitive feel for how your pigments behave.
“Clearing your knife blade between blends is the best way to keep your greens green,” advises artist Tom Rivera.
Getting More Time for Blending
That dreaded moment when a skin forms over your paint can ruin a perfect wet-on-wet blend. To fight back, add a small amount of acrylic retarder medium to your paint. It’s designed specifically to slow down the drying process and give you more working time.
Another trick is to keep a small spray bottle filled with water handy and give your palette a light mist every few minutes.
Here’s a simple routine that works wonders:
- Squeeze out your paints onto a stay-wet palette.
- Add 2–3 drops of retarder to each dollop of paint and mix it in.
- If you have to step away, cover the palette with plastic wrap to keep everything fresh.
Painters often find this extends their workable paint life by up to 5 times. You'll find yourself creating much smoother gradients and feeling less rushed during your sessions.
Managing the Dreaded Color Shift
It’s a fundamental truth of acrylics: the color you see when it’s wet is almost never the color you get when it’s dry. It will almost always dry a shade or two darker. Learning to anticipate this is key.
Before you apply a big patch of color, always mix a small test drop on a piece of scrap paper and let it dry completely. Then you can see the true final color and adjust your mix before it’s too late.
A few tactics to keep in mind:
- Aim to mix your colors one shade lighter than what you actually want the final result to be.
- Check your test swatches under different kinds of light (cool and warm) to see how they look.
- If you need to make adjustments, use tiny dots of white paint or a bit of glazing medium.
Drying shift is not a flaw but a feature of acrylic chemistry.
Keep a Color Journal for Perfect Recall
Want to turn guesswork into a repeatable science? Start a color journal. It's as simple as painting a swatch of every new color you mix and jotting down the recipe—the base colors and the rough ratios you used.
Over time, this becomes your personal library of colors, which is a massive confidence booster. No more struggling to remember how you made that perfect shade of olive green two weeks ago.
Here's an easy template to follow:
| Date | Base Colors | Ratio | Result |
|---|---|---|---|
| 05/14 | Ultramarine Blue, Cadmium Yellow | 1:2 | Bright Chartreuse |
This hands-on log helps you spot patterns you might otherwise miss and gives you a reliable reference for all your future projects.
With a clean workspace, the right mediums, and a little planning, you can conquer even the most stubborn mixing challenges. These strategies will help keep your journey of learning how to mix acrylic paint colors creative, not chaotic.
Keep Experimenting and Have Fun
At the end of the day, trial and error is just part of the process. Every muddy mix is a lesson in what not to do next time. Keep practicing, keep refining your technique, and don't forget to celebrate the little wins along the way.
Now go paint with bold confidence
Common Questions on Mixing Acrylics
As you start getting your hands dirty with acrylics, a few questions always seem to come up. Let's tackle some of the most common ones I hear from artists, so you can solve problems quickly and mix with more confidence.
How Do I Get My Colors to Look Brighter?
Getting truly vibrant, bright colors is all about protecting the purity of your pigment. The second you introduce black or a complementary color, you're going to dull things down.
The best trick is to start with high-quality, single-pigment paints. They are naturally cleaner and have a much more intense color right out of the tube. When you're mixing, try adding just a tiny bit of a lighter, neighboring color from the color wheel. For instance, a small touch of pure yellow can really make an orange sing.
While adding white will certainly make a color lighter, just know that it can also wash it out, giving you a more pastel look rather than a vibrant one. And a final pro tip: keep your water, brushes, and palette knife spotless between mixes. Even a little bit of contamination can muddy your colors and steal that brightness you're working so hard to achieve.
Can I Mix Different Brands of Acrylic Paint?
Yep, you absolutely can. For the most part, artist-grade acrylic paints are water-based and use similar acrylic polymer binders, so they play nicely together without any weird chemical reactions.
That said, there are a few things to keep in mind, as not all brands are created equal:
- Consistency: Some paints are thick and buttery (heavy body), while others are thin and flowy (fluid). Mixing them will land you somewhere in the middle.
- Drying Time: Brands often have their own formulas, so one might dry faster or slower than another.
- Finish: You might find one brand dries to a glossy sheen while another has a matte finish. When you mix them, you'll likely get a satin finish.
While it's totally fine to mix brands when you're just practicing, if you're working on a serious piece, sticking to one brand can give you more predictable results, especially when it comes to the final look and how the colors shift as they dry.
How Can I Mix a Really Rich Black?
Forget the flat, lifeless black that comes straight out of a tube. Mixing your own "chromatic black" gives you a dark color that's so much deeper and more interesting. These mixed blacks have subtle undertones that just work better with the rest of your painting, creating far more believable shadows.
My go-to recipe is a simple mix of Ultramarine Blue and Burnt Umber. Start with roughly equal parts and see what you get.
You can easily tweak the temperature of this black. Want it a bit cooler? Add more blue. Need a warmer, earthier dark? Add a little more of the brown.
Another great way to get a complex black is to mix all three primary colors. Try a dark, cool red (like Alizarin Crimson), a deep blue (like Ultramarine), and a touch of yellow. The trick here is finding just the right balance so no single color takes over, leaving you with a beautifully neutral, rich dark.
What’s the Best Way to Mix a Big Batch of One Color?
When you're working on a large painting, the last thing you want is to run out of a custom color and have to rematch it. It’s nearly impossible to get it perfect a second time. The best solution is to mix a big, consistent batch from the start.
Grab a separate, sealable container—a small glass jar or a lidded plastic pot works great. Mix a small test version on your palette first to get the recipe right, and try to eyeball the ratios you're using. Once you love the color, you can scale that recipe up in your larger container.
A few tips to make this process foolproof:
- Always, always mix more than you think you’ll need. Trust me on this one.
- Use a palette knife instead of a brush to do the heavy lifting. It ensures all the pigment is thoroughly blended.
- If you need the paint to stay wet for a while, add a few drops of acrylic retarder or keep your container in a stay-wet palette.
Ready to turn your favorite photos into a masterpiece? At Custom Paint By Numbers, we make it easy to create a personalized paint-by-number kit from any image. It’s the perfect way to practice your new color mixing skills on a project that truly means something to you. Start creating your custom kit today at https://paint-by-number.com


