

Learning to paint really comes down to four key stages: getting your basic supplies together, learning the fundamental techniques, practicing with some guided projects, and eventually, developing your own unique style. The whole journey is much more about consistent practice than it is about waiting for a strike of inspiration. It all starts with simple tools and small, achievable goals to build your confidence.
Your First Brushstroke: A Realistic Starting Point
Jumping into painting isn't about some natural-born talent; it's all about having the right mindset. A lot of beginners get hung up on the idea of a blank canvas, worried they aren't "creative enough" to even start. That's a myth we need to bust right now. Every single artist you admire started exactly where you are.
The real secret is breaking the whole process down into small, manageable steps. Forget about creating a masterpiece on your first try. The only goal for day one is to simply begin. This guide is your practical roadmap, designed to take you from a curious beginner to a painter who feels genuinely confident in their skills. We'll cover everything, from picking out your very first paints to finishing a piece you're proud to show off.
Adopting a Painter's Mindset
Honestly, the most important tool in your kit is patience—with yourself. Your first few paintings probably won't match the vision in your head, and that is completely okay. Think of every attempt as a lesson. You're learning about how colors mix, how texture works, and how to control your brush. It's a bit like creative problem-solving.
This isn't just about learning a new skill, either. Painting is a fantastic way to practice mindfulness and even give your brain a workout. In fact, studies show that visual arts can give your cognitive function a real boost. Research in npj Science of Learning found that students in arts workshops had higher GPAs and better grades in subjects like math and language arts.
"The journey of a thousand miles begins with a single step." - Lao Tzu. This classic quote couldn't be more true for painting. Your first brushstroke, no matter how wobbly or imperfect, is the official start of your artistic journey.
Your Painting Journey At A Glance
Before you even dip a brush in paint, understanding the broader world of art can give you some great context and make your first steps feel more meaningful.
To help you see the path ahead, here’s a quick summary of the essential stages for learning to paint, from gathering your tools to completing your first piece.
| Stage | What It Involves | Key Goal |
|---|---|---|
| Gathering Supplies | Choosing beginner-friendly paints, brushes, and surfaces. | To build an affordable starter kit without feeling overwhelmed. |
| Learning Techniques | Practicing color mixing, brushwork, and blending. | To build foundational skills and muscle memory. |
| Guided Practice | Using structured projects like paint-by-numbers or tutorials. | To complete a full painting and gain a sense of accomplishment. |
| Developing Style | Experimenting with subjects and finding personal inspiration. | To start making your own creative choices and find your voice. |
This table lays it all out, but remember, the goal is to enjoy the process, one stage at a time.
Choosing Your Tools Without Overspending
Stepping into an art supply store for the first time can be completely overwhelming. I get it. You're faced with what feels like a million shades of paint and an endless variety of brushes. It's so easy to either buy way too much stuff or grab the priciest items, thinking professional-grade tools are a shortcut to skill.
Here's the good news: you absolutely do not need to spend a fortune to get started. The real goal is to put together a simple, affordable kit that lets you start painting right away. When you're just figuring things out, function and value are what matter—not fancy labels.
Picking Your First Paint
The type of paint you choose will have the biggest impact on your first few creative sessions. For anyone new to this, I always recommend sticking with water-based paints. They’re just so much easier to work with and clean up. Your three best bets are acrylics, watercolors, and gouache.
- Acrylics: This is the go-to recommendation for a reason. Acrylics are incredibly versatile. You can thin them with water to create a watercolor-like wash or apply them straight from the tube for thick, textured effects. They dry fast, which is fantastic for layering colors, but can make blending a bit of a race against the clock. The best part? They're super forgiving. If you make a mistake, just let it dry and paint right over it.
- Watercolors: If you love a light, airy, and transparent look, watercolors might be for you. They’re known for their beautiful, luminous quality. Plus, they’re compact and easy to travel with, which is great if you want to sketch on the go. The trade-off is that they can be a bit unforgiving; once a color is down on the paper, it's tough to cover up mistakes.
- Gouache: Think of gouache as watercolor’s opaque cousin. It dries to a velvety, matte finish and has a unique quality: you can reactivate it with water even after it dries. This makes blending a breeze compared to acrylics, and you can easily paint light colors on top of dark ones. It offers a ton of flexibility.
Deciding between these can be tough, so I've put together a quick comparison to help you see how they stack up for a beginner.
Comparing Beginner Paint Types
| Paint Type | Best For | Drying Time | Cleanup |
|---|---|---|---|
| Acrylic | Versatile techniques and forgiving mistakes. | Fast (5-20 minutes) | Easy with soap and water when wet. |
| Watercolor | Luminous, transparent effects and portability. | Fast (1-15 minutes) | Very easy with just water. |
| Gouache | Opaque, matte finishes and easy blending. | Fast (5-30 minutes) | Easy with water, even after drying. |
Hopefully, seeing their key differences laid out like this makes it easier to pick the medium that feels like the best fit for you.
Assembling Your Essential Starter Kit
Once you've landed on a paint type, you only need a handful of other things to get going. Seriously, don't worry about buying every kind of brush or a stack of canvases. A minimal setup is all you need right now.
For a really detailed shopping list that takes all the guesswork out of that first trip to the art store, check out our complete guide on art supplies for beginners.
This image gives you a great visual of what a beginner’s toolkit should contain.
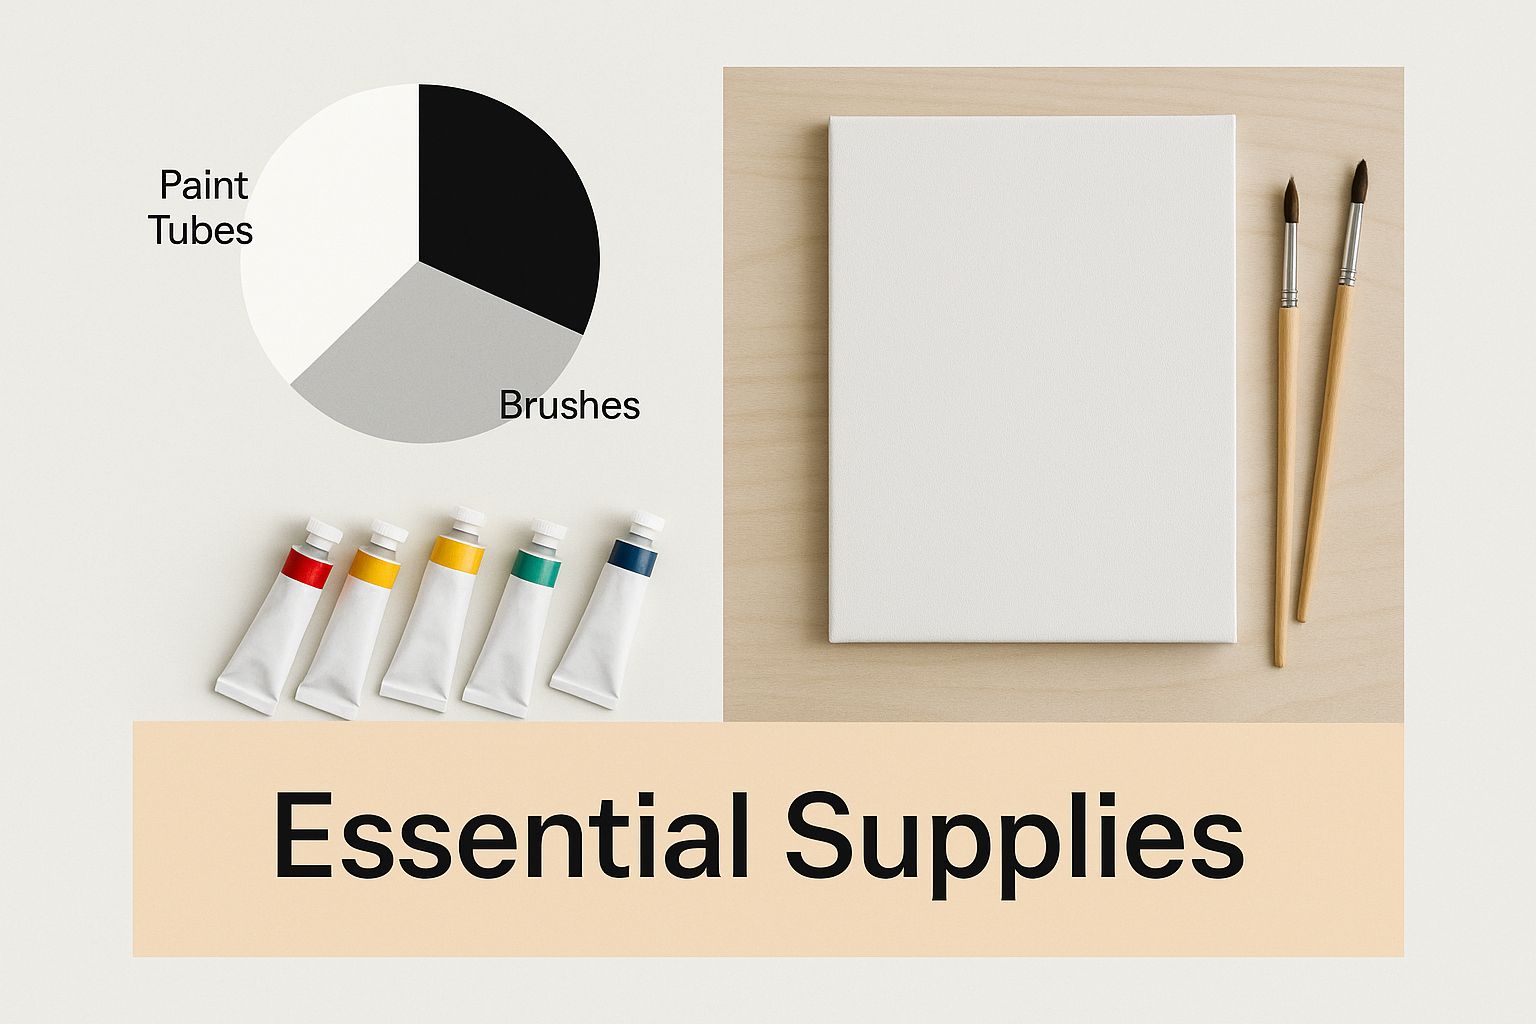
As you can see, a simple, well-chosen set of tools is more than enough to start your creative journey. You can easily build a fantastic starter kit for under $50. A student-grade paint set, a small pack of brushes, and the right kind of paper are all it takes.
Your first supplies aren't an investment in a professional career; they are an investment in learning. The goal is to get tools that are good enough to not hold you back, but not so expensive that you're afraid to "waste" them by experimenting.
Brushes And Surfaces On A Budget
You really don't need a giant collection of brushes. A small variety pack of synthetic brushes is the perfect starting point—they work well with acrylics, watercolors, and gouache. Just make sure the set includes a few key shapes:
- A Flat Brush: For covering large areas and making bold, broad strokes.
- A Round Brush: Your go-to for details and creating lines.
- A Filbert Brush: A versatile hybrid of the two, with a nice curved edge.
As for what to paint on, the right surface depends entirely on your paint. For acrylics, you can't go wrong with inexpensive canvas boards or a pad of canvas paper. If you chose watercolors or gouache, you’ll need a thick paper—look for 140 lb or 300 gsm—that can handle the water without buckling or warping. Buying paper in a pad is almost always cheaper than buying single sheets. Just do yourself a favor and avoid regular printer paper; it will just fall apart.
Getting to Grips with Core Painting Techniques
Alright, you've got your supplies. Now for the fun part: moving from theory to actually putting paint on a surface. This is where you’ll start building the muscle memory that bridges the gap between the idea in your head and the image you create.
Forget about making a masterpiece right now. The real goal here is to get comfortable with your tools. You need to learn how they behave through simple, repeatable exercises.
This whole stage is about discovery. You'll see how a tiny speck of blue can knock back a vibrant yellow into a muted green, or how just changing the pressure on your brush creates completely different textures. Think of these techniques as the basic vocabulary of painting. Once you know the words, you can start forming your own artistic sentences.
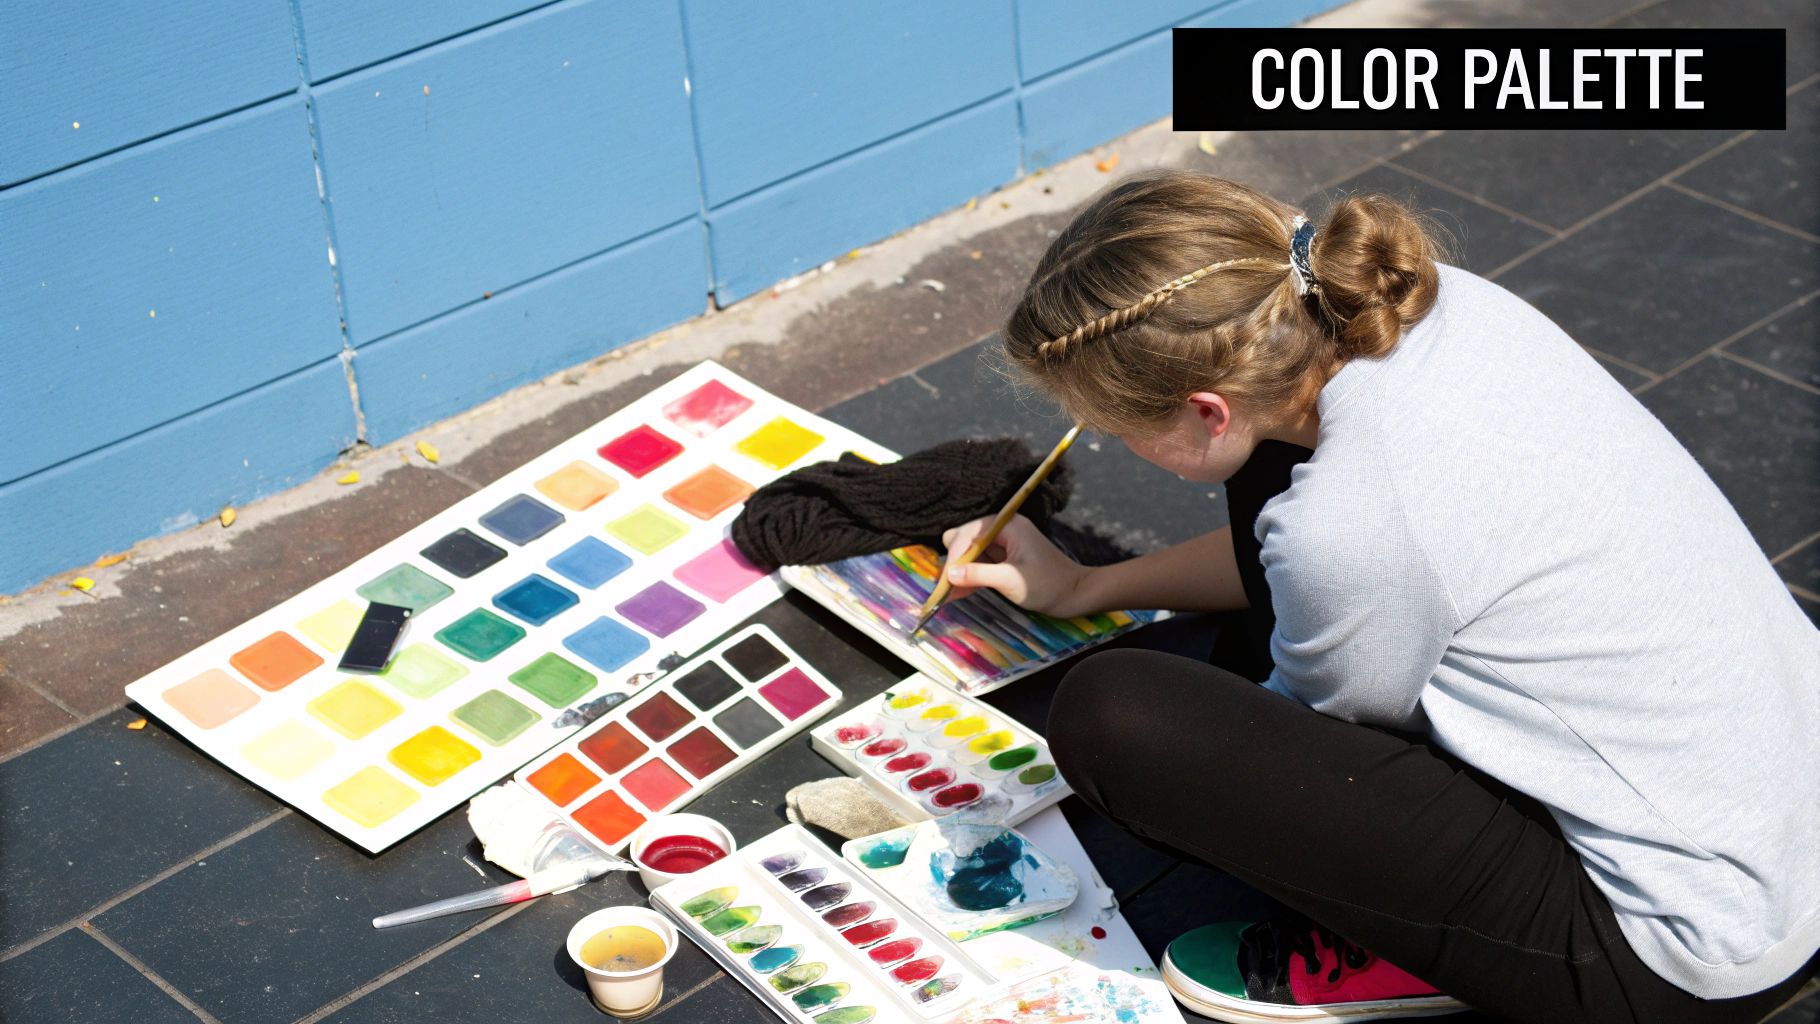
Unlocking the Secrets of Color Mixing
One of the most powerful skills a new painter can learn is how to mix colors. It feels like magic when you realize that just three primary colors—red, yellow, and blue—can produce almost every other color you could possibly need.
Instead of buying dozens of different paint tubes, starting with a limited palette forces you to learn. So grab your primaries, plus black and white, and try these little drills on some scrap paper.
- Make Secondary Colors: Mix equal parts of two primaries. Red + yellow = orange. Yellow + blue = green. Blue + red = violet. Play around with the ratios to see how the shade changes when you add more of one color.
- Mix Tertiary Colors: Now, combine a primary color with a secondary color next to it. For instance, mixing blue with green gives you a beautiful blue-green, or teal.
- Neutralize a Color: Want to make a color less intense? Add a tiny bit of its complementary color (the one opposite it on the color wheel). A dot of red added to green will create a much more earthy, natural-looking hue.
Getting your hands dirty with this kind of practice is way more valuable than just reading color theory. You'll start to build a gut feeling for how colors work together.
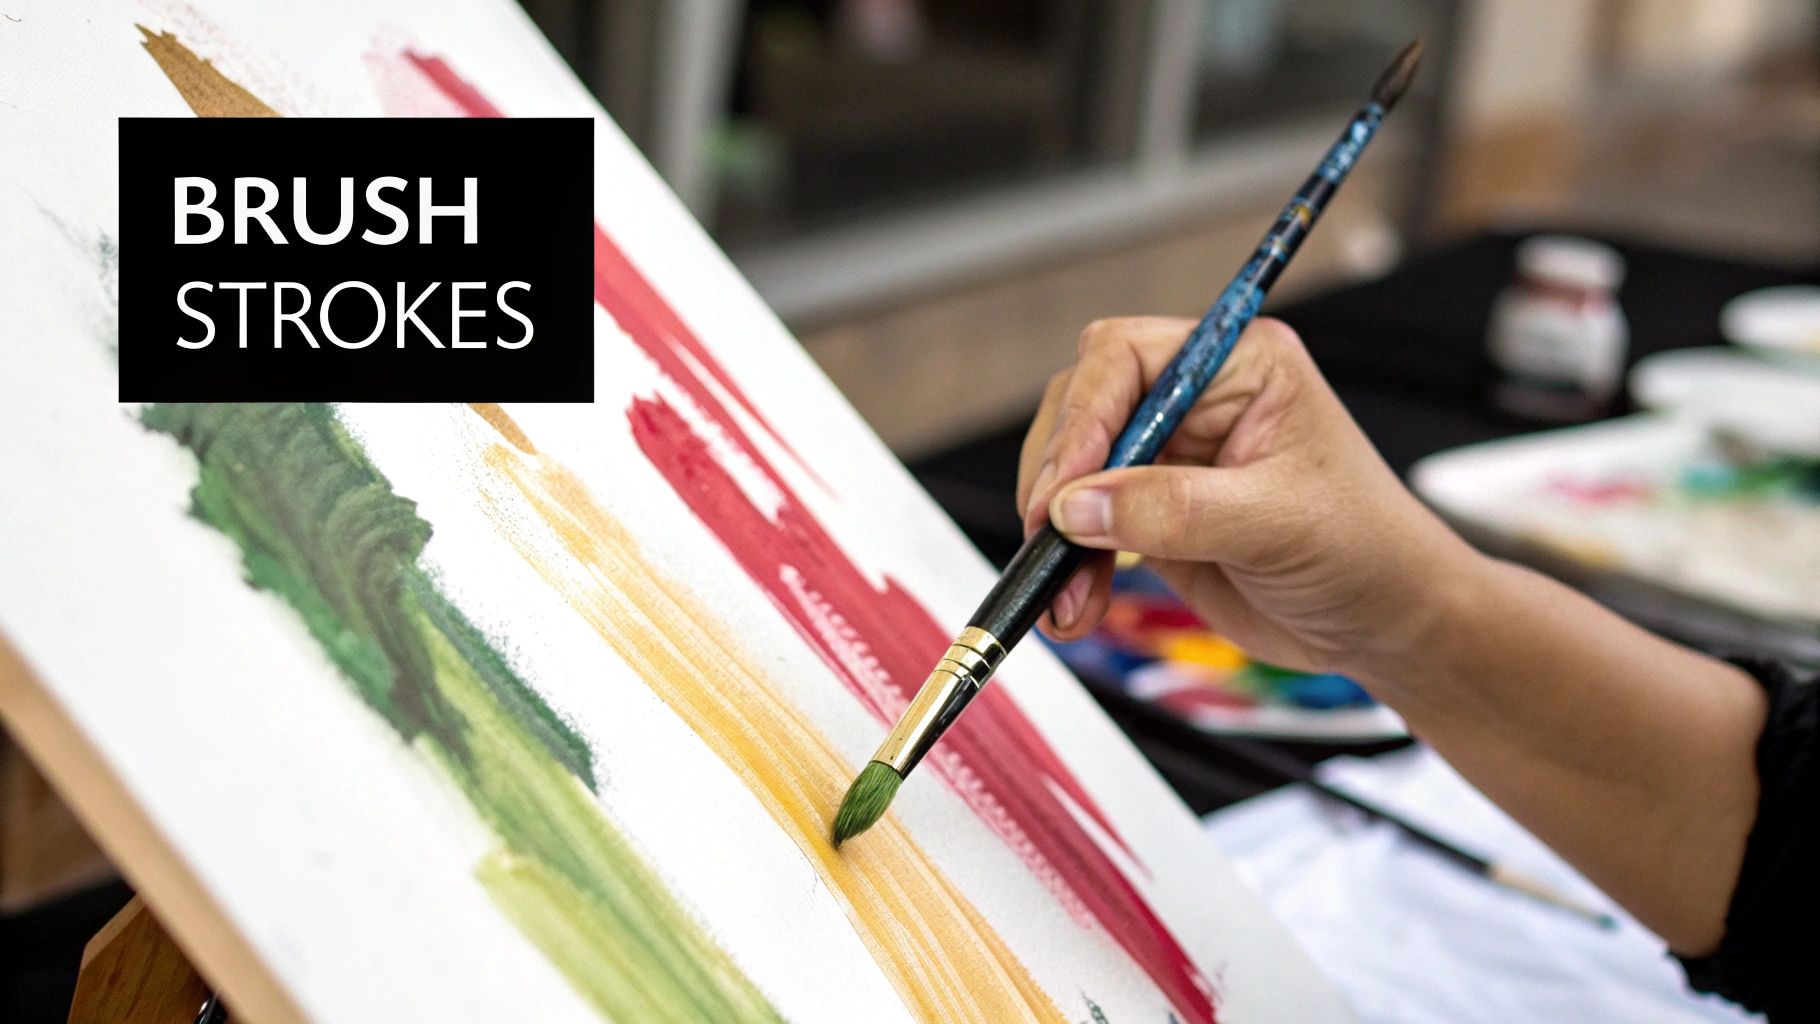
Developing Your Brushwork
How you hold and move your brush is just as important as the colors you pick. Different brushes and strokes create unique effects, adding personality and texture to your art. A classic beginner mistake is to grip the brush like a pencil, which almost always leads to stiff, overly controlled lines.
Try holding the brush further back on the handle. This simple shift encourages you to paint from your arm and shoulder, not just your wrist, leading to much more fluid, expressive strokes.
A great way to build confidence is by creating a "stroke library." Just take a piece of paper and fill it with different marks using each of your brushes. Make dabs, long lines, short strokes, zig-zags. It’s a no-pressure way to figure out what each tool can really do.
Understanding Value and Blending
Value is simply the lightness or darkness of a color. It’s the secret ingredient that gives objects in a painting a sense of form and three-dimensionality. A painting with a good range of values, from bright highlights to deep shadows, will have depth and look far more believable.
A fantastic exercise for this is creating a monochromatic value scale.
- Pick one color (blue works well).
- Mix it with different amounts of white to create at least five distinct shades, from dark to light.
- Now, try painting a simple object, like a sphere, using only those shades to show where the light hits and where the shadows fall.
Blending is how you create those smooth transitions between values or colors. With acrylics, you have to work fast because they dry so quickly. A good trick is to lay two different colors next to each other on the canvas, then use a clean, slightly damp brush to gently feather the edges together until they merge.
Mastering these foundational skills is key, especially with acrylics. To dig a little deeper, you can find a ton of practical advice in our guide to acrylic painting techniques for beginners.
Layering to Build Depth and Richness
Layering, sometimes called glazing, involves applying thin, see-through layers of paint over layers that have already dried. This is how artists create those rich, complex colors and a sense of light that you just can't get by mixing on the palette alone.
Imagine painting a sunset. You might start with a solid base of yellow. Once it’s bone dry, you could apply a very thin, watery wash of red over parts of it. The red will optically mix with the yellow underneath, creating a vibrant, glowing orange that looks way more dynamic than a flat orange ever could.
This technique definitely requires patience—you have to wait for each layer to dry completely. But the results are absolutely worth it, adding a professional-looking depth to your work that will make you proud.
Building Skills With Your First Guided Projects
Okay, so you've done the drills and practiced your brushstrokes. Now what? Moving from those exercises to a full-blown painting can feel like a huge leap. Staring at a blank canvas is intimidating, and it’s easy for all that new knowledge to suddenly evaporate.
Trust me, this is a completely normal feeling. The best way forward is to find a bridge—a project that gives you some structure and a clear finish line.
Guided projects are your best friend at this stage. They take the pressure off so you don't have to invent a masterpiece from scratch. Instead, you can just focus on the physical act of painting. This is where you get to translate all that practice into a real, tangible result, building the confidence you need to keep going.
Why Paint-By-Numbers Is A Powerful Learning Tool
Paint-by-number kits sometimes get dismissed as a simple craft, but for a beginner, they are an incredibly effective training tool. Don't think of it as a craft; think of it as a structured lesson in a box. It solves the two biggest challenges for any new artist: composition and color selection.
The canvas is already mapped out for you, showing you precisely where each color goes to create a balanced, compelling image. As you work, you’re quietly learning about color relationships and value placement without even realizing it. You get to pour all your energy into brush control, applying paint evenly, and staying within the lines—all foundational skills.
A paint-by-number kit is like having a private instructor guiding your hand. It offers a low-stakes way to complete an entire painting, delivering a huge sense of accomplishment that’s essential for building creative momentum.
That feeling of successfully finishing something is a powerful motivator. It proves to yourself that you can create something beautiful, which makes the idea of tackling that blank canvas later on feel so much less daunting.
Elevating Your Paint-By-Number Project
Just because you’re following a guide doesn’t mean your painting has to look like everyone else's. With a few simple tricks, you can make your finished piece look more professional and add your own personal touch. The goal here is to move beyond just filling in the shapes.
-
Soften the Edges: The hardest lines between colors are often a dead giveaway of a paint-by-number. To get a more artistic feel, try blending the edges where two colors meet while the paint is still a bit wet. Just take a clean, slightly damp brush and gently feather the boundary to create a smoother, more natural transition. This is fantastic practice for the blending techniques you've already been working on.
-
Layer Your Paints: Don't be shy about applying a second coat of paint, especially with the lighter colors. This helps to completely cover the printed numbers and gives the colors a much richer, more opaque finish. The whole piece will look more vibrant and substantial.
-
Vary Your Brushstrokes: Even though you’re working within lines, you can still play with texture. Experiment with dabbing, stippling, or using thicker strokes in certain areas to add visual interest. For instance, you could use short, choppy strokes for tree leaves or long, smooth strokes for water.
When you actively engage with the process instead of just coloring in, you turn the kit into a dynamic learning experience. For more inspiration, you can explore a wide variety of beginning painting ideas that are perfect for honing these skills.
Exploring Other Guided Painting Options
Paint-by-number kits are a great start, but they aren't the only option. The internet is packed with other fantastic resources that offer a similar level of structure and support for anyone learning to paint.
Simple, follow-along video tutorials are another excellent choice. Platforms like YouTube are filled with artists walking you step-by-step through creating a basic landscape, a simple floral, or a still life. The big advantage here is that you can see the instructor's brushwork in real-time and hit pause or rewind whenever you need to. Just search for tutorials labeled "for absolute beginners" to make sure the pace is right for you.
Ultimately, these guided first steps—whether it’s a kit or a video—are your launchpad.
Finding Your Unique Artistic Style
Once you’ve got a handle on the fundamentals and have a few guided projects under your belt, the real fun begins. This is the point where you slowly shift from following someone else's instructions to making your own creative decisions. You've learned how to paint; now it's time to discover your way of painting.
Don't panic! This doesn't happen overnight. An artistic style isn't something you just stumble upon like a lost set of keys. It's something you build, piece by piece, by consistently showing up to the canvas and exploring what genuinely excites you. It's the unique blend of your personal taste, how you see the world, and the techniques you find yourself returning to again and again.
Gathering Your Personal Inspiration
So, where do you start? First, figure out what you love to look at. The art you consume will have a massive influence on the art you create. Think of yourself as a visual collector.
- Create an Inspiration Folder: It could be a folder on your computer, a Pinterest board, or even a physical scrapbook. When an image makes you pause—whether it's a photograph, a still from a movie, or another artist’s work—save it. Don't second-guess yourself, just collect.
- Look for Patterns: After a few weeks, take a step back and look at your collection. What do you see? Are you drawn to bold, dramatic colors, or do you prefer soft, muted palettes? Do you mostly save landscapes, portraits, or abstract shapes? This collection is a visual map of what your creative brain is already drawn to.
This isn't just about passive scrolling. When you find an artist you admire, really study their work. Ask yourself, how are they using light? What kind of brushstrokes can I see? This kind of active observation will give you a ton of ideas to try out for yourself.
Style is born from a mix of imitation and innovation. You learn the rules by studying others, and then you figure out how to break them in a way that feels like you. Embracing that process is everything.
The Sketchbook: Your Creative Playground
If I could only give one piece of advice, it would be this: make your sketchbook your best friend. It is, without a doubt, the most important tool for developing your style. It’s a private, no-pressure zone where you can experiment, mess up, and test ideas without the commitment of a full-blown canvas.
Use it to splash around with color combinations you saw in your inspiration folder. Doodle a few rough composition ideas. See what happens when you mix two colors you normally wouldn't. Think of it as your personal lab—every "failed" experiment is just data that teaches you something valuable.
And these skills you're building aren't just for a hobby. You're participating in a massive creative economy. According to UNESCO, cultural industries like painting support around 50 million jobs worldwide, especially for young people. The very skills you're practicing—observation, creativity, and critical thinking—are valuable everywhere. You can learn more about the global impact of arts education and see how it fosters these essential abilities.
Creative Prompts to Find Your Voice
Stepping away from tutorials can feel a little scary at first. If you're feeling stuck, here are a few simple prompts to help you start painting subjects that actually mean something to you:
- Paint a cherished object from your home. Try to capture what makes it special.
- Recreate a favorite memory using only three colors. This constraint forces you to focus on mood and value instead of perfect representation.
- Paint the view from your window at different times of day. Pay close attention to how the light and colors shift from morning to night.
Exercises like these gently push you to find inspiration in your own life, and that's where your unique artistic style has been hiding all along.
Got Questions About Learning to Paint? We've Got Answers
As you dive into painting, it's totally normal to have a few questions swirl around in your head. Feeling a bit uncertain is part of the deal for any new skill, but don't let it stand in your way. Here are some real-world answers to the questions I hear all the time from beginners, aimed at clearing things up so you can keep that creative spark alive.
How Long Does It Take To Get Good At Painting?
There's no magic number here, but with consistent practice—even just for an hour or two a week—you'll start to see some real, tangible improvement within three to six months. The secret sauce isn't speed; it's just showing up consistently. Your progress might feel like a slow crawl at first, but then something will just click, and you'll feel your skills start to take off.
Instead of chasing a masterpiece right out of the gate, focus on nailing one small thing at a time. This week, maybe your only goal is blending two colors smoothly. Next week, it could be painting a straight line without a ruler. Get excited about those little victories! "Good" is a moving target anyway, so your best bet is to simply fall in love with the process of making things.
What's The Easiest Thing For A Beginner To Paint?
Simple still life objects and abstract designs are your best friends when you're starting out. They let you build skills without feeling completely overwhelmed.
Painting something like a single piece of fruit or your favorite coffee mug forces you to focus on the absolute fundamentals: shape, light, and shadow. You get to really study how light bounces off the object, creating bright spots and dark areas—a core skill every painter needs.
Abstract painting is another fantastic choice because it throws the pressure of realism right out the window. It’s your personal playground. You can just mess around with color, texture, and composition to see what the paint can do. Both are super low-stress ways to build a rock-solid foundation.
The goal of your first few paintings isn't to create a perfect replica of something. It's to learn how your brushes feel, how your paints mix, and how to start seeing the world through an artist's eyes—noticing the shapes, colors, and values you might have ignored before.
Do I Need To Know How To Draw Before I Learn To Paint?
While knowing how to draw is definitely a helpful skill, you absolutely do not need to be a master sketch artist to start painting. Plenty of amazing painting styles, from abstract expressionism to impressionism, are way more about color, emotion, and texture than they are about perfect, realistic lines. You can jump right in and focus on those things from day one.
That said, picking up a few basic drawing concepts like perspective and proportion will for sure help you improve faster, especially if you eventually want to paint realistically. Think of drawing and painting as two buddies that support each other. You can even learn them side-by-side—a little sketching practice one day, a little painting the next.
How Do I Stay Motivated When My Paintings Look... Bad?
Look, feeling discouraged is a rite of passage for every creative person. Every single artist, no matter how famous or skilled, makes stuff they don't like. The trick is to shift your focus from the final product to what you learned while making it.
Instead of staring at a "failed" painting, ask yourself what you can take away from it.
- Did you try a new color combo?
- Did you get a tiny bit better at controlling your brush?
- Did you simply carve out time for yourself to be creative today?
Treat every "bad" painting as a successful experiment that taught you something. It also helps a ton to find an online art community or take a local class. Seeing that other beginners are going through the exact same struggles is incredibly validating and can give you the push you need to pick up that brush again tomorrow. Every painting, good or bad, is just a step forward.
Ready to turn a favorite memory into your next painting project? With Custom Paint By Numbers, you can upload any photo and get a complete kit to create a truly personal masterpiece. It's the perfect way to practice your new skills on a subject you already love. Start creating your custom kit today at https://paint-by-number.com.


